Deep Side Part Test: Flatter Your Face Shape
Not sure if the deep side part comeback is for you in 2026? Use this quick at-home test plus face-shape rules to find your most flattering part, then confirm it with a virtual hairstyle try-on before you commit.
Deep side parts are back in a big way in 2026, but the most stylish look is not always the most flattering one for your face. A part that is too extreme can throw off balance, emphasize asymmetry, or fight your natural growth pattern. In this guide, you will run a quick mirror test to find your best side, learn the common reasons a side part can look "off," and confirm your winner with a virtual try-on before you commit.
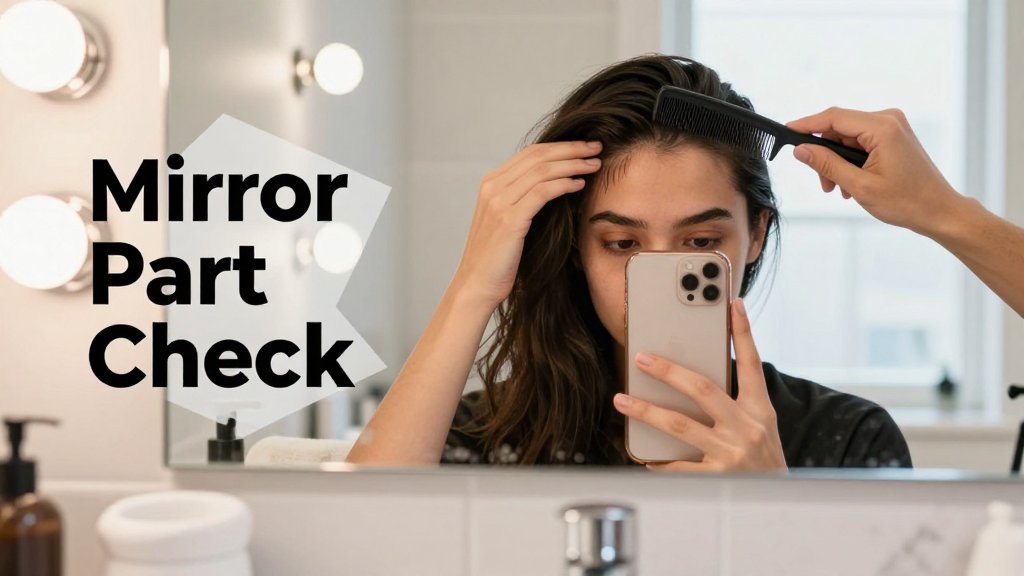
Deep side part test: 2-minute mirror check
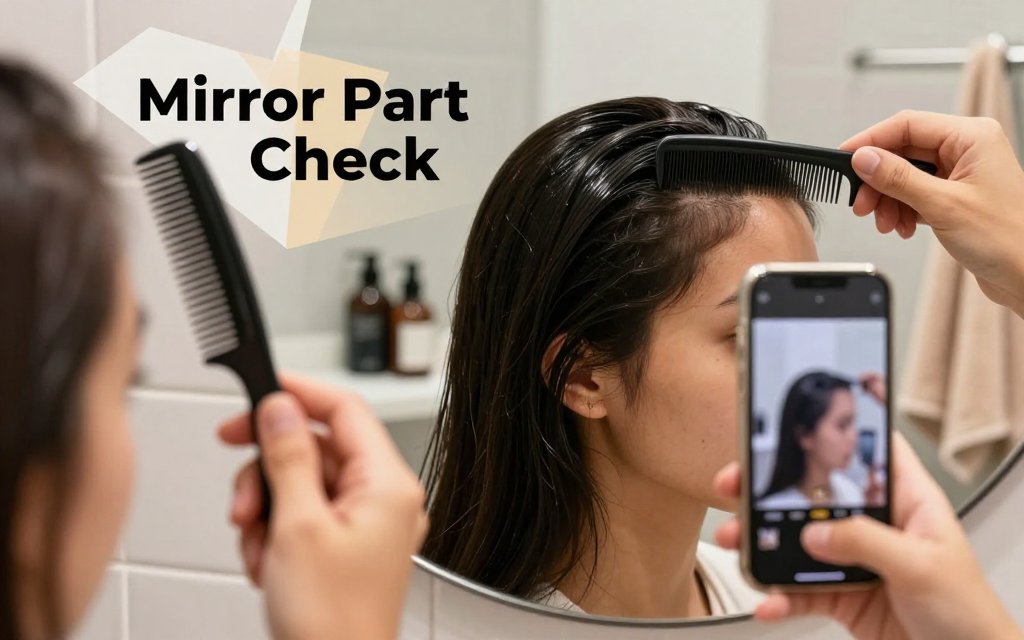
Quick rule you can quote to yourself in the mirror: a deep side part shifts visual weight to one side, which adds lift at the front and can make your face look longer and slimmer when the heavier hair falls over the cheekbone. The best part is that you do not need a salon appointment to test it. Grab a rat-tail comb (or the pointy end of a brush), stand in strong bathroom light, and use your phone camera like a mini “before and after” studio. You are not trying to find the most dramatic line possible, you are trying to find the line that makes your features look balanced, bright, and intentional.
What a deep side part actually changes on your face
A deep side part works because it creates asymmetry on purpose. That sounds fancy, but it is simple: when one side has more hair, your eye reads more height at the roots, more curve at the forehead, and more coverage at the cheek. That can visually narrow a rounder face, soften a square jaw, and make an oval or oblong face look a bit more sculpted, depending on where you start the line. “Deep” usually means the part begins near the peak of the eyebrow (the highest point of the arch) or slightly farther out toward the temple, not just a casual off-center part that is one finger-width from the middle.
Placement matters more than hair type, but your texture changes how bold it looks. On straight or fine hair, a deep part reads sharper and can give instant “model hair” lift if you add a little root mousse and dry the roots up and away from the part. On wavy, curly, or coily hair, the same part can create a gorgeous sweep and highlight your curl pattern, especially if you define the heavier side with a curl cream and let the lighter side tuck behind the ear. If you are also thinking about color, a side part can show dimension fast. Warm brunette shades like cherry mocha pop when the heavier side catches light, so pair your test photos with a color idea from cherry mocha hair shade matching if you want the full effect.
The quick test: find your best line, then sanity-check it
Start with your natural part on dry hair, with no tight ponytail dents or fresh hat hair. Face the mirror, then hold your phone at eye level (propping it on a shelf works). Use the comb tip at your hairline and redraw the part a half inch deeper toward your stronger side. Smooth each side lightly with your fingers, but do not press the roots flat. Now take three quick photos with the same lighting and distance: straight-on with a neutral face, straight-on with a slight smile (smiling changes cheek width), and a 45-degree angle from the heavier side. Repeat one more time, shifting another half inch deeper, so you have three part options to compare.
Now do the sanity-check, because a deep part can go from “wow” to “why do I look lopsided” quickly. Zoom in on your photos and look at three things: eye openness, cheek width, and forehead height. If one eye looks noticeably smaller, the part is likely too far over, or the heavier side is dragging forward and shadowing that eye. If one cheek suddenly looks wider, your sweep is landing at the widest point of the cheek instead of skimming past it. Fix both by backing the part up slightly toward off-center, then re-sweeping the front section so it arcs above the eyebrow rather than laying straight down.
Most mistakes come down to fighting your hair’s natural growth pattern. Mistake one is making the part too extreme, which can expose scalp and make the style look like a combover, especially on fine hair. The fix is simple: move the line back a half inch and add lift at the roots with a round brush or a small Velcro roller at the front. Mistake two is ignoring cowlicks at the hairline or crown, which creates a stubborn flip that ruins the sleek sweep. Instead, angle the part so it works with the swirl, and avoid slicking it unnaturally flat, a tip echoed in cowlick styling advice. Mistake three is flattening the wrong side: you want volume at the front and crown on the heavier side, not a pasted-down look.
If your deep side part makes one eye disappear or one cheek look heavy, it is too far. Slide the part back a touch, lift roots at the front, and let your natural growth pattern lead.
Once you have a favorite, lock it in for a full day before you decide. Hair can behave differently after you walk outside, tuck one side behind your ear, or add accessories. For brides, do this test with the earrings or veil style you plan to wear, since a deep part can create a beautiful “sweep” that frames one side of the face in photos. If you want a faster comparison, upload your three test photos into Fravyn and try a few complementary cuts (like a side-swept lob, long layers with face-framing, or a textured pixie with a deep fringe) plus a couple of color options. The goal is not perfection, it is a part that makes you feel instantly more like yourself.
Best hair part for face shape in 2026
The best hair part for your face shape in 2026 is the one that creates visual balance fast: add a little length where your face reads widest, and soften or sharpen angles where you want more definition. In practical terms, round faces usually look slimmer with a deeper, more diagonal part plus height at the crown, while oval faces can wear almost any part and choose based on the vibe of the day. If you want a simple, research-backed baseline, this face shape guide notes that round faces benefit from more height on top and less width at the sides, and that oval faces tend to suit almost any hairstyle (with a caution about adding too much height).
Quick cues for other common shapes, without overthinking it: if your face is square, an off-center or deep side part often looks more modern than a strict middle part, especially with a soft, broken fringe that blurs the jawline. If your face is heart-shaped, try a side part that lets you tuck one side back, then keep face-framing pieces starting below the cheekbone so the chin looks a touch fuller. Diamond shapes often look great when the part and fringe add a bit of width at the temples (think airy curtain bangs you can still sweep to one side). Oblong or rectangular faces usually do better with a part that does not add extra height, plus some fringe to visually shorten length, like bottleneck bangs or a textured side fringe.
Hair part for round face: the slimming placements that work
For a round face, aim for a true deep side part that starts around the outer third of your eyebrow, not at the center of your forehead. That placement creates a stronger diagonal line across the face, which helps the eye travel up and down instead of side to side. Pair it with height at the crown and sleeker sides. A simple way to get this is to blow-dry the root area opposite your part up and back with a round brush, then smooth the sides with a lightweight cream. Style pairings that make this look intentional: an angled lob (longer in front), long layers with face-framing starting below the chin, or a textured pixie with a long top that can sweep over.
What usually backfires on a round face is combining a deep side part with extra width right at cheek level. Think big, fluffy waves that expand at the cheeks, or a heavy side-swept bang that stops exactly at the cheekbone and visually draws a line across the widest part of the face. If you love fringe, ask for a longer, softer side fringe that blends past the cheek and into the jawline, or a curtain fringe that can still be worn as a side sweep. If your hair is curly or coily, keep volume higher and more vertical: define curls at the top, then rake a little gel or mousse through the sides so they sit closer to the face instead of ballooning outward.
Hair part for oval face: why you can break the rules
Oval faces can usually wear middle parts, off-center parts, and deep side parts without the part looking “wrong” because the proportions are already balanced. That freedom is useful in 2026, when the same haircut often gets styled three ways depending on the moment. Use this quick chooser: pick a deep side part when you want drama and lift (especially if your hair photographs flat in selfies or you are wearing a structured outfit), go off-center for everyday balance that still feels polished, and choose a middle part when you want symmetry and a clean, editorial vibe. This is why oval faces pull off everything from an Italian bob to long butterfly layers.
Bridal try-this: a deep side part plus soft waves and one tucked side tends to photograph well, especially in three-quarter angles where a perfectly centered part can sometimes read harsh. Ask your stylist for a wave pattern that starts around the cheekbone and then opens up toward the ends, which keeps the look romantic but not overly round at the face. If you are wearing a veil or hair comb, place it on the heavier side of the part so the part line looks deliberate, like a planned design detail. For finer hair, a tiny dusting of volumizing powder at the crown can help the deep part stay lifted through a long ceremony and reception.
No matter your face shape, the difference between “accidental side part” and “intentional side part” is usually finish. Make the part crisp with the point of a tail comb, then set it for two minutes with clips while you do skincare or makeup. Choose fringe that supports the direction of the part: long side bangs that blend into layers, bottleneck bangs you can sweep, or cheekbone-length curtain pieces that you can push to one side without a gap. If you are unsure, try your part with two styling moods before you commit to a cut: sleek and tucked (think sharp bob, glass-hair vibe) versus soft and airy (think layered waves). An AI try-on is also a low-stakes way to preview deep side part angles and fringe lengths on your own photo before you touch the scissors.
Virtual try-on workflow and training your part
If you are on the fence about a deep side part, treat it like a quick experiment, not a commitment. Start with a virtual try-on so you can judge the effect on your face shape before you touch a comb. In Fravyn, upload a straight-on, well-lit photo (think window light, no harsh overhead shadows). Tie hair back if needed so your hairline is visible, because the hairline at the part is one of the biggest “yes or no” signals. Then run face shape analysis, and keep that result on screen while you try parts. Your goal is not perfection, it is clarity: which part makes your eyes look most balanced, your cheeks look most proportional, and your jaw look more defined (or softer, if that is what you want).
Try it before you commit: face shape analysis and virtual try-on
Use a repeatable workflow so you are comparing apples to apples. Keep the same photo, the same zoom level, and the same “neutral face” expression for each try-on. Then test three parts (deep side, off-center, middle) across three hairstyles so you see how the part behaves in real life, not just in one look. Fravyn makes this fast because you can cycle styles and colors without committing to a cut, bleach, or awkward grow-out. You are looking for a part that works in motion too, so pay attention to how the top lays and how much scalp shows when you imagine turning your head or tucking hair behind an ear.
Once you have a winner, sanity-check it with two tiny details people forget: glasses and your natural hairline shape. If you wear glasses, a deep side part can feel chic, but it can also create a strong diagonal line that competes with thick frames. Try the off-center part as a softer alternative. Also look at the part itself: if the line looks zigzaggy or shows a wider strip of scalp near the front, you may be fighting a cowlick or thinning at the hairline. In that case, pick the part that gives you the cleanest front inch, then add style support with a lightweight root lift (mousse or spray) and a tiny bit of texture paste just at the crown, not along the hairline.
Training your hair part takes 7 to 14 days for most people, and it works best when you reset it right after washing. On damp hair, draw your new part with a rat-tail comb, apply heat protectant, then blow-dry the roots in the direction you want them to live. Use two duckbill clips crossing over the part for 5 to 10 minutes while you do makeup, that “sets” the root bend without extra heat. If your hair is curly or coily, do the same idea during your twisting or stretching step, and keep tension gentle. Avoid making the part razor-straight every day, a slightly soft part line looks more natural and is easier on fragile edges.
Pro tip: if day 3 looks “wrong,” do not panic and switch back. Your roots are learning a new direction. Commit to the new part for one full week before you judge it in photos.
Off center part vs middle part: which looks more youthful?
An off-center part often reads more youthful because it adds a little lift and asymmetry without looking like a throwback deep side part. It can soften strong symmetry, blur a harsh center line, and give fine hair more movement at the root. A middle part can look fresh and modern too, especially with a blunt bob, center-aligned braids, or curtain bangs, but it also spotlights facial symmetry and any flatness at the crown. If you want the “young but effortless” sweet spot, start off-center, then nudge toward middle once you see how your hairline behaves.
How do I find my best part if I have a cowlick?
First, find where the cowlick lives by letting hair air-dry with no part, then notice where it naturally splits at the crown or front hairline. Work with that map, not against it. If your cowlick sits near the center, an off-center part is usually easier to control than a true middle. If it sits near your usual side, try shifting the part just half an inch rather than doing a dramatic flip. Blow-dry roots in short bursts, then clip the roots to cool. Avoid heavy oils at the root, they make the cowlick spring back faster.
How to train your hair part without damaging your hairline?
Think “low tension, low friction, low heat.” Keep ponytails and buns looser while you retrain the part, and avoid rubber bands or tight elastics that pull the same front pieces daily. If you love extensions, braids, or slicked styles, rotate placement so the same edges are not under stress, and stop if you feel pain or bumps. Dermatology groups warn that repeated tension can contribute to traction hair loss, and the Society for Pediatric Dermatology shares practical traction alopecia prevention tips that apply to adults too. Use heat protectant, keep tools off the hairline, and give your edges “rest days.”
Ready to see how a new hairstyle looks on you, before you touch your scissors or book a salon visit? Try Fravyn and preview 50+ styles on your own photo in seconds, including deep side parts at different depths and directions. Download the app here: iOS. Upload a photo, test a few options, and pick the part that makes your features look instantly more balanced.
Try a New Hairstyle Today
Preview 50+ hairstyles and 29+ colors on your own photo with Fravyn.