Root Melt vs Money Piece, Placement That Flatters
Root melt and money piece highlights can both look modern and effortless, but they solve different problems. This guide breaks down the real differences, how placement changes what your face shape reads as, and what to ask for at the salon so your color grows out nicely.
Choosing between a root melt and a money piece is not just a color decision, it is a placement decision that can change how your whole face reads in photos and in real life. In this guide, you will learn the key differences, where each technique sits, and which option tends to flatter different face shapes. We will also cover low-maintenance grow-out, what to ask for in the salon, and a quick try-on step so you can preview the look before you commit.
Root melt vs money piece, what is the difference
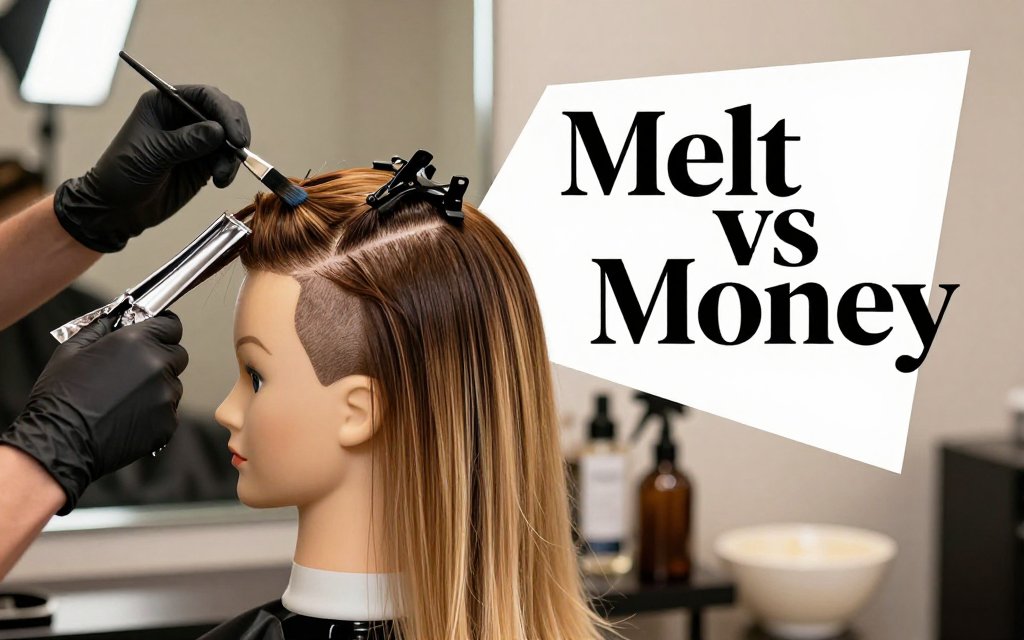
Think of these techniques as working in two different directions. A root melt (or root smudge) changes what happens at the top of your hair so grow-out looks softer and more intentional. A money piece changes what happens around your face so your features look brighter, more open, and more “done” even on a casual day. Quick visual: picture your hair as a gradient painting. The root melt is the fade at the crown that blurs the line between your natural root and your lighter lengths. The money piece is a spotlight on the front sections, like turning up the brightness around your hairline and fringe. If you remember one stylist-style line, make it this: “Melt for wear time, money-piece for mirror time.”
Root smudge vs root melt, the quick definition
Root smudge and root melt both deepen and blur the root area, especially after highlights or balayage, so you do not see a harsh line as your hair grows. The difference is mainly how far the blending travels and how “diffused” it looks. A root smudge is a tighter blur right at the scalp, like softly rubbing charcoal at the root so it looks shadowed and natural. Many colorists keep it close to your natural shade so it reads believable, and beauty guides like this root smudge technique explain it as leaving roots slightly darker for a smoother transition after lightening. It is a favorite if you like your highlights to start higher, but you still want a “lived-in” finish.
A simple range to picture helps when you are explaining this in the salon chair. A smudge often looks like about 0.5 to 1.5 inches of shadow at the root (enough to blur, not enough to feel like an ombre). A root melt is a longer, softer transition, commonly about 1.5 to 4 inches of gradual blend, depending on hair length and how low-maintenance you want your grow-out to be. On a blunt bob, a 4 inch melt can swallow the brightness, so a shorter melt or smudge usually flatters more. On long layers, a longer melt can look gorgeous because it creates depth at the crown while keeping mids and ends bright. If you are trying to stretch appointments from 6 weeks to 10 or 12, melts are often the move.
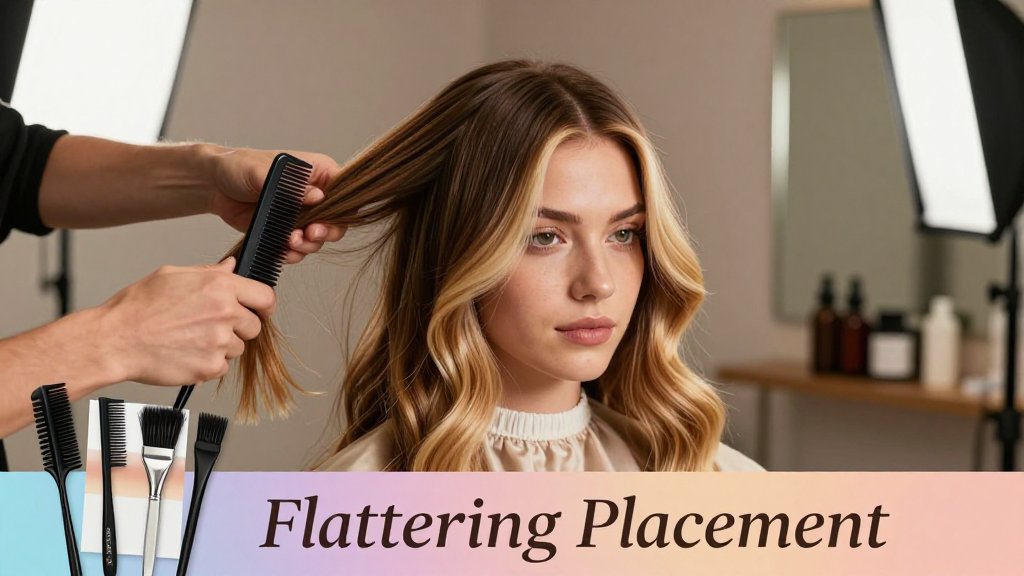
Money piece highlights, the face framing effect
Money piece highlights are about placement, not just color. They live at the very front hairline, the fringe or bang area, and sometimes the temple panels (the sections that naturally fall forward when you tuck hair behind your ear). Because these pieces sit closest to your face and catch direct light in photos, they read brighter than the same blonde placed deeper in the head. That is why a money piece can make your face look more open, and why it is popular for engagement photos, bridal events, and anyone who wants a noticeable refresh without doing a full highlight. On a warm bronde base, a honey or beige money piece can mimic that “vacation glow.” On a cool brunette, a soft mushroom-blonde money piece can sharpen cheekbones without going too contrasty.
The practical warning: too wide or too light can look stripey, especially on fine hair or very dark bases that do not have enough supporting dimension behind it. If you have level 2 to 3 hair (deep brown to soft black) and you jump straight to icy platinum in chunky front panels, the contrast can read like two “bands” instead of a blended highlight moment. A safer ask is a narrower money piece (think ribbon-thin near the hairline) plus subtle face-framing highlights that start slightly behind it, so the brightness has a gradient to blend into. Toning matters, too. A money piece that is one to two levels brighter than the rest often looks expensive, while four levels brighter can look accidental unless the whole color story supports it.
Most people actually love the combo: a root melt (or smudge) for softer grow-out, paired with a money piece for that instant face lift effect. For example, if you are growing out balayage after a busy season, a caramel root melt can blur the top while keeping your blonde ends intact, and a beige money piece keeps your face bright in pictures. If you are planning a wedding look, this pairing is especially camera-friendly because it adds depth at the crown (great for updos and waves) while keeping the front sparkling. Choosing the right tone is where your skin undertone matters, so if you are drawn to rich brunette warmth, use cherry mocha shade matching to sanity-check whether you will look best in rosy, cocoa, or more neutral brown-red reflections.
If you want fewer touch-ups, ask for a root melt or smudge. If you want your eyes and cheekbones to pop in selfies, ask for a money piece. Keep it narrow, then blend it into soft face-framing highlights.
Placement that flatters, face shape and lifestyle guide
Most people look best with a softer money piece plus a root melt for grow-out. The magic is in the ratio. Think of the money piece as the spotlight (small, intentional brightness near the face), and the root melt as the filter (a gentle blur at the root so everything looks expensive as it grows). If your natural level is darker (levels 3 to 5), go softer on the money piece so it does not read “stripy,” and let the melt do more work. If you are already a natural dark blonde (levels 6 to 7), you can handle a brighter face frame with a lighter melt and still keep it believable.
Quick real-life example: Mia is getting married in eight weeks, wears her hair half-up, and has naturally medium brown hair that pulls warm. She wanted that bright “photo-ready” frame, but she also travels for work and did not want a harsh root line in the honeymoon photos. Her colorist chose a caramel-bronde money piece that stayed softly blended at the root, then added a deeper root melt so the brightness started around the cheekbone and looked intentional even if she pushed her appointment. Before booking, she tried a few face-framing widths in Fravyn so she could show her stylist a clear reference that matched her own features, not just a model’s.
Face framing highlights for face shape, what to ask for
For round faces, the goal is lift and length, not extra width. Ask for a narrower, more vertical money piece that starts slightly off the part (so it does not create a bright “helmet” effect right on top). Keep the brightest part from mid-brow to cheekbone, then taper it into softer ribbons through the front layers. If you wear bangs, go even softer at the root so the fringe does not turn into one solid bright block. Curtain fringe is a cheat code here: tiny micro-lights on the curtain edges give sparkle without widening the face.
For square faces, you usually want the brightness to soften the jawline. A flattering ask is: “Start the face frame around my cheekbones and curve it slightly back.” That placement draws the eye inward and up, instead of straight across the jaw. For heart-shaped faces (wider forehead, narrower jaw), avoid extreme contrast right at the temples. Ask for a softer, more diffused money piece near the top, then more noticeable brightness closer to the jaw and collarbone so the lower face feels balanced. If you like visual references, this face-shape framing guide from face-framing highlight tips can help you point to the exact effect you mean.
For longer faces, balance comes from width and softness. Ask for a slightly wider money piece, but have your stylist begin the brightness a bit lower, around the cheekbone or even the top of the lip, instead of right at the root. That keeps the face from looking visually longer. If you have a long face and straight-across bangs, you can go brighter on the ends of the bangs and lighter through the sides, then melt the root so it still feels grown-in. If you have curtain bangs, request “baby ribbon lights” inside the curtain, with the brightest pop hitting where the curtain opens, usually at cheekbone level.
> I want a soft money piece that starts off the part, brightens from cheekbone down, and melts into my base with no line. Keep the root slightly deeper so my grow-out looks intentional in photos.
Low maintenance blonde grow out, the decision framework
If you want low-maintenance blonde (or bronde) that stays cute for 8 to 12 weeks, choose a deeper shadow root or root melt and keep the money piece softer, or skip it entirely. Your north star is: “Make regrowth look like design.” That means the melt should blur your natural root into the highlights for a few inches, and the face frame should be a gentle ribbon, not a stark stripe. This is especially forgiving if you air-dry often, work out a lot, or wear ponytails, because hard lines show faster when hair is pulled back.
If you are higher maintenance (you like crisp brightness and book ahead), a brighter money piece plus a lighter melt can look freshly “done” every day, but plan on 4 to 8 week toners or glosses to keep the face frame from going brassy or dull. For 2026 bronde vibes, ask for beige-bronde or caramel-bronde placement with subtle ribbon lights through the midlengths, then a soft melt at the root so the dimension looks expensive, not chunky. It pairs beautifully with modern bridal styling like loose waves, tucked-behind-one-ear looks, and sleek blowouts because the light hits in the places cameras love: around the cheekbones and through the bend of the wave.
Salon requests, formulas, and virtual try on steps
Before you sit in the chair, decide what you are actually asking for in salon language: placement, contrast, and maintenance. A helpful way to talk about contrast is in “levels” (how dark or light the hair is). Many color lines use a depth scale where 1 is the darkest and 10 is the lightest, which is why you will hear a stylist say “lift you 2 levels” or “tone you to a level 8.” If you want a quick refresher, this guide on hair color chart numbers makes the numbering logic easier to follow. Bring that clarity into your consult, and you will be far less likely to end up with muddy roots or a money piece that feels like two chunky stripes.
Bring this to your appointment, a simple script
Bring 2 to 4 reference photos that show the front hairline and the sides, plus one that shows the overall finish in natural light. Skip heavy filters, ring light glare, and pictures where the model’s hair is curled into a totally different texture than yours. Then use a simple script that covers vibe, maintenance window, and placement (this is the “dimension hair color placement guide” piece most people forget). Here is what to say, in order: - Vibe: “soft bronde,” “bright blonde,” “rich copper,” or “neutral espresso with subtle face frame.” - Maintenance: “I want 6 to 8 weeks,” or “I can do 10 to 12 weeks,” plus whether you will do quick toners in between. - Placement: face frame width (fine vs bold), brightness level relative to ends (1 to 3 levels lighter), and where the blend starts (at the root, 1 inch down, or at cheekbone).
I’m aiming for a soft bronde, not platinum. I can come in every 10 to 12 weeks. Keep the face frame fine, about a half inch, 2 levels lighter than my ends, and start blending one inch off the root.
If you only remember one caution, make it this: “root melt” can mean different things depending on the stylist and the salon. One person might use it to mean a quick shadow root (short and soft), while another means a longer, deliberate melt that travels farther down and is built for extended grow out. Confirm the map by asking, “Where does the shadow start and where does it end on me?” That one question prevents the classic muddy melt, which usually happens when the shadow is pulled too far down or toned too warm and too dark for your mids. For money pieces, the biggest cause of chunkiness is width at the hairline, especially if the stylist foils a big triangle on each side without enough micro highlights behind it to blur the edge.
FAQ, root melt and money piece questions
These are the three questions people ask right before a big appointment, especially if they are growing out previous highlights, covering a few grays at the hairline, or planning photos for an engagement or wedding. Use the answers as a mini checklist during your consult: decide how bold you want the face frame, decide how long you need the grow out to look intentional, then preview the placement so “face framing” means the same thing to you and your colorist. If your hair is fine, curly, coily, or very dark naturally, mention that up front since the same placement can read much bolder on certain textures and base shades.
Is a money piece flattering on everyone
Quick answer: it can be flattering on almost anyone, but width and contrast matter more than the idea itself. Go softer if you have fine hair, a very dark base, or a round face and you want a slimmer effect, ask for a fine face frame that is only 1 to 2 levels brighter than your ends. Go bolder if you have an oval face, thicker hair, or you love high contrast looks, you can handle a brighter, more obvious ribbon. The most common mistake is making it too wide right at the hairline, so it reads like two stripes. Next step: ask for a “micro money piece” test first, then build brighter next visit if you love it.
How long does a root melt last vs a root smudge
Quick answer: both can look good for weeks, but melts are built for longer grow out. A root smudge often looks best for about 6 to 10 weeks because it is usually a shorter shadow that can start to feel “done” as your natural root grows past it. A true root melt can often stretch about 8 to 14 weeks, depending on your contrast, how fast your hair grows, and whether you need consistent gray coverage. Toner or gloss refreshes can extend both looks without re lightening, especially if your mids get brassy or your ends look dull. Next step: book a 15 minute gloss add on at week 6 to 8 instead of redoing highlights.
How can I preview placement before I dye it
Quick answer: use a virtual hair color try on with adjustable placement, then save screenshots for your stylist. In Fravyn, upload a well lit front facing photo (window light, no overhead yellow bulbs). Test 2 to 3 money piece widths, for example a fine ribbon, a medium face frame, and a bold panel, and keep the rest of the hair the same so you are only judging placement. Next, compare warm vs cool bronde tones and check how your skin looks around the eyes and smile lines. Finally, review side views to see how far the brightness travels past the cheekbone. Next step: bring 3 screenshots and say, “I like option B, but slightly softer at the root.”
Ready to see how a new hairstyle looks on you before your next appointment? Try Fravyn and preview 50+ styles on your own photo in seconds, including face-framing options that mimic a money piece or softer blended looks. Download now and test a few placements to find your best match, then bring your favorite screenshot to the salon. Get it here: iOS.
Try a New Hairstyle Today
Preview 50+ hairstyles and 29+ colors on your own photo with Fravyn.