Patch Test Protocol for Hair Dye, Step by Step
A clear, step-by-step hair dye patch test protocol (plus a quick strand test) so you can spot allergy signs early, understand what your results mean, and plan a safer hair color change before your appointment or DIY dye day.
New hair color can feel like a fresh start, but an allergic reaction can turn that excitement into itching, burning, or even swelling that lasts for days. A patch test is the small, unglamorous step that helps you avoid the scary outcomes, especially if you are using permanent dye or dark shades. In this guide, you will learn an exact at-home patch test protocol, a simple strand test to confirm the shade, how long to wait before you commit, and what to do if your skin reacts.
How to do a hair dye patch test at home
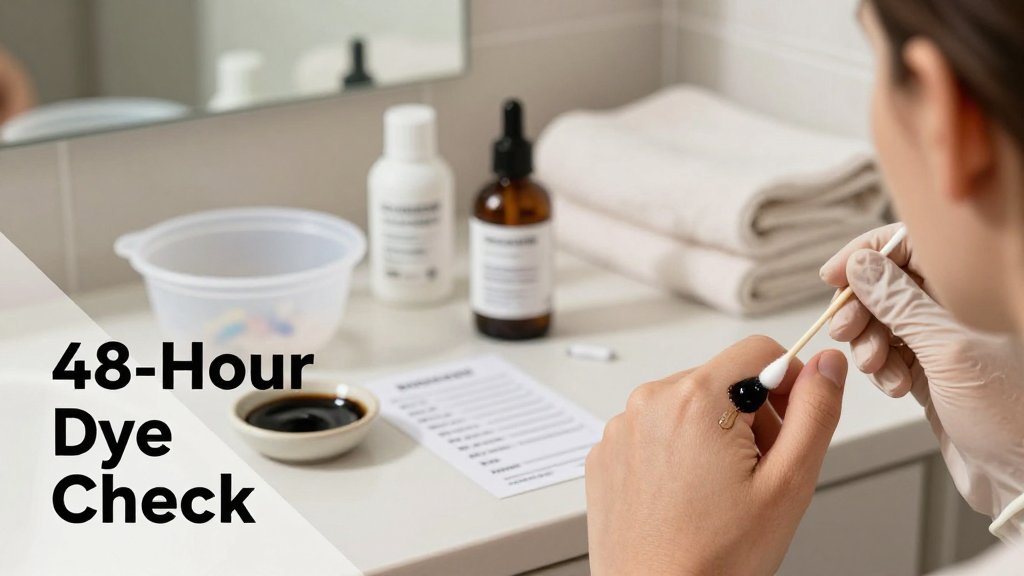
A hair dye patch test is the unglamorous step that protects your scalp, face, and even your eyes from a surprise reaction. It is especially worth doing with permanent box dye, salon tints mixed with developer (like 10 or 20 volume), and darker brunette or black shades that often rely on stronger dye intermediates. The key detail: you are testing your skin for sensitivity, not previewing the shade. In fact, the FDA hair dye precautions note leaving a tiny amount on the skin for two days and repeating the test each time you dye, even if you have used color before.
Patch test protocol, measured and timed
“You are testing your immune reaction, not whether the color looks good.” Treat this like a mini lab protocol and you will get a result you can actually trust. Plan it for a calm 48 hour window, not right before a wedding event, a long run, or a beach day. If you are booking a salon service, you can still do this at home with the exact formula your stylist will use, or ask the salon to apply the test behind your ear with their mixed color. If you have eczema, a history of fragrance allergies, or past reactions to hair dye, consider checking in with a clinician first.
Step 1 is picking your spot: behind the ear is popular because it mimics the skin near your hairline, while the inner elbow is easy to see and harder to accidentally shampoo. Step 2 is prep: wash the area with mild soap, rinse well, and pat completely dry. Skip lotion, body oil, sunscreen, fragrance, aftershave, or acne actives (like benzoyl peroxide) on that patch, because they can either irritate the skin or create a barrier that changes absorption. Step 3 is product: mix a literal pea-sized amount exactly as you will use it, meaning color plus developer in the same proportions and developer strength (for example, do not patch test with 10 volume if you will actually apply 20 volume).
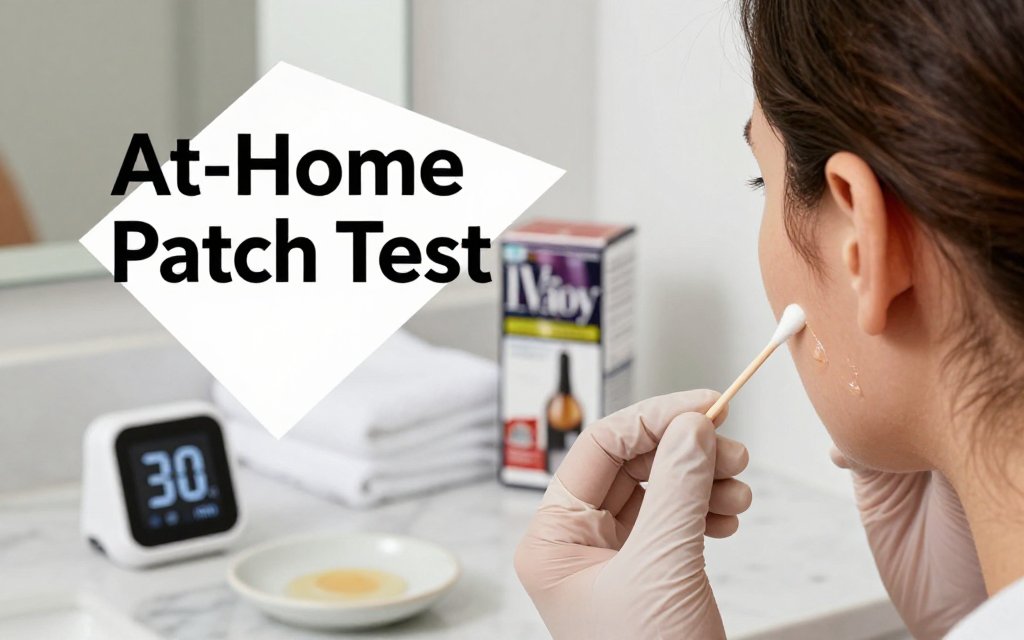
Step 4: apply a thin layer about the size of a nickel. A thin film is the goal, not a thick blob that stays wet and causes extra irritation. Step 5: let it dry and leave it uncovered so you do not trap heat and moisture against the skin. Step 6: protect the area from skewing factors, which means no scrubbing, no swimming, and no heavy sweating right over that spot. Step 7: do timed checks at 30 minutes, 2 hours, 24 hours, and again at 48 hours. Look for redness that spreads, itching, raised bumps, swelling, blistering, or weeping. If you get intense burning or swelling, wash it off and get medical help.
Set four alarms and take a quick photo at each check. Mild redness can creep in slowly, and pictures make it obvious. If anything worsens after 24 or 48 hours, treat it as a fail.
Common mistakes that make patch tests useless
The most common “false safe” patch test happens when someone preps the area like skincare day. If you apply moisturizer first, the dye may not penetrate the same way, and you can miss a reaction. Covering the spot with a bandage is another trap: occluding it can increase irritation and make a mild tingle look like an allergy, or it can push more dye into the skin than your normal hair service would. Using unmixed color is also misleading because many dyes only become reactive in their final mixed form. Finally, do not call it negative after 10 to 30 minutes. Delayed reactions are exactly why the full wait window matters.
Another easy mistake is treating a patch test like a lifetime clearance badge. Patch test every time you change brand, switch shade families (for example, warm copper to cool ash), or change developer strength. Also repeat it if it has been more than a few weeks since your last application, because sensitivities can develop over time, even to products you have used before. If you are planning bridal hair or a big event, schedule your test at least 48 hours before any appointment so you have time to pivot. While you wait, you can play with non-committal styling options like heatless curls by hair type and save your color idea until you have a truly clear result.
What patch test results mean and allergy red flags
A patch test is not about finding a “perfectly calm” spot of skin, it is about spotting the kind of reaction that could turn into a full scalp, face, or neck flare when dye sits on your head for 20 to 45 minutes. Think in three lanes. Proceed only if the area stays basically normal for the full waiting window and feels like your regular skin. Pause and re-test (or switch formulas) if you get mild dryness or faint pinkness that settles quickly and does not spread. Do not dye if you see swelling, blistering, hives, or any reaction that looks like it is escalating. If anything feels scary, especially around the eyes or lips, treat it as a “no.” Your wedding hair, new copper bob, or jet-black gloss is never worth a swollen face.
Normal vs not normal: a quick interpretation guide
If you see swelling, blistering, or hives, do not dye. Full stop. Those are not “sensitive skin” moments, they are big warning lights. Other signs that strongly suggest allergy include raised bumps (especially if they cluster), oozing or weeping, intense itch, and burning that ramps up instead of fading. Eyelid swelling and puffiness around the eyes can happen even if the patch test spot is behind your ear, because hair dye allergens can trigger a larger skin response once your immune system is on alert. Another red flag is a reaction that shows up later, like 12 to 48 hours after you applied the test mix. That delay is classic for allergic contact dermatitis from hair dye ingredients.
What can be “normal” after a patch test? Slight dryness, a tight feeling, or faint pinkness that looks like you rubbed the skin a little, and then fades quickly without spreading. A tiny bit of flaking the next day can happen, especially if you already run dry, use retinoids on your face that migrate, or you tested on irritated skin after shaving. The difference is the trend line. Irritation should improve hour by hour. Allergy tends to intensify, get bumpier, and feel disproportionately itchy for how it looks. Practical tip: itching that wakes you up at night is a huge red flag, even if the area looks only mildly pink in the mirror.
Delayed reactions are why waiting matters. Hair dye allergy is often a delayed immune response, which means you can look fine at 30 minutes, fine at 6 hours, and then wake up the next day with swelling, heat, and a rash that keeps spreading. If your patch test was clean at 48 hours but you notice new itch or redness at 72 hours, treat that as meaningful, especially if it is getting worse. In that situation, “pause” is the safer call: do not put dye on your scalp yet. Let the area fully settle, take photos for reference, and consider professional patch testing through a dermatologist if you are determined to color and you have a history of eczema, fragrance allergy, or reactions to cosmetics.
PPD hair dye allergy and why it surprises people
Para-phenylenediamine (PPD) and related dye intermediates are common triggers in permanent oxidative hair color, especially darker shades like espresso brown, soft black, and blue-black. That is why someone can tolerate a honey-blonde gloss but react to a deep brunette “level 3” kit, even from the same brand line. The twist that catches people off guard is sensitization: you can dye your hair for years and then suddenly react, because the immune system can become more reactive after repeated exposures. DermNet’s PPD allergy guidance describes how reactions can be delayed and show up with redness, swelling, blistering, or dryness at the test site, which is exactly why “it didn’t sting immediately” does not mean “I’m safe.”
If you suspect a PPD-type reaction, choose safety over a quick color fix. Skip the dye appointment and do not “try again” with the same formula on a different day, since repeat exposure can worsen the response. If symptoms are spreading, painful, or involve facial swelling, seek medical guidance. For style goals, there are workarounds you can discuss with a pro: highlights or balayage that minimize scalp contact, a root smudge painted slightly off the scalp, or a temporary color deposit for a weekend event (think a rose-gold tint on pre-lightened pieces). Even with alternatives, patch test again, because “PPD-free” on a label does not automatically mean allergy-safe. Some products swap in related colorants that can still cross-react for some people.
If you had any reaction, show your stylist photos and give them a clear, simple timeline. You can say: “I used permanent box dye in a dark brown shade, mixed color cream with developer, applied a patch behind my ear. About 18 hours later, it started itching and burning, and by the next day it was puffy with little bumps.” That level of detail helps them choose safer options and decide whether a salon patch test is appropriate. Also mention any black henna tattoos, brow tinting, or lash dye history, since those can be relevant. Box dye ingredients can differ from salon color in both pigment system and extras like fragrance, preservatives, and conditioners, plus drugstore kits vary a lot by shade even within one brand. Your stylist needs the exact product name, shade, and what you felt, not just “I reacted to hair dye.”
Strand test for hair dye and safer next steps
A patch test tells you about your skin. A strand test tells you the truth about your hair. If you have highlights, gray streaks, past box dye, or even just sun lightening at the ends, your head can process like three different people. A quick strand test helps you confirm processing time, the exact tone (golden, coppery, ash, neutral), and how your hair feels after rinsing. It also keeps you from “just leaving it on a little longer,” which is how hair can turn too dark or feel rough. For basic safety reminders like not exceeding the directions and patch testing each time, the FDA hair dye precautions are worth a skim before you start mixing.
How to do a strand test, so your hair does not get fried
Pick a hidden section near the nape, where mistakes stay private. You can either snip a small piece (best for checking tone only) or isolate a section still attached to your head (best for checking condition). Aim for about 1/4 inch wide, roughly the thickness of a thin shoelace. Mix your color and developer exactly like you plan to for your full head, same ratio, same bowl, same gloves. Saturate that small section from roots to ends, start a timer immediately, and check it every 5 minutes. Stop at the brand maximum, even if you are tempted. Rinse, shampoo if the directions say to, condition, then dry it fully before you judge the shade.
You are looking for four things: unexpected warmth, overly dark deposit, uneven porosity, and elasticity changes. Unexpected warmth shows up as orange or brassy bands, especially if you are lifting a level or covering old color. Overly dark deposit looks like “espresso ends” when you wanted soft medium brown. Uneven porosity shows up when the ends grab darker than the mid lengths, or when gray hairs stay bright and resistant. For elasticity, wet the strand, gently stretch it, and see if it springs back. If it feels gummy, stretches too far, or snaps, your hair is waving a red flag. Strand tests are where you learn you need 10 minutes, not 35, to hit your goal safely.
If the strand test result is off, treat it like useful data, not a failure. Too warm? You may need a cooler shade family (ash or neutral) or a separate toner step, especially on pre lightened hair. Too dark? Shorten the time, choose a lighter level, or switch to demi-permanent instead of permanent so you deposit more gently. Uneven ends usually means porous hair, so a porosity equalizer or a deep conditioning routine for a week can help, and you can apply dye to mid lengths first, then ends last. If the strand feels rough or tangly after rinsing, pause the project, trim split ends, and plan a lower stress approach like a gloss, a few face-framing highlights, or a pro appointment with a bond builder.
How long should I wait after a hair dye patch test before coloring?
Wait the full 48 hours, even if the spot looks totally calm after a few hours. Many hair dye reactions are delayed, so “no redness yet” is not the same as “all clear.” If you are coloring at home, plan your timeline like this: patch test first, then do your strand test the next day, then color after the 48 hour window is complete and you still feel normal. If you opened a kit to do the patch test, keep components sealed tightly and store them as directed. If anything smells off or changes texture, replace it.
What should I do if I get hair dye allergy symptoms after a patch test?
Do not dye your hair. Remove any remaining product from the test area right away and wash with gentle soap and cool water. If you have mild itching or a small rash, you can ask a pharmacist about an over the counter antihistamine or a low strength hydrocortisone cream, but stop if it stings and follow the label. Call a clinician if the reaction is spreading, blistering, or getting worse. Get urgent care immediately for facial swelling, wheezing, or trouble breathing. Take photos, note the shade name and ingredients, and consider dermatologist patch testing so you can identify what to avoid.
Can I patch test at the salon, or do I need to do it at home?
You can absolutely patch test through a salon, and it is often the easiest option if you are unsure which formula will be used. The key is scheduling: you still need the test done about 48 hours before your color appointment, not right before the cape goes on. Ask the salon to use the exact brand and shade family they will apply, and ask where they place the test (behind the ear and inner elbow are common). If you are doing at-home dye, you control the timing and can repeat the test every time you switch shades, developers, or brands, which matters more than most people think.
Once your patch test and strand test both look good, you get to focus on the fun part: choosing a shade that flatters you. If you love how caramel balayage brightens your cheekbones, or how a cool espresso makes green eyes pop, you can plan that look with less guesswork when you have already confirmed timing and hair condition. This is also where a virtual try on helps you stay realistic. With Fravyn on iOS, you can preview 50+ hairstyles and 29+ hair colors on your own photo, get face shape analysis, and see personalized recommendations before you commit. Safety first, then confidence, then your best color.
Ready to see how a new hairstyle looks on you before you book an appointment or open the dye box? Try Fravyn to preview 50+ styles on your own photo in seconds, so you can choose a look with more confidence. Download the app here: iOS. Pick a style, test a few variations, then move forward with your color plan feeling prepared.
Try a New Hairstyle Today
Preview 50+ hairstyles and 29+ colors on your own photo with Fravyn.