Wedding Hair Trial Timeline, From Photos to Altar
A practical, date-based bridal hair trial timeline that starts with photo inspo and ends with a stress-free wedding morning. Learn when to schedule your trial, what to test for longevity and veil placement, and how a virtual hairstyle try-on can save you time and money.
You found the perfect bridal hairstyle in photos, then real life shows up with heat, humidity, extensions, and a veil that changes everything. A wedding hair trial is not just about looking pretty, it is about lasting all day, photographing beautifully, and still feeling like you. In this guide, you will get a clear timeline by months, weeks, and days before the wedding, plus exactly what to test during your trial so you can avoid costly do-over appointments.
Start with photos, face shape, and budget
The best wedding hair trials start before you ever sit in the chair. Not because you need to micromanage your stylist, but because the trial goes fastest when you arrive with clear visuals, realistic expectations for your length and texture, and a budget that already includes the “extras” (pins, padding, extensions, and time). A screenshot of a model with waist-length hair and a thick hairline can be inspiring, but it is not automatically transferable to a fine-hair bob, a dense coily texture, or a shaved undercut growing out. Your pre-work is simply matching inspiration to what you actually have right now, then giving your stylist enough information to recreate it confidently.
A common mistake story: someone books one trial, walks in excited, and says, “I want this sleek low bun.” Halfway through, they remember they hate a middle part on themselves, their hair is two inches shorter than the photo, and they plan to wear clip-in extensions but left them at home. The style ends up feeling tight, flat, and unfamiliar, so they pay for a second trial just to test a different part, add extension volume, and soften the front. The simple fix is unglamorous but effective: decide your part and your add-ons first, then make your photos reflect those choices. It is cheaper to edit your inspo than to redo your appointment.
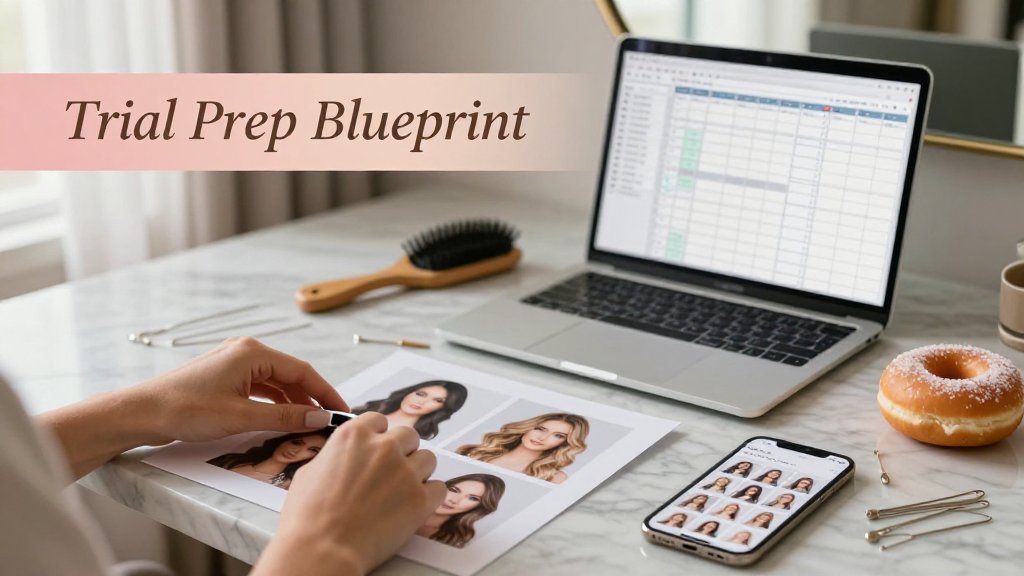
Build an inspo set that your stylist can use
Bring inspiration that acts like a blueprint, not a mood board. Use the 6-photo rule, because a single front-facing glam shot hides the exact things your stylist needs to see: where the bun sits, how the sides are smoothed, and what the hairline looks like around the ears. Add one practical filter that saves frustration fast: only save styles on hair within about 2 inches of your current length, or label the image “with extensions” so the stylist can plan padding or clip-ins from the start. For 2026-friendly pins, look for a low textured bun wedding hair look (soft, airy, not messy), a polished low knot (sleek and modern), and soft half up half down wedding hair with face-framing pieces (great for movement and photos).
Face shape and parting can make the same style read totally different in photos, which is why your inspo set should include part variations even if you think you are “one-part-only.” A middle part creates symmetry that can feel chic on some faces and harsh on others, especially if your natural growth pattern fights it. A deep side part can add instant lift at the front, but it can also slide during dancing if your roots are silky or your hair is freshly washed. Also note what the model is doing that you might not do: hair tucked behind ears (changes your perceived jaw width), baby hairs laid (changes the hairline), or heavy face-framing pieces curled forward (changes cheekbone emphasis). When you spot those details ahead of time, your stylist can recreate them intentionally instead of guessing.
Before your trial, pick three hairstyles and two colors that work on your own face and length. A stylist can refine details quickly, but they cannot guess your texture or grow hair overnight.
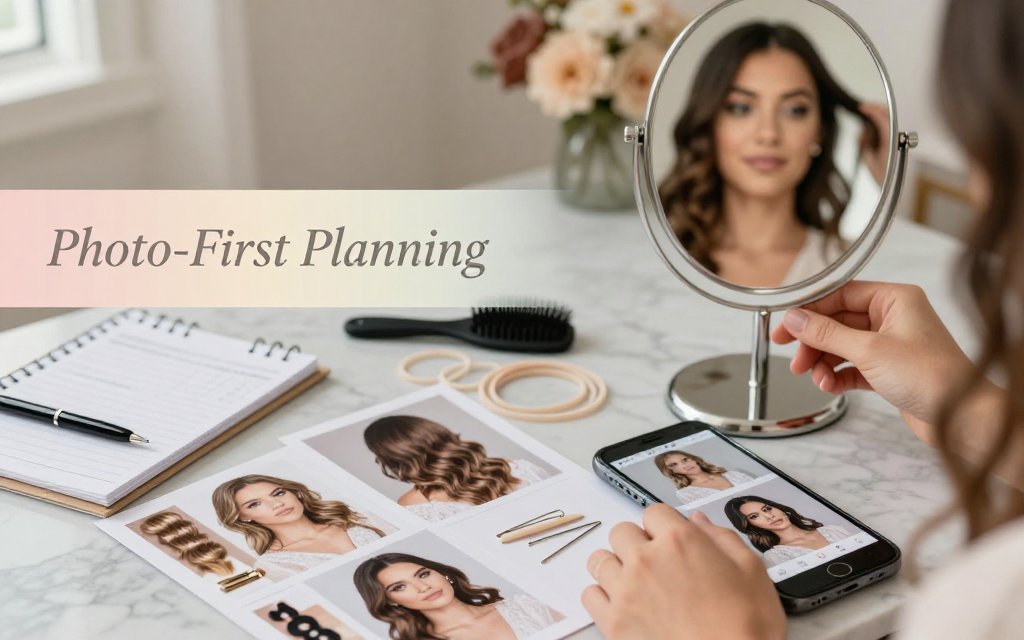
Pre-screen styles with virtual try-on before booking
A virtual try-on is your shortcut to “good options only.” Here is a quick workflow that keeps it fun and decisive: upload one clear, front-facing photo in daylight (no sunglasses, no heavy shadow), then try 10 to 15 styles fast, without overthinking. You are looking for your best proportions, not perfection. From there, shortlist 3 styles you would happily wear to the altar, plus 2 hair colors that support your outfit, makeup, and skin tone. With Fravyn, you can audition 50+ hairstyles and 29+ hair colors on your own photo, and its face shape analysis helps you understand why certain looks flatter you. If one of your shortlisted shades is a warm brunette with depth, pair this step with cherry mocha hair shade matching so your color notes are as clear as your style notes.
Use simple face shape logic to guide your shortlist, then let your stylist customize. If your face reads round in photos, a little height at the crown, or a slightly lifted half-up style, can elongate your overall silhouette (think: soft volume, not a teased tower). If your face is longer or more oblong, a low bun or low knot with gentle width at the sides can balance length and keep your features from looking pulled downward. If your jawline is angular, face-framing pieces that curve at cheekbone level can soften the look without hiding your structure. Most importantly, treat the part as a design choice, not a default. A middle part is not universal, and neither is the “perfect” sleekness level for your texture.
Budget is the final piece that keeps your trial from turning into a redo. In many salons, the trial itself is a separate appointment fee, and trial cost range estimates often land around $75 to $200 or more, depending on time and experience. To avoid paying for a second trial, spend 15 minutes confirming three things before you book: whether extension placement is included, how many looks you can test in one session, and whether you can email your 6-photo inspo set plus a selfie of your current hair ahead of time. Showing up with decisions, not confusion, usually means your stylist uses the appointment to refine details like smoothness, pins, placement, and longevity, which is exactly what a trial is for.
When to schedule your bridal hair trial
Aim to do your bridal hair trial 8 to 12 weeks before the wedding date. That window is close enough that your haircut, length, and texture behave like they will on the big day, but early enough that you can still pivot if the style is not photogenic or comfortable. It also fits with what many wedding beauty pros suggest, including one to three months before the wedding. Move earlier if you are changing color (especially a big shift like brunette to blonde), adding extensions, trying a new curly haircut, or traveling for a destination wedding where you will not have access to your stylist for last minute tweaks.
Schedule your hair trial 8 to 12 weeks out, then treat it like a wearable stress test. If it survives six hours, flash photos, a seatbelt, and a few hugs, it can survive your wedding.
The 6-month to 2-week booking map
Start with booking the stylist (or hair and makeup team) first, not the trial. For peak wedding months, many stylists fill up 6 to 9 months out, sometimes earlier for Saturdays and travel dates. Once your contract and day-of location are locked, you can pick the trial date with less guesswork. If you are getting married away from home, add buffer time for travel days and humidity differences. For example, if you live in Denver and marry in Miami in July, schedule your trial on a day when you can mimic humidity at home (hello, bathroom steam) or plan a quick mini-test once you arrive.
Next, lock your actual trial appointment 8 to 12 weeks before the wedding. Put it on a calendar like a real milestone because it triggers other decisions: veil height, part direction, and whether you need extra hair volume for a low chignon or a 90s supermodel blowout. Schedule a second mini-check only if something significant changes after the trial, such as switching from a fingertip veil to a cathedral veil, moving from clip-in extensions to a sewn-in install, or changing your color tone (like warm honey blonde to icy beige). For grooms and anyone wearing short hair, plan a cut 10 to 14 days before the wedding, plus a neckline clean-up 2 to 3 days before for crisp photos.
Treat your trial like a dress rehearsal and bring the pieces that affect proportions. A sleek center-part bun reads very different with bold brows and a square neckline than it does with soft makeup and a sweetheart bodice. Bring your inspo photos, but also bring reality: a photo of your hair air-dried, plus a quick selfie in outdoor shade so your stylist can see frizz patterns and shine.
What to test during the trial so it lasts
A trial is not complete when you love it in the mirror. It is complete when it holds up to real life. Wear the style at least 6 hours, preferably longer, so you see what happens after the initial set cools and your scalp warms up. Do a seatbelt test (ride in a car or at least sit back in a chair) because low buns and Hollywood waves can flatten fast. Do a dancing test at home with a few songs, then do a hug test with someone who will squeeze you the way relatives do. Finally, take flash photos from multiple angles, including a back shot, because shine spray and texture powder can look different on camera than in a bathroom mirror.
Also test comfort and sensitivity, since wedding hair is basically wearable engineering. If your scalp feels sore within an hour, ask for fewer pins at the crown, a looser anchor braid, or a different placement for padding. If you react to fragrance or certain hold products, note it now, not on the wedding morning. Pay attention to frizz behavior if you have curls, coils, or waves: does a high pony puff up, does a twist-out lose definition, do face-framing tendrils revert? Accessory testing matters too. A veil comb that tugs can ruin your mood, so make sure it slides in, locks, and does not pull when you turn your head.
Before you leave, ask for the “recipe,” not just the look. A great stylist will write down the products used (for example, a root-lift spray at the crown, a strong-hold hairspray for pinning, and a serum only on ends), the curling iron or wand size, and the direction of each section around your face. They should also note pin placement, especially for a French twist, a low textured chignon, or a braided crown where symmetry matters. Take a short video walking in daylight so you can see movement and shine. Then confirm what you will arrive with on wedding day (clean and dry, day-old blowout, diffused curls) so the style starts on the right foundation.
Veil placement, prep checklist, and wedding-week plan
At this point, you are done collecting inspiration and you are in execution mode. Your hairstyle is no longer just a hairstyle, it is a structure that has to hold a veil, pins, sometimes a headpiece, and hours of hugs. Veil placement changes the whole silhouette in photos, too. A crown placement can make a round face read longer, while a low placement can spotlight a textured low bun and a dramatic back detail. Bring your actual veil and accessories to any final run-through. If you want to sanity-check ideas fast, try the same photo in Fravyn with a low bun, a half-up twist, and a sleek pony, then decide which shape feels most like you before you start pinning anything for real.
Your wedding-week plan should focus on grip, predictability, and avoiding “brand-new” anything. Slippery hair is the classic surprise, especially on fine hair, freshly deep-conditioned curls, or super straight hair that was blow-dried silky smooth. Most updos hold better on hair that is washed the night before (not squeaky clean), then prepped with mousse at the roots and a dry texture spray through mid-lengths. If you are prone to oily roots, use a lightweight dry shampoo (like Living Proof Perfect Hair Day or Klorane) the morning of, then let your stylist brush it through so it does not leave white cast in flash photos. Pack a tiny emergency kit: mini hairspray, a few U-pins, clear elastics, and a bobby pin card labeled “veil pins” so they do not disappear.
Veil placement hairstyle guide for real heads
Think of veil placement as choosing an anchor point, not “sticking a comb somewhere.” Placing the comb above the bun gives lift and shows off the veil’s volume, but it can add pull on the crown if the veil is heavy. Placing it below the bun creates that classic, flowing drop from the nape area, and it is often more comfortable for long ceremonies because the weight sits lower. Placing it at the crown works beautifully for half-up styles and for adding height, but it can snag more easily on teased sections. The most common snag points are: comb teeth that are too shallow in the hair, veil weight that overwhelms fine strands, and hair that is too silky because it is missing grit from a texture product or light backcombing.
For a low textured bun, ask for a “pin cushion” base: a small teased pocket or a hidden mini elastic that gives the comb something to bite into. If you want the bun visible, veil below the bun is the easiest win, and it also makes bun accessories (pearls, pins, combs) easier to show. For half-up half-down, crown placement is usually the most secure because the half-up section can be reinforced with crisscross bobby pins, then the veil comb slides into that reinforced area. For a ponytail, placement depends on height: with a high pony, place the veil just above the pony base so it does not collapse the lift; with a low pony, treat it like a low bun and place below the tie for a softer drape. For short hair, your stylist can create an anchor using two crossed pins and a small clear elastic “loop,” then stitch the veil comb into that loop so it cannot slide.
Do a full wear test at home: put in the veil, sit in the car, hug someone, and take it out. If comb teeth barely catch, the veil will drift during the ceremony and tug in photos.
FAQ: Bridal hair trial timeline and prep questions
If you want fewer surprises, treat your hair like a mini project with checkpoints. One checkpoint is timeline, so you have room to adjust your cut, accessories, or parting. Another checkpoint is color, so any toner settle-in, root shadow softness, or curl pattern bounce-back happens before the big day. The last checkpoint is mechanics: veil comb, pins, and headpieces either lock in or they do not, and you cannot “willpower” them into staying put. Take a few front-facing photos, side profiles, and a back shot after each practice. The camera always reveals what the mirror lets you miss, especially at the crown and at the nape.
When should I schedule my bridal hair trial?
Schedule your bridal hair trial about 8 to 12 weeks before the wedding. That window is early enough to change your mind, book a second trial if needed, and order a different veil comb or hairpiece if the first one is too heavy. It is also close enough that your hair length, layers, and fringe are similar to wedding day. If you are growing out a pixie or doing clip-in extensions, plan the trial right after a shaping haircut so the outline is realistic. Bring your veil, earrings, and any hair accessories, and wear a top with a neckline similar to what you will wear on the day.
How close to the wedding should I color my hair?
For most people, do major color (balayage, highlights, big brunette-to-blonde shifts) about 10 to 14 days before the wedding so toner has time to soften and you still have time to fix anything. Save a simple root touch-up for about 5 to 7 days before, especially if your hair grows fast or you are covering gray. If you are sensitive, follow safety guidance like a 48-hour patch test before using dye products, so you do not discover irritation during wedding week. (fda.gov)
Is a virtual hairstyle try on useful for wedding hair decisions?
Yes, a virtual try-on is useful because it answers the fastest question first: “Do I like this shape on my face?” Before you spend time and money on a second trial, use a tool like Fravyn to compare three versions of the same vibe, like a sleek low bun vs a textured low bun vs a half-up twist, on the same photo and lighting. It is especially helpful for part placement (middle vs deep side), bang decisions (curtain fringe vs no fringe), and color direction (warmer honey vs cooler beige). Then your in-person trial can focus on real-world details like veil anchoring, longevity, and comfort.
Ready to see how a new hairstyle looks on you before you commit? Try Fravyn and preview 50+ styles on your own photo in seconds, so you can walk into your hair trial with a shortlist you actually love. Download the app and start testing updos, waves, buns, and veil-friendly looks today on iOS.
Try a New Hairstyle Today
Preview 50+ hairstyles and 29+ colors on your own photo with Fravyn.