LinkedIn Photo Hair: 9 Styles That Read Confident
Choosing LinkedIn headshot hair is less about trends and more about clean lines, controlled volume, and a part that frames your face on camera. Here are 9 camera-ready hairstyles and practical rules for face shape, flyaways, and professional hair color, plus a quick virtual try-on workflow to test options before you commit.
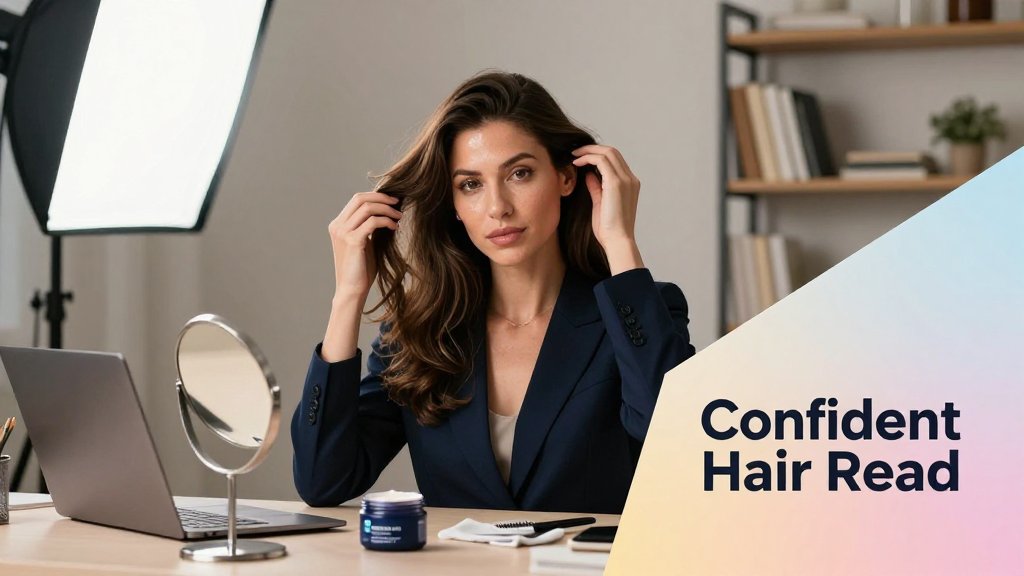
Your LinkedIn photo has one job: earn trust fast. Before anyone reads your headline, your hair can signal polish, confidence, and approachability, or it can create glare, shadows, and that stiff “helmet” look that distracts from you. In this guide, you will find nine hair styles that consistently photograph well in a small profile frame, plus quick rules for parts, volume, and color so your face looks evenly lit. Use these ideas to test, tweak, and upgrade your shot.
What makes hair look confident in a LinkedIn headshot
Confident headshot hair is not about having the trendiest cut or the most “done” blowout. On camera, confidence reads as clarity. You want a clean overall shape (so the outline of your hair looks intentional), a touch of symmetry (so the photo feels balanced), controlled shine (so your hair looks healthy, not greasy), and volume placed where it flatters your face, not where it steals focus. In a LinkedIn crop, hair is basically a frame for your eyes and cheekbones, and that is why tiny details matter more than you think: a slightly shifted part, a cleaner neckline, or flyaways smoothed down can make your expression look sharper and more in-command.
The 4 camera rules that beat trends
Here is the headline you can steal: headshot hair confidence comes from clean outlines, controlled volume, visible eyes, and low-frizz texture. These four rules beat trends because cameras exaggerate anything messy or extreme. Common mistake one is too much height at the crown, which can elongate the face and make the top of your head look larger than your features. Mistake two is heavy fringe that casts a shadow over the eyes, especially under overhead office lighting. Mistake three is ultra-slick gel, which can create glare and make hair read wet. Mistake four is shoulder-level ends flipping outward, creating a “bracket” shape around your neck that looks nervous instead of polished.
The practical fixes are refreshingly small. Use a pea-sized smoothing cream (start at the ends, then lightly skim what is left over the top layer) to calm halo frizz without flattening volume. If you need separation or grip, swap shiny gel for a soft matte paste, and emulsify it between your hands until it feels almost invisible before you touch your hair. To set your outline after you shape it, use the blow dryer’s cold-shot for 5 to 10 seconds, because many dryers literally market the feature as a cool-shot to lock the style. For flyaways near the hairline, mist a clean spoolie (or toothbrush) with a tiny bit of hairspray and smooth only the strays, not the whole front.
Necklines matter more than most people realize, because they change where your haircut “ends” in the frame. A crisp collar, a simple crew neck, or a V-neck usually gives hair a clean boundary. High, bulky necklines (thick turtlenecks, big hoodies, wide scarves) can push hair outward, add static, and create a crowded silhouette, especially with a bob or lob. If your hair sits right on the shoulder, you are in the danger zone for outward flips. A quick fix is to bend the ends slightly under with a round brush, or decide on a consistent move: both sides tucked behind the ears, or one side tucked and one side forward, as long as it looks intentional.
Before you retake the photo, fix the outline first: clear the eyes, tame flyaways, and keep shine soft. One minute of smoothing and a tiny part shift reads more confident than a brand-new haircut.
Best part for photos: how to choose in 60 seconds
Do this fast test before you commit to a center part you will fight all day. With dry hair, lift the front sections up and slightly forward with your fingers, then let them fall. Watch where the hair naturally separates, especially around any cowlick near the forehead. That is your “easy” part. From there, adjust only 0.25 to 0.5 inch for balance, rather than dragging it an inch over and creating instant tension and flyaways. Use the tail of a comb to tidy the line, then soften it with the comb teeth so it is clean but not razor-straight. A slightly lived-in part photographs modern, while a super-straight line can lean “yearbook” on camera.
If you want quick face-shape hints, go slightly off-center for most people because it adds subtle lift without making the photo feel lopsided. A deeper side part can soften strong angles (square, rectangle, diamond) and can also help if one side of your hairline is a bit higher. A center part is best if you genuinely like symmetry and you have strong brow definition, because the eyes and brows become the anchor. If you are styling around thinning or a higher hairline, keep the front light and airy, and consider shapes that create a confident perimeter at the temples. You can also browse receding hairline haircut ideas to see cuts that keep the hairline looking intentional in photos.
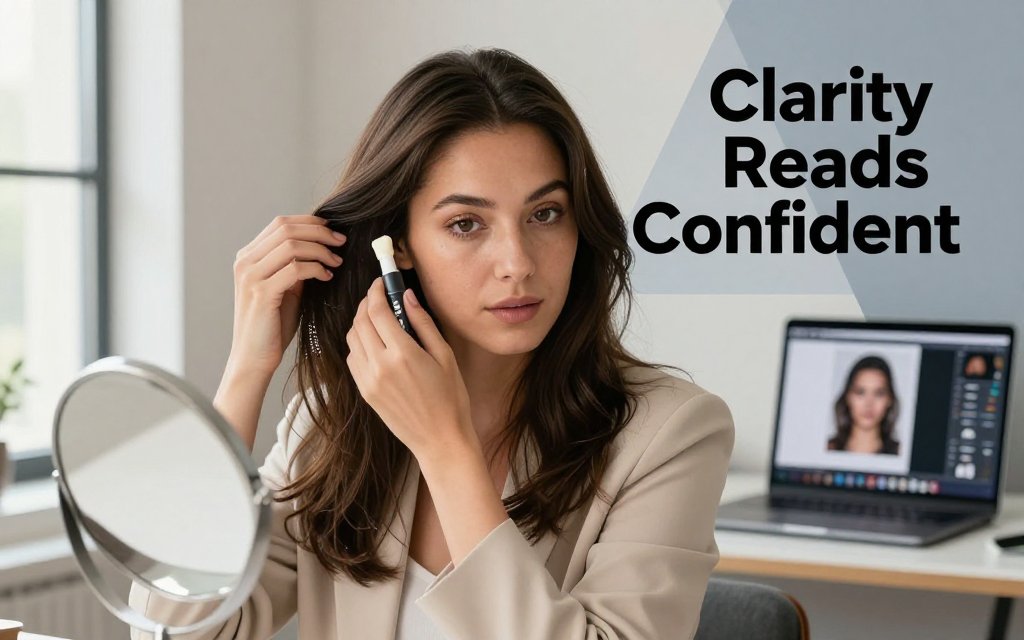
A stylist-style pep talk, because it is easy to spiral before a headshot: you do not need a brand-new cut to look confident, you need one or two strategic tweaks that make your features easier to read. Try taking three quick test photos: one with your usual part, one nudged slightly, and one with your hair tucked back to show the jawline. If you are debating color, think “camera friendly” first. Soft, natural dimension (like subtle caramel ribboning on brunette hair, or a beige blonde toner instead of icy silver) tends to photograph smoother than high-contrast striping. If you want to see options without committing, Fravyn lets you preview 50+ hairstyles and 29+ hair colors on your own photo, plus face shape analysis and personalized suggestions, so you can choose a direction before you ever pick up a styling tool.
Nine LinkedIn headshot hairstyles that photograph well
The goal for a LinkedIn headshot is a clean outline, calm face framing, and a shape that still looks intentional after the platform crops your image into a small circle. That usually means controlled volume at the sides, a smooth perimeter, and enough shine control that light does not bounce off flyaways. Keep your hairline and jawline readable, because those edges communicate “put together” fast. If you are unsure, preview your photo with a quick try-on first (Fravyn is handy here), then commit to the cut or color. LinkedIn also recommends your photo look like you today, including hair and facial hair, so do not pick a style you cannot repeat on a normal work morning.
Styles 1 to 5: clean shapes for medium to long hair
1) Polished low pony with soft face framing: This reads confident on oval and heart faces, and it is especially flattering for round faces if you keep the pony low and the sides sleek. Ask for long layers and a few face-framing pieces that start between the cheekbone and corner of the mouth (not at the chin, which can widen). Fast on-camera move: keep hair behind one shoulder for jaw definition, and do not pull both sides forward if you want a slimmer look. 2) Sleek low bun with a slight side part: Great for square and round faces when the part is off-center and the bun sits at the nape. Request a blunt perimeter around the hairline, plus internal layers only if your hair is very thick. Camera tip: leave a whisper of softness at the temples, not tight traction, so your head shape stays balanced in photos.
3) Shoulder-length blowout with tucked ends: This is a reliable “promotion photo” style for oval, heart, and square faces because the ends curve under and keep the silhouette tidy. Ask your stylist for a blunt perimeter (so the line looks strong on camera) and minimal long layers to prevent triangular width at the bottom. Quick camera-day move: tuck one side behind the ear and keep the other side grazing your cheek, so you get polish plus a little structure. 4) Lob with subtle bend and ends under: Ideal for round faces when it lands at or just below the collarbone, and also easy on square faces when the bend starts mid-shaft. Request a lob with a clean perimeter and light internal layers for movement, not choppy layers that can photograph uneven. On-camera tip: angle your chin slightly down and let the front pieces sit close to the face, rather than flipping out, to keep attention on your eyes.
5) Soft layered waves with controlled width at cheekbones: Waves can absolutely read professional when you control where the “widest” part lands. This is flattering on heart and oval faces naturally, and it can work on round faces if the waves start below the cheekbone instead of at it. Ask for long layers with subtle face framing, and tell your stylist you want “controlled width,” meaning the wave should fall down, not out. The fastest styling move is to curl only the mid-lengths and ends, then brush through so the wave looks like texture, not ringlets. On-camera tip: keep the wave volume slightly back from the cheeks, and use a tiny drop of smoothing serum on just the ends so frizz does not halo under office lighting.
Styles 6 to 9: short cuts and men’s options that read strong
6) Textured bob with a clean outline: This works for round, oval, heart, and square faces because the outline stays crisp while texture adds approachability. Ask for a clean perimeter at the ends (so it photographs intentional) and internal layers for movement, not heavy stacking. On-camera tip: style the side closest to the camera slightly smoother, and let the far side carry a touch more texture for depth. 7) Modern pixie with longer top and tidy sides: A longer top flatters heart and oval faces, and it softens square jaws when the fringe angles slightly forward. Request tidy sides with a bit of weight at the temples, plus a longer top you can sweep or lift. Fast camera-day move: create a small side part and push the top up and back just enough to show forehead, since that reads open and confident.
8) Tapered cut with natural volume on top: This is a dependable headshot choice for men and anyone wearing short styles, especially if you want strong structure without looking over-styled. It flatters round faces by adding height, and it suits square faces because it keeps the sides clean without over-exposing the head shape. Ask your barber for a taper (not a skin fade) and enough length on top to create natural volume, typically 2 to 4 inches depending on curl pattern. On-camera tip: blow-dry the top up and slightly back for lift, then press the sides down with your palms so the silhouette stays narrow. If you wear curls, define them on top and keep the temples neat so your eyes stay the focal point.
9) Short back and sides with a side-swept top or controlled curls: This reads “decisive” because the perimeter is clean and the top directs attention toward your face. It is strong on oval and heart faces, and it can be great on round faces if you keep the top slightly taller than the sides. Request short back and sides with a soft taper, plus a top that can sweep to the side or forward in a controlled way. Product: use matte paste or a light cream, about a pea to a dime size, rubbed fully between palms before you touch your hair. Common mistake: over-fading the sides can make the head look wider in a tight crop; leaving a touch of weight near the temples often photographs better. If you want one platform-specific rule to remember, follow LinkedIn photo tips and keep your look consistent with how you show up at work.
Hair color and try-on workflow for camera ready results
If your LinkedIn photo feels “off,” it is often not your face, it is the camera reacting to contrast. Hair color can either frame your features (confident, clear, polished) or steal attention (flat, harsh, or distracting). The goal for professional photos is simple: keep your hair readable, your complexion even, and your eyes visible. Before you book a color appointment or chop length, test your shortlist virtually and compare it in consistent light. A virtual try-on is especially helpful if you are deciding between two very similar options, like chestnut vs mocha, or collarbone-length vs long layers.
Hair color for professional photos: the safe ranges
Mid-contrast, even tone, and healthy shine reads most “confident” on camera. That combination keeps your hair from looking like a flat helmet, and it helps your features look defined without harsh shadows. Extremes can be tricky: very dark shades (levels 1 to 2) can swallow detail in indoor lighting, so curls and layers disappear into one block. Very light blondes (levels 9 to 10) can bounce light and wash out brows, lashes, and cheekbone definition, especially under bright window light or office fluorescents. If you have ever looked “tired” in a photo you took on a sunny day, over-bright hair plus bright light is often the culprit.
For a natural headshot, stay within 1 to 2 levels of your base. In salon terms, if your natural hair sits around a level 5 light brown, aim between a 4 and 6 for the most believable result. Choose neutral or slightly warm tones for approachability: think soft chestnut, warm dark blonde, caramel ribbon highlights, or a neutral espresso brown rather than blue-black. If your skin reads sallow on camera, avoid super-ashy tones that can pull gray or green in photos. A practical rule: if silver jewelry makes your under-eye area look sharper, go more neutral; if gold makes you glow, a touch of warmth in your hair usually photographs better.
Timing matters as much as shade. A clear gloss 3 to 7 days before your photo can smooth the cuticle so light reflects more evenly, which makes hair look healthier and more expensive on camera. If you want a salon option, ask for a clear or neutral gloss (many salons use gloss services similar to Redken Shades EQ Clear), or try an at-home gloss like dpHUE Gloss+ in Clear if you are comfortable following instructions. Plan a root touch-up 5 to 10 days before, not the night before, so the hairline looks soft instead of freshly stamped. Finish strong: a pea-size anti-frizz cream through mid-lengths, then a quick blast of cool air to set shine without making hair look oily.
Now the try-on workflow that keeps you from guessing. Start by taking three photos of yourself in the same spot: straight on, a 45-degree angle, and a true side profile. Use window light, face the light source, and turn off overhead lights. LSU’s career center even calls out that soft, natural light is usually the most flattering for headshots. Then open Fravyn on iOS and test options with intention: pick 3 hairstyles that match your vibe (for example, a textured crop, a collarbone lob, and long layers) and 2 hair colors within your safe range (for example, neutral brown and warm brown).
Keep your test fair: same lighting, same distance, same expression. Change only one variable at a time (style or color). If your eyes disappear, your hair is too heavy near the face or too high contrast.
FAQ: LinkedIn headshot hair, parts, and virtual try-on
What is the best hairstyle for headshots if I hate styling?
The best headshot hairstyle for low effort is one that holds its shape without heat. Ask for a blunt-to-soft lob, a tidy textured crop, or long layers with face-framing pieces that start at cheekbone level. On photo day, use a lightweight leave-in conditioner, then either air-dry with a tuck behind one ear or do a 5 minute blow-dry just at the roots for lift. Common pitfall: overly long front pieces that fall into your eyes, which reads tired and hides your expression. Try it in Fravyn first to confirm eye visibility from front and 45-degree angles.
What is the best part for photos, center part or side part?
The best part is the one that opens your eyes and evens your face in the specific lighting you will use. Center parts can read modern and symmetrical, but they also emphasize any flyaways and can deepen under-eye shadows if hair collapses forward. Side parts add lift at the hairline and often brighten one side of the face, which is great for headshots. Test both with your front and 45-degree photos, then pick the part that shows more iris (less lid shadow) and gives you cleaner cheekbone light. Pitfall: a dramatic deep side part that creates a heavy sweep over one eye.
What hair color looks most professional on camera?
The most professional hair color on camera is a mid-contrast shade that looks healthy and believable on you. For most people, that means staying within 1 to 2 levels of your natural base and choosing neutral or slightly warm tones that keep skin looking alive. If you love dimension, pick subtle highlights that start a little away from the root so the hairline stays soft. Pitfalls include ultra-dark dye that turns hair into a single block, and icy blondes that reflect light and wash out features. Use virtual try-on to compare two close options, then commit to the one that keeps brows, eyes, and jawline clear.
Ready to see how a new hairstyle looks on you? Try Fravyn and preview 50+ styles on your own photo in seconds, so you can choose a LinkedIn-ready look with confidence before you book a cut or color. Download Fravyn now on iOS, upload a clear headshot, and start testing styles that hold shape, frame your face, and photograph cleanly.
Try a New Hairstyle Today
Preview 50+ hairstyles and 29+ colors on your own photo with Fravyn.