Knotless vs Box Braids: Choose Your Best Install
Not sure whether to book knotless or classic box braids? This guide breaks down the real-life differences: how each install feels, how long it lasts, what it costs, and what to ask your braider so you leave the chair happy, not sore.
Braids are supposed to boost your confidence, not leave your scalp sore and stressed. If you are choosing between knotless and box braids, the right install can make a big difference in comfort, how long your style lasts, and how healthy your hair feels afterward. In this guide, you will learn how each method is installed, what to expect for tension and pain level, typical longevity and cost, and which styles each option supports best. You will also get key questions to ask before booking and easy upkeep tips.
Knotless vs box braids: What is the real difference
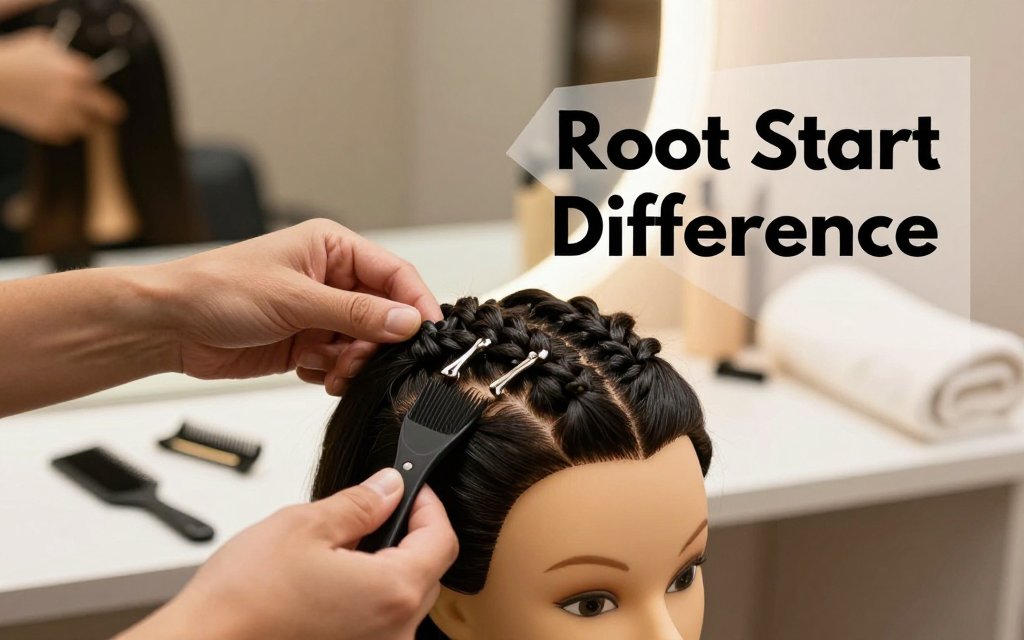
Think of the difference as what happens at the very first second your braider starts each braid. With traditional box braids, the extension hair is anchored right away with a small knot at the root, then the braid continues down. With knotless braids, your natural hair starts the braid first, and the extensions are fed in gradually a little at a time. That tiny change is why knotless often feels lighter and less “bumpy” at the scalp. Visual concept: box braids can feel like a tiny bead sitting at the base of every part, while knotless feels more like a smooth, tapered ramp that blends into your own hair.
That lighter feeling matters most around the hairline. If you have sensitive temples, fine edges, or you get headaches from tight ponytails, the flatter base of knotless braids can be a relief, especially in the first few days. Box braids still have a place, though: they can feel more secure at the root and some people like the “fresh, firm” look for longer. If you are planning a color moment for your braids, match the extension shade to your skin tone first, then pick the braid type. Start with cherry mocha hair shade tips so your install and your color choice work together.
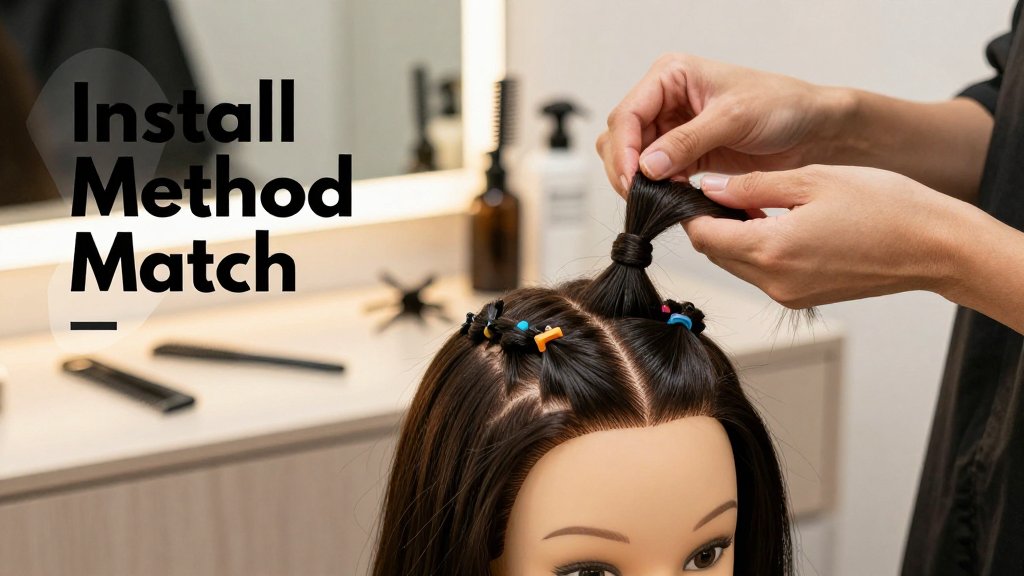
Install method and tension: Feed-in vs knot start
With box braids, your braider typically sections a neat square or triangle part, places extension hair at the base, and ties or “knots” it in to anchor before braiding down. That anchored knot creates instant grip, but it also creates instant bulk and weight at the base. Knotless braids use a feed-in technique: the braid starts with your hair, then small pieces of extension hair get added as the braid builds. The biggest consequence is less bulk at the root and usually less pulling, especially in the first 48 hours when your scalp is deciding if it is happy or mad. Technique matters more than the label, though, because a too-tight knotless install can still hurt.
If you want a low-tension install, focus on what your braider is doing with their hands, not just what style name is on the booking page. Ask what they use for grip (gel, wax, mousse), and tell them you want a “snug, not snatching” start. Red flags in the chair include stinging at the hairline, watery eyes from pulling, or feeling like your eyebrows are being lifted. Red flags after you leave include tightness that does not ease after a warm shower, tiny bumps along the parts, or a headache when you try to sleep. A great braider will adjust tension row by row, especially around the temples and nape.
Tell your braider: 'Start with my natural hair, keep the first inch light, and check my hairline tension after each row. If I feel stinging or see bumps, loosen it before I leave.'
Who usually loves knotless, and who still picks box
Knotless braids are often the comfort pick. People with tender scalps, postpartum edges, or anyone who hates that heavy first-week feeling usually fall in love fast. The flatter base also looks amazing for bridal styling and photo days because the parts lie smooth for updos like a high braided ponytail, a low braided chignon, or a half-up topknot that frames the face. If you are active, knotless can be easier to live in under a wig cap, a satin-lined beanie, or a helmet because there is less root bulk to rub. For first-time braids, medium knotless (not super small) is a friendly starting point that still looks natural.
Box braids still win for people who want a firmer root, do not mind a bit more weight, or prefer a quicker, often cheaper install. If you like your braids to feel very “locked in” for long days, travel, or minimal daily fussing, that knot start can feel secure. The final feel depends a lot on hair density, curl pattern, and the braid size you choose. Jumbo box braids on dense hair can feel totally fine, while tiny braids with heavy extension packs can feel like a lot in any method. Also remember that repeated tension can contribute to hairline thinning, which is why it is smart to follow guidance like Mayo Clinic traction alopecia warnings about stress from tight braids and similar styles. Your best match is the install that feels comfortable on day one and stays comfortable after sleep.
Which braids last longer, and what they cost
Longevity: Typical wear time and why styles fail early
If you want the most dependable hold at the roots, box braids often last a bit longer because the knot anchors the extension right away. Knotless braids can look more natural and feel lighter from day one, but they may loosen sooner if the base is installed too large, or if your hair is very silky and the feed-in is not tight enough. For most people, both styles land in the same real-life window: about 4 to 8 weeks. Smaller braids with clean parts and consistent tension can push longer, while rushed sectioning, slippery extension hair, or heavy product buildup can cut that timeline short fast.
Texture matters more than people admit. Very straight or low-friction hair (including some relaxed, silk-pressed, or fine 1a-2b textures) can slip at the root, especially with knotless, because there is no knot doing the gripping for you. Coarser, curlier, or kinkier hair (3c-4c) often holds a braid pattern longer, but it can show fuzz sooner if the braid is too small, too tight, or you are rubbing the hairline every day (think helmets, hoodies, or a high-collar coat). If you are planning a wedding look, ask your braider to prioritize a smooth hairline and an updo-friendly perimeter that still feels comfortable.
The most common “why did these get old so fast?” issue is a base that is either too thick (so it can wiggle) or too tight (so it swells and frizzes from irritation). You can usually tell by week two: if the root is already puffy, you will fight fuzz for the rest of the install. Another early-failure culprit is daily habits. If you work out often, wear your braids in a bun every day, or sleep without a bonnet, friction will rough up the cuticle and make even perfect braids look tired. Also, watch the calendar: the longer you push past your take-down window, the more new growth can tangle and matte at the roots.
A quick health reality check: “lasting longer” is not always the goal if your scalp is stressed. The Society for Pediatric Dermatology specifically advises not keeping braided styles longer than 2 months, plus choosing loose braids and minimizing tension at the edges, which is helpful guidance for adults too (especially if you are protecting a thinning hairline). You can reference their braided-style time limit when you are deciding whether to re-do, refresh, or remove. If your scalp hurts, itches nonstop, or shows bumps, take them down, even if they still look cute.
Cost: What you are really paying for
Knotless usually costs more because it is slower and more technical. Your braider is feeding in hair gradually, keeping the base flat, and controlling tension so the braid does not feel heavy. That takes time, especially for medium to small sizes and mid-back to waist length. In many US cities, you will see prices overlap, but it is common for knotless to run higher than traditional box braids for the same size and length, sometimes by a noticeable amount. If you are changing hair color with braiding hair (like #27 honey blonde, #30 auburn, or a 1B base with burgundy peekaboo), mixing shades cleanly also adds time and can raise the price.
The biggest cost drivers are simple: time in the chair and how much hair is being installed. Shoulder length is usually cheaper than mid-back, and waist length climbs quickly because every braid takes longer and uses more extension packs. Density matters too. If you want tiny parts, a lot of braids, and very full ends, you are paying for meticulous sectioning, consistent braid thickness, and endurance. Added services can be worth it if you hate doing prep at home: wash, blow-dry, detangle, a trim, or a clarifying scalp cleanse before braiding. If the listing says “hair included,” clarify what kind (pre-stretched kanekalon vs premium blends) because the fiber affects both the final look and the itch factor.
Edge-safe tension is another thing you are paying for, even if it is not written on the service menu. A skilled braider adjusts the perimeter, uses smaller amounts of extension at the hairline, and keeps the first inch of the braid secure without yanking. That matters for everyone, and it is especially important if you wear your braids pulled back, if you are postpartum, or if you have any history of traction alopecia. One last honest tip: a higher price is not always better, but a bargain install that snatches your edges is expensive later. If you feel sharp pain, see bumps along the parting, or cannot sleep comfortably, speak up or stop the service.
How to choose your best braid install
If you want a simple way to decide, use this three step framework: scalp sensitivity, lifestyle, and styling goals. First, be honest about your scalp. If you regularly get headaches from ponytails or your edges feel tender after slick backs, lean knotless or choose larger parts (even for box braids). Second, check your calendar: workouts, travel, and swim days all change how often you will cleanse and dry your hair. Third, name your “main character” moment: a bridal updo, a soft everyday side part, or a bold color moment like 30 honey-blonde highlights. Your best install is the one you can comfortably live in for weeks, not just the one that looks perfect on day one.
What to ask your braider, so you do not regret it
A great braider will not be offended by questions, they will be relieved you care about the details. Bring 2 to 3 photos showing the vibe (for example, medium knotless with a side part, or small box braids with a triangle parting pattern), then ask to see the part sizes on your own head before they commit. If you have fine edges or a history of breakage, say it out loud at the start, not after the first row is already tight. Also mention your lifestyle needs: if you sweat daily, you may want slightly larger braids so drying time is easier and scalp access is cleaner.
Use this quick decision rule: if your scalp hurts during the first 10 minutes, speak up immediately. Do not wait for the “it will loosen up” promise. Pain is a signal that tension is too high, and many dermatology resources stress that tight styles that hurt can contribute to traction issues over time. The University of Iowa Health Care even spells it out in plain language in their traction alopecia overview. One counterintuitive tip that saves edges: slightly bigger parts can be healthier on fine hairlines, even if you love the tiny braid look, because the weight is distributed across fewer, stronger anchor points.
Pause me for a tension check, please. If you feel my scalp tightening or burning, I need it looser now, not later. A comfortable install should feel secure, not painful, and my edges should not throb.
Maintenance that actually works for knotless and box braids
A realistic routine beats a complicated one. Cleanse your scalp every 7 to 10 days, not daily, and not only “when it itches.” Focus shampoo on the scalp, then let the suds rinse down the braid lengths instead of roughing them up with heavy scrubbing. An applicator bottle helps you place diluted shampoo right along the parts. Take drying seriously: squeeze with a microfiber towel, then air dry fully or use a hooded dryer on low, because trapped moisture can cause odor and irritation. For frizz control, use a foam or mousse (especially at the roots) and tie down the hairline for 10 to 15 minutes so it sets smooth.
Keep moisture light so your braids stay fresh. If you are itchy, apply a light oil only on the scalp (think a few drops, not a soak) and massage gently with the pads of your fingers. At night, a satin scarf plus a bonnet is the easiest combo for protecting the hairline and reducing frizz on both knotless and box braids. The most common mistake I see is heavy grease rubbed down the braids, which attracts lint, holds onto smoke and perfume, and makes a two week old style look old fast. If you want shine, use a tiny amount of braid sheen spray on your hands, then smooth the surface lightly.
FAQ: Which braids are better for a sensitive scalp
Knotless often feels more comfortable because there is less bulk and less immediate tension at the root, but technique matters more than the braid name. For a sensitive scalp, ask for medium knotless (not micro), fewer packs of hair, and edge-safe tension in the front rows. If you feel severe pain, get bumps, or develop headaches that do not settle quickly, treat it as a red flag. Braids should feel secure, not like a constant pulling sensation. If it hurts, request adjustments right away, and be willing to loosen or remove them if symptoms continue.
FAQ: Can you swim, work out, and wash braids
Yes, you can swim, work out, and wash braids, but add a few guardrails. Rinse after chlorine or salt water as soon as you can, then cleanse the scalp (not the full braid length) on your next wash day. During workouts, tie braids up and consider a soft sweat band to reduce friction at the hairline, especially if your edges are fine. Dry thoroughly after any soaking session, because damp braids can develop odor. Frequent soaking can make roots fuzz faster, so if you are in the pool multiple times a week, plan earlier touch-ups around the perimeter or part line.
FAQ: How do I choose braid size and a new hair color
Smaller braids look ultra-detailed, but they take longer, cost more, and can feel heavier if the install is too dense. Medium sizes are the sweet spot for most people because they balance fullness, scalp access, and wear time. For color, start natural-adjacent (1B, 2, 4) or add a few face-framing highlights before you commit to bold copper or 613 blonde. Face shape helps too: longer lengths can elongate round faces, and side parts soften strong jawlines. If you feel unsure, Fravyn (iOS) lets you preview braid length, part, and color with 50+ styles, 29+ colors, plus face shape analysis so you book with confidence.
Ready to see how a new hairstyle looks on you before you book? Try Fravyn and preview 50+ braid and protective styles on your own photo in seconds, so you can choose with confidence. Download the app and test a few looks, then bring your favorite screenshot to your braider. Get Fravyn on iOS and start your try-on now.
Try a New Hairstyle Today
Preview 50+ hairstyles and 29+ colors on your own photo with Fravyn.