Jellyfish Cut Preview: Pick Layers for Face Shape
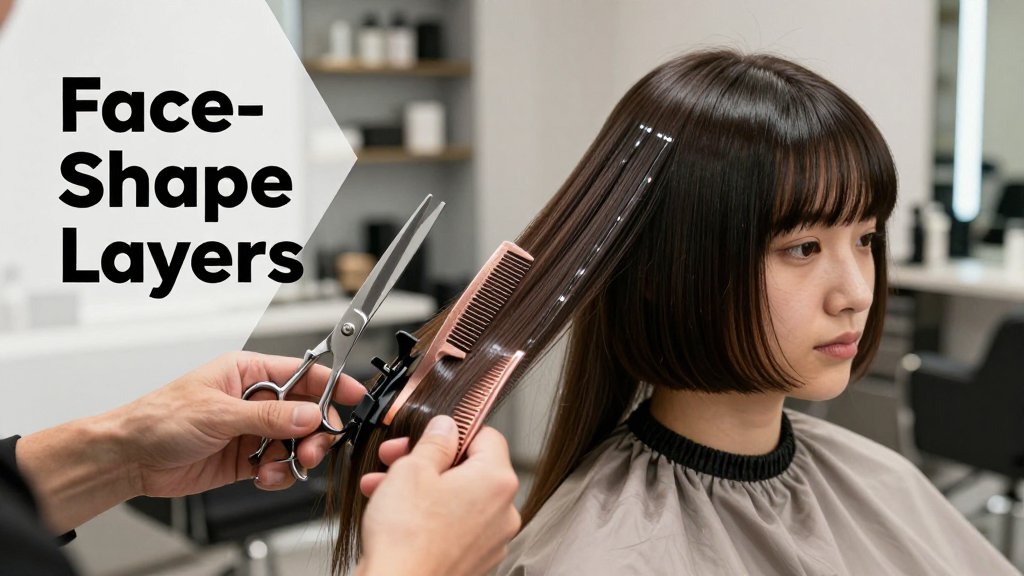
The jellyfish cut is all about contrast: a shorter top layer with longer lengths underneath. This outline helps you preview variations by face shape, compare it to the hime cut, and walk into the salon with the exact layer lengths, fringe, and perimeter you want.
The jellyfish cut can look ultra-edgy in photos, yet it can be surprisingly wearable when the layers are tailored to your face shape. The difference comes down to smart choices, not luck. In this preview, you will learn what the jellyfish cut is, what it is not, and why testing proportions first can save you from instant regret. We will break down the three decisions that matter most: top layer length, bottom perimeter length, and fringe, so your final shape feels intentional.
What a jellyfish cut is and is not
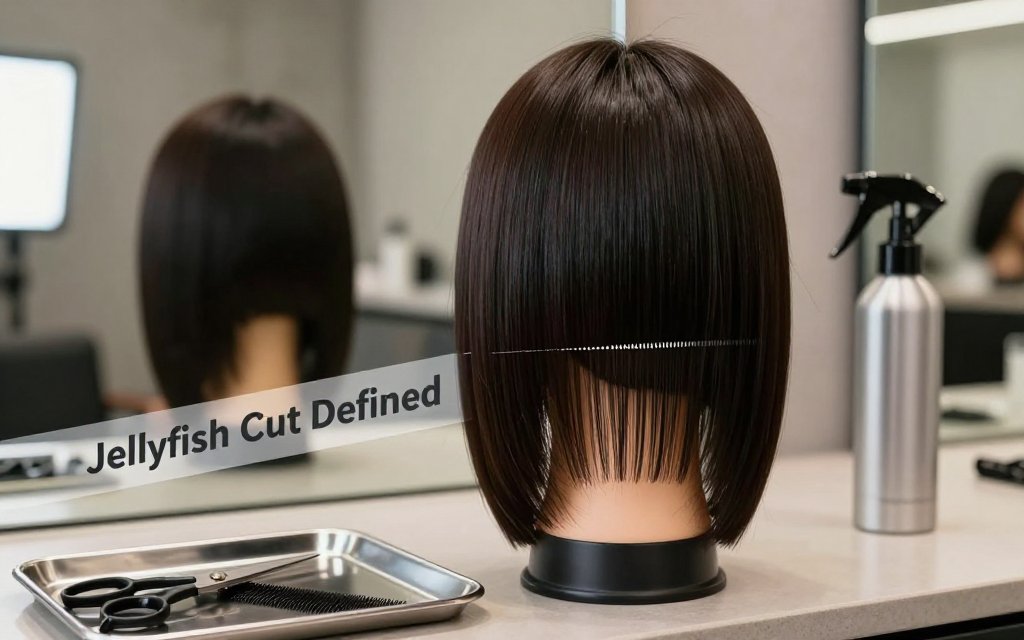
The jellyfish cut is a two-tier haircut with a deliberate “disconnected layers” look: a shorter top layer that sits like a bob or cap, plus a longer layer underneath that keeps your length. Think of it as getting a short haircut and a long haircut in one appointment, with a visible line where the top ends and the bottom begins. That separation is the point, not a mistake. On straight hair it can look graphic and editorial, while on wavy or curly hair it reads softer and more dimensional because the “top” blooms with volume and the “tentacles” move. If you want a simple mental picture: short crown, long perimeter, and a clear step between them.
What it is not: it is not just “lots of layers,” and it is not the same as a shag, wolf cut, octopus cut, or long layers that melt together. In a jellyfish cut, your stylist is intentionally preserving a weight line (that shelf-like edge) instead of diffusing it away. That is one reason it is showing up in jellyfish cut 2026 searches, people want a bold, intentional shape that still keeps length for ponytails, buns, and wedding updos. It also matches the current mood for customizable cuts that can swing from runway to everyday, depending on how blunt the top is and whether you tuck, curl, or slick it. For a clear overview of the cut’s defining shape and why it took off on social media, see the jellyfish haircut explanation.
Jellyfish haircut vs hime cut: the fastest way to tell
Here is the quotable difference you can use when you are scrolling inspo: the hime cut is structured with blunt sidelocks and a consistent silhouette, while the jellyfish cut is about visible separation between a short crown and a longer perimeter. A classic hime cut usually keeps most of the hair long and straight, then adds sharply cut face-framing sidelocks (often cheekbone to jaw length) and sometimes a blunt fringe. The “step” is mostly in the front. With a jellyfish cut, the short layer wraps all the way around your head, from front to back, so the top reads like a bob even when you turn sideways.
The common confusion point is that people call any two-tier cut a jellyfish. If the back looks mostly like one long sheet of hair and only the front pieces are shorter, it is usually closer to a hime cut (or a hime-inspired face frame). If the top looks like a separate haircut sitting over the bottom, you are in jellyfish territory. At the salon, your wording matters. Say “disconnected top layer” and “keep the weight line visible” if you want the jellyfish effect. Say “hime sidelocks” (and specify cheekbone, jaw, or chin) if you want that crisp princess-style framing without a full cap layer around the crown.
Ask your stylist to keep the top and bottom sections intentionally separate. If they start blending the weight line, the jellyfish effect disappears. A great cut still feels wearable because the bottom layer keeps your length.
The three knobs you can actually adjust
Once you know you are looking at a real jellyfish cut (not just a face frame), there are three practical “knobs” that change everything. First is top layer length. A cheekbone-length top layer feels high-fashion and sharp, especially if it is blunt and paired with micro bangs. Move that same top layer down to the jaw and it instantly becomes more wearable, because it frames like a bob without looking as costume-like. Drop it to collarbone and you get a softer, grown-out jellyfish that can pass as creative long layers when you curl it. This is why tiny length shifts matter more in this cut than in most layered styles.
Second is the bottom perimeter length, anywhere from chin to chest, depending on whether you want “tentacles” that flick at the shoulder or dramatic length that swings behind you. Third is fringe choice: micro, curtain, wispy, or none. Fringe is not required, but it sets the vibe fast. Micro fringe makes the top feel more graphic, curtain bangs make it feel more romantic, and wispy bangs soften a blunt top on thick hair. If you are thinking about adding a color contrast to make the step pop (like a deep espresso top with caramel lengths, or a black top with copper underneath), plan your formula first with demi semi permanent dye safety. Then, in Fravyn, you can preview both the tier lengths and color placement on your own photo before you commit.
Pick layer lengths that flatter your face shape
The jellyfish cut lives or dies on two measurements: where the short “cap” (top layer) ends, and where the long perimeter sits. A quick rule that works in real life is this: place the cap to highlight what you like most (cheekbones, lips, eyes) and place the longest layer to balance what feels strongest (full cheeks, a sharp jaw, or extra length). If you want your face to look longer, keep the widest, fullest part of the cut lower and softer. If you want to add definition, bring the cap higher and keep the ends textured instead of blunt. Fringe matters too, because bangs are basically a portable “frame” that can stretch, shorten, or soften your proportions.
Jellyfish cut for round face: create length, not width
The most common mistake on a round face is setting the cap so it ends right at cheek level, especially if the cap is thick and flipped outward. That placement can create a “halo” of width exactly where many round faces are already widest. A safer target is letting the cap land at the jawline or slightly below it, then keeping the longer perimeter past the shoulders (or at least grazing the collarbones) so the eye keeps traveling downward. Ask your stylist to keep the perimeter soft and tapered, not blunt, so it skims instead of forming a hard horizontal line.
For fringe, think vertical and diagonal lines. Curtain bangs or longer side fringe that starts around the bridge of the nose and drifts toward the cheekbone or jaw can visually elongate, especially with a center or soft off-center part. (If you want a reference point to show your stylist, the Vogue curtain bangs guide explains why this shape tends to flatter both round and square faces.) A simple checkpoint in the mirror: if the widest point of your haircut matches the widest point of your face, you will read rounder. Shift that width slightly lower, or break it up with face-framing pieces.
Jellyfish cut for square face: soften the corners strategically
Square faces often read strongest at the temples and jaw, so the goal is usually to keep the cool, disconnected jellyfish silhouette while blurring any boxy “corners.” A flattering placement is a cap that ends somewhere between the cheekbone and mid-jaw, with textured ends instead of a blunt shelf. That texture matters a lot. If the cap ends in a solid line, it can echo the straightness of the jaw and make the overall look feel more severe. Ask for point cutting on the cap’s hemline, plus subtle internal texture so it collapses softly rather than sitting like a helmet.
Fringe can do most of the softening work for you. Airy, piecey bangs or bottleneck bangs (narrower in the center, longer at the sides) are a great match because they break up the forehead-to-jaw “box” without hiding your face. If you love the dramatic separation that makes a jellyfish cut feel futuristic, keep the disconnection but avoid super sharp corners at the sides. On square faces, very crisp, disconnected edges can look harsher. Instead, keep the outline clean from a distance, then add small, invisible softening techniques up close (like slide cutting on the face frame).
Quick guidance for oval, heart, and long faces
Oval faces can wear almost any jellyfish proportions, so decide based on vibe and maintenance. If you want a subtle, wearable version, put the cap around cheekbone level and keep the perimeter at collarbone or longer, then add whispery face-framing layers so it blends when you air-dry. Heart-shaped faces usually look best when you do not add extra bulk at the temples (which can make the forehead look wider). Try a cap that starts a bit lower, around the top of the cheekbones, and use longer curtain fringe or side-swept fringe to pull attention down toward the center of the face. Keep the longest layer full enough near the jaw to balance a narrower chin.
Long (oblong) faces often benefit from the opposite of round-face logic: you usually want controlled width at the cheeks and less vertical “drag” at the ends. Consider a cap that ends at the cheekbones with light, airy volume, plus a perimeter that hits collarbone to shoulder rather than extra-long lengths that visually stretch the face. A soft, slightly fuller fringe (think curtain bangs that start a touch shorter in the center) can also reduce the look of length without feeling heavy. If you are unsure, preview a few cap lengths on your own photo first. A small shift, like moving the cap down one inch, can be the difference between “editorial cool” and “why does my face look wider or longer?”
Preview jellyfish cut variations before you commit
A jellyfish cut is one of those styles that can look editorial on TikTok, then feel surprisingly bold in real life once the top layer is shorter and the perimeter stays long. That is exactly why previewing it matters. A virtual hairstyle try-on lets you see the silhouette on your own face, with your hairline, your cheekbones, and your neck length, instead of guessing from someone else’s angles. In Fravyn, you can pair a try-on with face shape analysis, then compare a few versions side by side so you can decide how “disconnected” you want the cut to read. You are not picking just one haircut, you are picking proportions.
How to use a virtual hairstyle try-on for layer decisions
Start with a well-lit, front-facing photo, natural daylight near a window beats overhead bathroom lighting. Pull hair away from your face so the app can read your true outline, then run face shape analysis first so you have a baseline. Now test jellyfish proportions like a stylist would: try two to three top-layer lengths (cheekbone, jaw, collarbone is a great set), while keeping the perimeter constant so you can actually feel the difference. Next, keep the perimeter constant and test fringe options (none, curtain, wispy, blunt). Then reverse it: lock fringe and change perimeter length. Save screenshots labeled “Top: jaw, Perimeter: chest, Fringe: curtain.”
After shape, color is the fastest way to make a jellyfish cut look intentional rather than accidental. In your try-on, experiment with one to two shades lighter than your current color, because the extra brightness can highlight the separation between the top layer and the longer perimeter. Think warm honey over light brown, or a beige blonde shift that makes the top layer pop in photos. If you want a sleeker, less dramatic effect, preview a darker shade like espresso or soft black, which visually “connects” the layers. For your stylist, screenshot front, both profiles, and a three-quarter view, plus one close-up of the fringe shape and one of the overall outline.
How to style a jellyfish cut so it looks intentional
For everyday wear, aim for five to eight minutes of “polish,” not a full blowout. Smooth the top layer first using a round brush and dryer, or one to two passes with a flat iron, then stop. Mist texture spray on the top layer only so the shorter pieces get lift and grip, while the long perimeter stays clean and swishy. (Kenra Dry Texture Spray and Oribe Dry Texturizing are popular for that airy hold.) If you heat style regularly, keep the temperature moderate and protect your strands first, dermatologists at the AAD share practical guidance in their hair styling tips. The jellyfish cut looks best when the top has movement and the bottom has shine.
Two go-to looks keep it from reading like a grown-out shag. Look one: a sleek perimeter with flipped-out top ends, where the long length is straight and glossy, and the top layer bends out slightly at the ends for a graphic contrast. Look two: soft wave underneath with a straighter top for that intentional “floating layer” effect, use a one-inch wand on the perimeter only, then lightly straighten the top. The most common mistake is curling everything the same direction, because that blends the layers and makes the shape look accidental. For prom or a wedding guest look, try a half-up style that lifts the crown, then tuck the top layer behind one ear with a pearl pin so the disconnection looks styled, not messy.
Does the jellyfish cut work on thin or fine hair?
Yes, but it needs cleaner geometry and lighter texturizing. On fine hair, the “top” can look see-through if it is over-thinned, so ask for internal layering that preserves density at the ends of the top section. A jaw-length top with a chest-length perimeter is often easier than going super short on top. Styling matters too: use volumizing mousse at the roots, then texture spray on the top layer only, so the long perimeter still looks full and healthy.
What should I ask my stylist for to avoid a choppy at-home look?
Ask for a “disconnected two-tier cut with a blunt perimeter,” then specify your exact top length, perimeter length, and fringe choice using your try-on screenshots. The blunt perimeter is key because it keeps the bottom looking intentional instead of shredded. Also ask how they will blend only where you want blending, for example, minimal point-cutting on the top ends for softness, but not razor texturizing through the perimeter. Confirm the part placement too (center vs off-center) so the top layer lands where you expect.
How often do you need trims to keep the jellyfish shape?
Plan on a shape refresh about every six to eight weeks for the top layer and fringe, because those pieces grow out fast and are what make the cut read “jellyfish.” If you are growing the perimeter longer, you can stretch full-length trims to around 10 to 12 weeks, focusing on dusting the ends for split ends while keeping the outline blunt. If you wear your fringe daily, book bang trims in between, even a quick five-minute cleanup can keep the whole cut looking sharp.
Ready to see how a new hairstyle looks on you? Try Fravyn and preview 50+ styles on your own photo in seconds, including jellyfish-inspired layer combos that help you choose the right top length, perimeter, and fringe. Download the app now and experiment before you commit to the chair. Get it here: iOS.
Try a New Hairstyle Today
Preview 50+ hairstyles and 29+ colors on your own photo with Fravyn.