Helmet Friendly Hairstyles: Bike, Ski, Motorcycle Looks
Real-world helmet hairstyles that actually fit under bike, ski, and motorcycle helmets, plus simple ways to prevent frizz and flattening. Includes hair type, length, and face shape guidance so you can look good before and after you take the helmet off.
You know the feeling: you take off your helmet and suddenly you have flat roots, frizz at the hairline, and a helmet-shaped part that refuses to cooperate. This guide breaks down helmet friendly hairstyles for biking, skiing, and motorcycles, with do-this-next steps tailored to different helmet fits and hair types. You will learn how to prep, secure, and protect your hair so the style stays comfortable under the helmet and still looks presentable afterward. Plus, you can test looks fast with a virtual try-on and face shape guidance.
Best helmet hairstyles that stay put
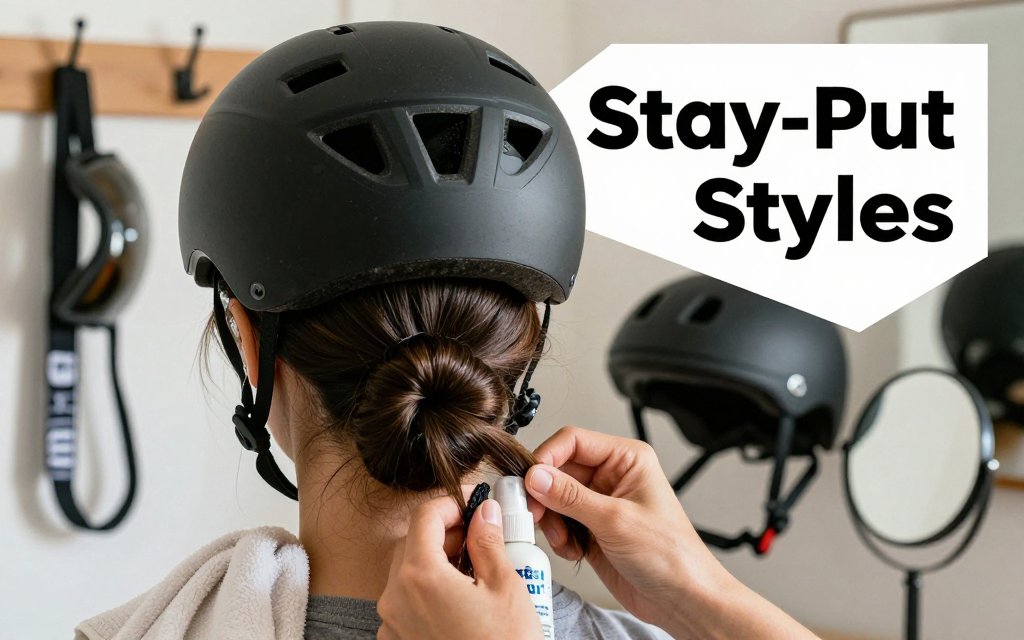
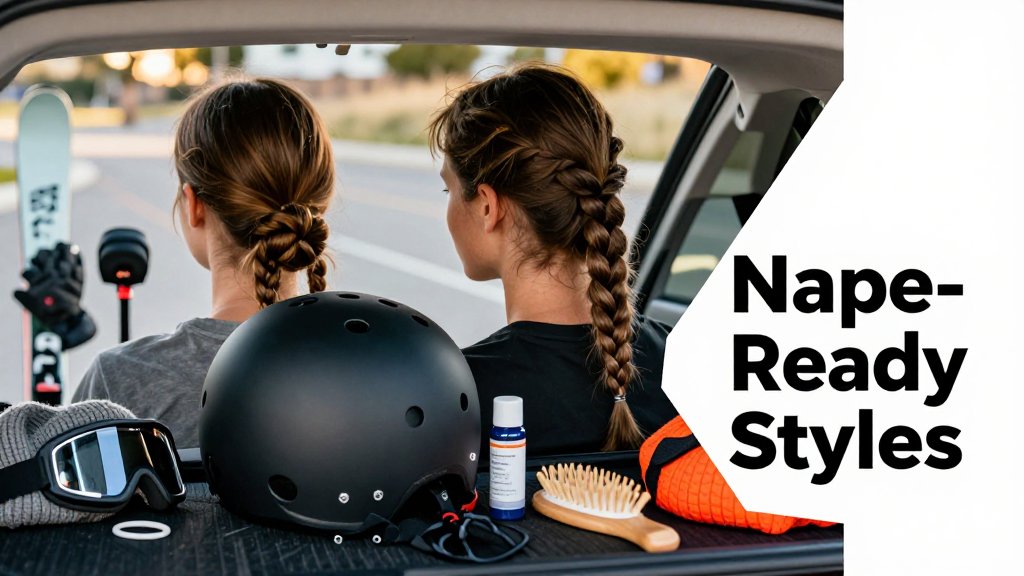
The hairstyles that behave best under a helmet share three traits: low-bulk, low-friction, and placed at the nape (or fully contained) so your helmet sits the same way every time. Most tangles, frizz, and “pancake hair” happen where the helmet shell and pads rub, especially around the back cradle and strap paths. That is why fit guidance often reminds riders to adjust helmet for hairstyles, because a different hair setup can change pressure and stability. Think smooth and flat, not tight and high, and you will get comfort plus better-looking hair after you take the helmet off.
For bike helmets, the usual trouble spot is the rear dial or “fit ring,” plus the lower edge that meets your ponytail or bun. Ski helmets add goggle straps and thicker ear pads, so bulky hair can create uneven pressure that turns into frizz at the crown. Motorcycle helmets are the most sensitive, since a snug fit is part of safety, and any lump can feel like a hard point after 20 minutes on the road. Quick comfort rules: Do keep hair low and flat, use snag-free elastics, and smooth ends with a tiny bit of leave-in. Do not stack clips at the crown, use a high ponytail under the rear pad, or tighten your style so much it pulls at your scalp.
If you want a “grab and go” approach, pick a style that matches your hair length and texture, then repeat it consistently so your helmet fit stays predictable. These are my most reliable options for bike, ski, and motorcycle days, and they are friendly to straight, wavy, curly, and coily hair. (If your hair is very slippery, add a little texture spray to the lengths before you start, not at the scalp, so it grips without feeling itchy under padding.)
A common mistake is placing a ponytail too high, right where the helmet’s rear cradle or shell wants to sit. At first it feels “fine,” then 10 to 30 minutes later you get a pressure hotspot, headache, or that numb, tender scalp feeling when you finally take it down. If you love ponytails, move it to the nape and keep it skinny, or switch to two low braids so the helmet rests evenly. Your best test is simple: put the helmet on, buckle it, then gently nod yes and no. If the helmet rocks or you feel one sharp point, restyle before you ride.
Aim for a hairstyle that sits below the helmet’s rear dial and feels smooth when you press your palm over it. If you can feel a bump, your helmet will feel it too.
Low bun for helmet: the nape sweet spot
A low bun at the nape is the closest thing to “set it and forget it” helmet hair, because it clears most retention systems and does not fight jacket collars. The goal is a flat coil, not a round knot. Step-by-step: brush hair into a low ponytail right at the nape, then twist the length until it starts to wrap on itself. Coil it flat against your head (like a cinnamon roll that stays wide, not tall). Pin it in an X with two bobby pins so it locks from both directions, then add a soft scrunchie or snag-free elastic over the coil for backup.
Hair length tweaks make the bun more comfortable. Short hair: work with what you have, use mini pins plus a small claw clip placed low and sideways so it does not create a ridge, then tuck flyaways under the helmet padding. Long hair: instead of wrapping the whole ponytail into one thick rope, spread the coil wide and pin more points around the edges so the bun stays flatter. Thick hair: split the ponytail into two sections, twist each section separately, then wrap them around each other into a flatter bun. That “two twist” method reduces bulk and helps you avoid the helmet pushing forward.
Braids for helmet hair: the no-tangle option
Braids are my top pick for preventing tangles and post-ride matting. Choose one of two paths. Option 1: two low braids for medium to long hair, parted down the middle, tied off with soft elastics so the ends stay controlled inside your jacket or neck gaiter. Option 2: a single French or Dutch braid that starts low at the crown (not right at the hairline), which gives better grip under a ski helmet and keeps the “braid spine” from rubbing at the very top. For friction control, smooth a pea-sized leave-in conditioner through the ends, then mist hairspray on the braid (not your scalp). Comfort check: you should be able to slide one finger between braid and scalp without pain. If you are deciding on protective styles, compare textures and tension in knotless vs box braids so your helmet days stay comfortable.
Once you find your “helmet signature style,” it is worth previewing how it looks from all angles, especially if you are also considering a color shift or wedding-ready polish. In Fravyn, you can try a low bun, braid looks, and sleek nape styles on your own photo, then test hair colors that still look fresh after compression (for example, deeper roots, soft balayage, or a shade that matches your brows so regrowth is less obvious). The face shape analysis is also helpful here: a low bun can visually elongate a round face, while low braids can soften a strong jawline without adding height that a helmet will flatten anyway.
How to prevent helmet hair and frizz
You cannot fully avoid flattening once a helmet is snug and doing its job, but you can reduce helmet hair and frizz using three levers: moisture balance, friction reduction, and strategic volume placement. Moisture balance keeps hair flexible instead of puffy or kinked. Friction reduction stops the helmet lining from roughing up the cuticle (hello, halo frizz). Strategic volume placement means you put lift where a helmet will not crush it into a weird dent. The goal is not to look like you just left a salon, it is to look intentionally styled with minimal effort, minimal buildup, and no itchy, slippery scalp under your helmet.
Pre-helmet routine in under 3 minutes
Start with dry hair if you can. Damp hair plus helmet pressure is basically a mold that sets in kinks right where the straps and padding sit, especially near the nape and behind the ears. In your 3 minutes, focus product only where it helps: use a dime-sized anti-frizz cream (about the size of a small coin) warmed between palms, then smooth it from mid-lengths to ends only. Leave the scalp alone. If you want extra polish, use a tiny swipe of a smoothing stick at the hairline and above the ears where flyaways pop out, then stop. Too much product near roots makes the helmet feel hotter, can cause slipping, and can leave you itchy by hour two.
If your hair is fine or gets greasy fast, swap the cream for a lightweight spray leave-in: 2 to 4 sprays total, aimed at the outer layer and ends, then comb through with fingers. This gives slip without collapse. A helpful rule is that conditioner-type ingredients belong on the hair shaft, not massaged into the scalp, which lines up with AAD conditioner guidance that focuses application on the lengths, especially the ends. Finish with the counterintuitive trick: skip a crisp center part. A soft off-center part hides compression lines better, and it still reads neat even if the top gets slightly flattened.
Quick fixes during breaks (without making your helmet gross)
If you have a stop light, lodge break, or coffee run, treat it like a mini reset, not a full restyle. First, lift the helmet straight up and back so you do not drag the lining across your hairline. Let your hair cool and dehumidify for 20 to 30 seconds before adding anything, because sweat plus product equals paste. If your scalp is damp, blot along the part and nape with a clean tissue or a corner of a microfiber cloth, do not rub. Then use fingertips to loosen the roots only at the crown and temples for 5 seconds. If you must reapply product, keep it to ends: one pea-sized dot of cream or one mist of leave-in on your hands, then touch only the last 2 to 3 inches of hair.
After-helmet reset that looks on purpose
Your fastest reset is a repeatable little flow, and it works for most textures with tiny tweaks. Step one: remove the helmet, then gently shake the roots with fingertips for 10 seconds, like you are loosening Velcro, not scratching your scalp. Step two: if it is safe and you are steady, flip your head forward for 5 seconds to unstick the crown, then come back up and set your part slightly off-center with your fingers. Step three: apply travel dry shampoo only at the roots, 2 to 4 sprays total for most people (start with 2). Hold the can 6 to 10 inches away, spray, wait 20 seconds, then brush lightly just at the top layer so you do not create a powdery, tangled mess under the surface.
For curly, coily, or wavy hair, the goal is to revive the outer canopy while leaving the shape intact. Skip heavy brushing. Instead, put a single drop of serum or lightweight oil on your palms, rub hands together until it is almost gone, then scrunch only the outermost layer and ends. If your curls got squashed, cup sections upward for 10 seconds each to encourage spring without creating frizz. A practical bike-to-office move is keeping one tool in your bag based on your texture: a small boar-bristle style brush for straight to wavy hair (great for smoothing the top without blowing up volume) or a wide-tooth comb for curls and coils (great for separating without destroying definition). Add one intentional detail, like tucking one side behind the ear or pinning back the front with a small clip, and it reads styled, not rescued.
Strategic volume placement is what makes all of this look polished. Instead of fighting for lift directly on top (the helmet will win), put volume slightly forward of the crown or at the sides where you like your face framing, then keep the very top smoother. For short hair, that can mean a tiny bit of texturizing spray worked into the fringe, not the scalp. For medium to long hair, it can mean loosening around the temples and keeping the lengths sleek. If you are also considering a color change, remember that high-shine shades like espresso, copper, and soft black can make hair look healthier even after compression, while softer highlights can disguise dents. If you want to sanity-check what looks best on your face shape before you commit, Fravyn can help you preview new cuts and colors on your own photo so your helmet routine supports a look you actually love.
Choose a helmet hairstyle by hair type and face shape
Picture this: two friends meet up for a weekend ride, both wearing the same “simple” low ponytail. One person takes off their helmet and their hair falls into a neat, glossy swoop. The other looks like their ponytail got pressed into their neck, their part vanished, and their face looks wider than it does in selfies. The difference is rarely skill. It is usually hair density (fine hair collapses faster), curl pattern (curls spring and frizz), and face shape (some placements shorten the face). The goal is not perfection, it is choosing a placement that works with your features and your helmet.
Start by matching the style to your length and texture so it stays flat where the helmet touches. Short hair: a pixie, crop, or short shag often behaves best with a flexible paste worked through the ends, then tuck behind ears so nothing bunches at the temple. Medium hair: a low braid starting at the nape keeps bulk off the crown, especially for wavy hair that puffs at the back. Long hair: two low braids can feel smoother than one thick braid if your hair is dense. Straight hair usually looks sleekest with a low pony plus a gentle “bend” at the ends. Curly and coily hair often does better with a low twist or braided ponytail, which controls shrinkage and keeps the helmet edge from catching coils.
Placement rules that flatter your face shape
Placement is your secret weapon because it changes the “frame” around your face the second the helmet comes off. Round faces often look longer with the braid starting slightly above the nape, then adding a tiny bit of lift at the crown before you braid, so it is still helmet-safe. Square faces tend to look softer with a looser braid start and tighter ends, plus a couple of face-framing pieces if your helmet allows it. Oval faces can wear most placements, but avoid bulky side knots that push the helmet fit. Heart-shaped faces often look balanced with a low bun and a soft side part. Safety always wins: per the CDC, a helmet fits snugly, so do not add volume where the shell needs to sit.
Round faces: keep height a touch higher than the nape. Square faces: soften with a looser braid start. Oval faces: skip side bulk. Heart shapes: low bun with side part. Never trade fit for bangs.
What is the best hairstyle to wear with a bike, ski, or motorcycle helmet?
The best all-around option is a low braid that starts at the nape, not mid-head, because it keeps the crown flat and prevents the “ponytail bump” that can make a helmet feel tight. If your hair is thick, try two low braids for an even slimmer profile. If your hair is short to medium, a low pony followed by a quick three-strand braid keeps the elastic from sliding and reduces tangles. For very curly or coily hair, a low braided ponytail or low two-strand twist tucks in neatly and helps with shrinkage once you take the helmet off.
How do I prevent helmet hair without using a ton of product?
Use friction control and airflow, not layers of spray. Start with dry hair or fully dried roots, since damp roots flatten into weird angles. Before you put your helmet on, set your part with your fingers, then lightly “pre-lift” the crown by combing hair up for five seconds and letting it fall back. A braid or twist holds that shape better than a loose ponytail. After the ride, shake out at the roots and flip your part for 30 seconds to reintroduce volume. If you need something, use one pea-sized drop of lightweight oil on ends only, not the scalp.
Can I wear bangs or a fringe under a helmet safely?
Yes, but only if your bangs do not change helmet fit or block vision. The safest approach is to keep the front as flat as possible: sweep bangs to the side, then smooth them down before you put the helmet on, so you are not tempted to shove extra hair under the front padding. Curtain bangs can work if they lie flush and you can tuck them behind your cheekbones once the helmet comes off. Avoid bulky bang clips under the shell, and do not “stack” hair at the forehead to make it look cute. If the helmet feels tighter, restart the style.
If you are torn between a low bun, a low braid, or two braids, a virtual try-on can save you a lot of trial and error. With Fravyn, you can preview 50+ hairstyles and 29+ hair colors on your own photo, then use face shape analysis to sanity-check placement. For example, if a low bun makes your jaw look sharper than you want, you can test a softer side part plus a low braid. You can also pick a color that still looks intentional after a helmet day, like a warm chestnut gloss for straight hair shine, or subtle caramel ribbons that break up “flat” areas once you fluff the roots. The best helmet hairstyle is the one that protects your fit and still feels like you.
Ready to see how a new helmet friendly hairstyle looks on you before you commit? Try Fravyn and preview 50+ styles on your own photo in seconds, so you can find a look that suits your face shape and works with your helmet routine. Download the app and start testing styles today on iOS.
Try a New Hairstyle Today
Preview 50+ hairstyles and 29+ colors on your own photo with Fravyn.