Headscarf Hairstyles for 2026, Tie It Three Ways
Three easy, face shape friendly ways to tie a headscarf in 2026, from silk scarf hairstyles to the lace headscarf trend. Includes step-by-step placement tips for short, medium, and long hair, plus quick fixes for bad hair days and braid-friendly scarf styles.
You know that moment when your hair refuses to cooperate, your plans are in 20 minutes, and the mirror is not on your side. In 2026, a silk or lace headscarf is the fastest way to look polished without fighting frizz, flyaways, or flat roots. In this guide, you will learn three foolproof ways to tie a headscarf, each with exact folding steps, where to place the knot, which hairstyles pair best, and quick face shape tweaks so it looks flattering, not costume-y.
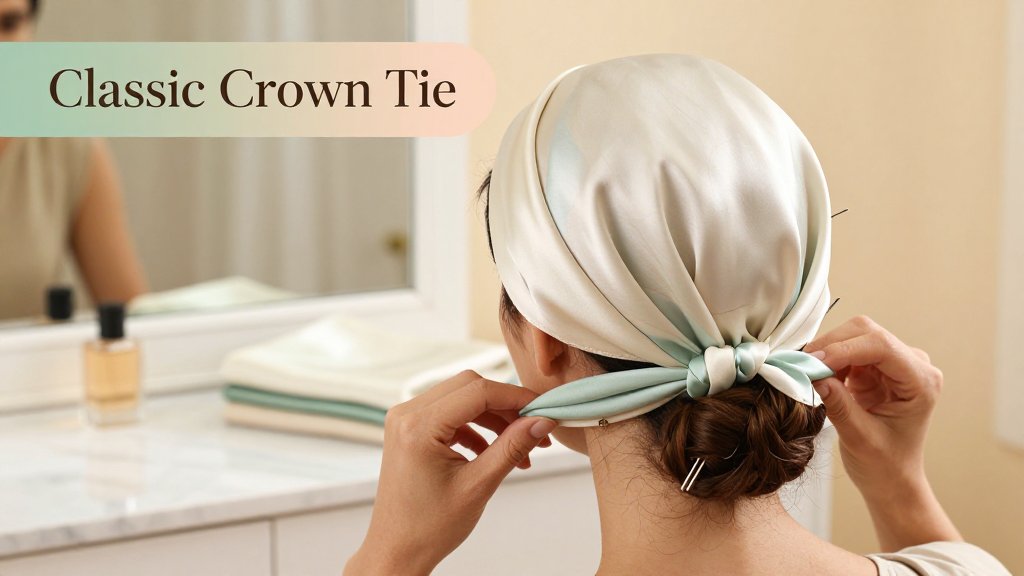
The Classic Crown Tie that flatters most faces
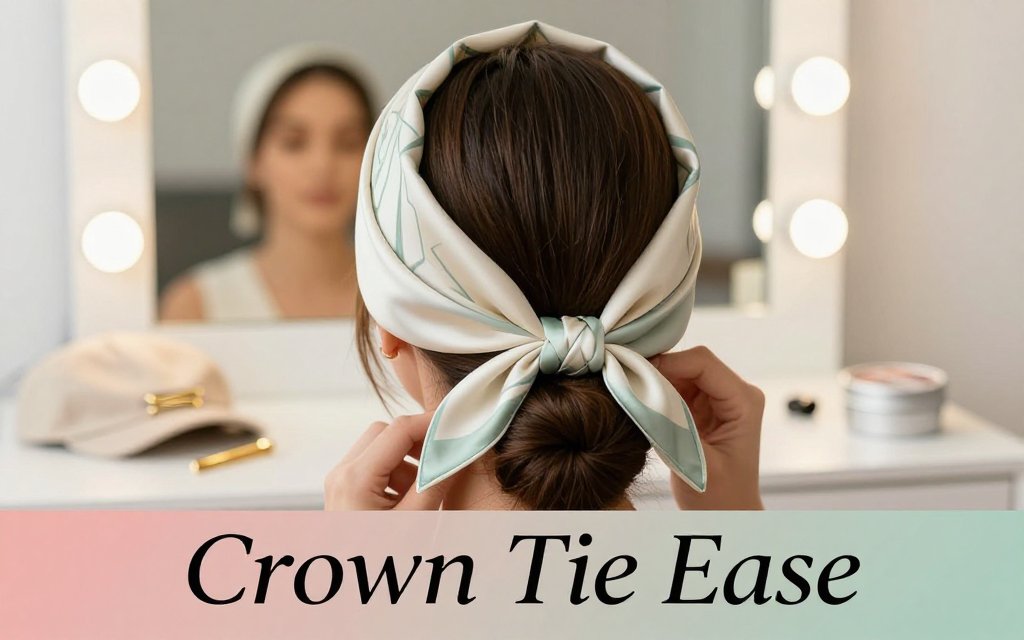
If you want one headscarf look that feels effortless, photo-ready, and wearable for errands or a wedding morning, the classic crown tie is it. The 2026 version is less “retro bow” and more “quiet-luxury headband,” with a flatter knot and a smoother band that shows off your scarf print. Placement matters most: aim to sit the band right at your hairline for a bold look, or slightly behind it for a softer, face-lengthening effect. Also worth knowing, smooth fabrics can slide on many hair types. Resources like Cancer Council ACT note that silky scarves can slip, and they suggest using a cap underneath plus pins to secure the scarf in place, especially for all-day wear (headscarf pin tips).
To keep the crown tie from creeping back, think “secure grip” instead of “crank it tight.” The band should feel snug enough that you can gently slide one fingertip under it without pulling your skin, and tight enough that it does not shift when you turn your head side to side. If your hair is freshly washed and slippery, add texture first: a light mist of flexible-hold hairspray at the temples, a dusting of dry shampoo at the roots, or a tiny swipe of styling wax on baby hairs can give the scarf something to hold onto. Pairing is where this look becomes a hairstyle, not just an accessory: try it with a low bun for clean lines, loose waves for romantic softness, or even short hair for that polished, editorial finish.
Step-by-step: silk scarf crown tie in 90 seconds
Start with a square silk scarf (about 27 to 36 inches works nicely). Fold it into a smooth 2 to 3 inch band, taking time to align the edges so the band stays even. Place the center of the band at the nape of your neck, then bring the ends up behind your ears so the scarf hugs the head without bending your ears forward. Cross the ends at the top of your head, slightly toward your part, then pull the ends down just a touch to lock the cross in place. Tie a flat double knot (not a big bow) slightly off-center so it looks intentional and feels comfortable when you lean back in a chair.
For friction tricks, use a pea-sized dab of hairspray on your fingertips and lightly press it where the scarf will sit at the temples, then let it get tacky for about 10 seconds before tying. If you need extra insurance, slide one tiny bobby pin under the fold right above one ear, catching a bit of scarf fabric and a small section of hair. Hide the pin by nudging the fold over it. Bangs and fringe are easy to customize: for full bangs, keep the band 0.5 inch behind the hairline so your fringe stays airy; for curtain fringe, pull two face-framing pieces forward after tying; for a deep side part, angle the knot toward the heavier side to keep the style balanced.
Want it to stay put? Tie it firm, not tight: you should slide one fingertip under the band. Add grip at the temples with a hidden pin, then let two soft pieces frame your face.
Face shape and hair length tweaks that change everything
Small adjustments can make the crown tie look custom to your face. For round faces, the fastest trick is placement: sit the scarf 0.5 to 1 inch behind the hairline and add a hint of lift at the crown by gently tugging the band upward at the top before you knot it, then smooth the sides. For square faces, soften angles by tying the knot to the side and pulling out two wispy pieces at the temples or just in front of the ears. For heart faces, balance a narrower chin by placing the scarf slightly lower on the forehead and keeping the sides fuller, not pulled tight. For long faces, skip extra height and keep the band wider so the look reads more horizontal than vertical.
Hair length changes the finishing steps. With short hair, plan to tuck the scarf ends under the band after the double knot, then use two mini pins (one per side, hidden under the fold) so the band does not spring loose. If your hair is very fine, a little root powder at the temples can help the pins hold without slipping. With long hair, the crown tie looks especially modern paired with a low bun at the nape or a bubble ponytail that starts low and goes down the back, which keeps the scarf as the focal point. If you are craving more volume without committing to a chop, combine this tie with invisible layers for volume so the crown area looks lifted even when your hair is pulled back.
The Scarf Braid Tie for sporty 2026 days
This is the headscarf hairstyle I reach for on busy, sporty days when I still want my hair to look styled, not just “pulled back.” A scarf braid gives you that braided polish while keeping flyaways contained, plus it is comfortable under a hoodie, bike helmet, or big headphones. The secret is choosing a scarf that adds color without adding bulk. Look for a long scarf in a thin fabric (silk twill, cotton voile, or a soft modal). If your hair is thick or curly, a slightly longer scarf helps the braid finish neatly without a tiny, stressed-looking tie at the end.
Most “scarf braid” problems come down to grip and tension: the scarf slips, the braid puffs up, or one side gets tighter so the braid bends like a banana. Before you even fold the scarf, give your roots a little texture so pins have something to hold onto. A few quick options that work across hair types: a light mist of texture spray, a pinch of dry shampoo at the crown, or a small amount of mousse on damp hair if you are planning ahead. If your hair is very silky, rub the scarf between your palms with a tiny spritz of hairspray, then let it dry for 10 seconds so it feels slightly “grippy,” not sticky.
How to do a scarf braid hairstyle that stays put
Start with scarf prep that matches the fabric. For silk, fold it into a long tube about 1 to 1.5 inches wide so it lies flat and does not create a chunky braid. For cotton or linen, go slightly wider so it does not twist into a thin cord that disappears. Place the scarf at the crown with the midpoint of the scarf centered, then anchor it using one bobby pin crossed like an X right over the scarf tube. That crossed pin trick is what stops the “slow slide” that happens as you move around. If you want to see the basic placement idea, this wrap scarf tutorial shows the scarf being secured at the back of the head before braiding.
Now split your hair into two equal sections, left and right, and let the scarf act as your third strand. A helpful mental cue is “hair, scarf, hair,” then keep repeating. Here is the tension tip that keeps the braid from ballooning: keep the scarf strand slightly tighter than the hair strands as you cross it over. Hair expands and fluffs as you braid, especially if it is layered or curly, but the scarf does not, so if the scarf is too loose it creates a puffy ladder effect. If you notice bulk starting near the top, pause and gently slide your fingers down the braid to compress it, then continue with smaller, more even crossings.
When you get to the ends, secure the braid with a small clear elastic first, then tie the scarf ends into a small bow right at the braid tip. For a cleaner, more “sporty 2026” finish, tuck that bow under the braid end and pin it with a mini bobby pin so you see pattern, not a floppy knot. For shorter hair that cannot feed into one long braid, do a version with two small braids: part your hair down the middle, make one small braid on each side from just above the ear down to wherever your hair runs out, then wrap the folded scarf around both braid bases and tie once to anchor. From there, you can braid the two scarf tails together (like a skinny rope braid), then pin that braided scarf under the back of your head to connect the look.
Make it face shape friendly with placement, not perfection
The nicest thing about a scarf braid is that it looks intentional even if the braid is not perfectly symmetrical, so use placement to do the flattering work. For round and heart face shapes, start the braid a bit higher (closer to the crown) and leave a soft face frame, like two loose pieces at the temples, so the scarf does not create a hard line across the widest part of the face. For square faces, start slightly off-center so the braid breaks up the “straight down the middle” effect, and keep the braid a touch looser around the jaw area. For long faces, start the braid lower and avoid slicking the top too tight, because extra height can make the face read longer.
Bad hair day hack, especially if your roots are oily or your hair has helmet dents: braid only the top half and leave the rest in a low ponytail. Start your scarf anchor at the crown, take only the top section of hair (from temple to temple), and braid it with the scarf as the third strand for about 4 to 6 inches. Then merge that braid into a low pony with the remaining hair, securing everything with a strong elastic. The scarf fold disguises greasy roots, and the pony keeps the style light so it does not feel bulky on medium hair. If you are experimenting with color for summer, this style is also great for seeing how a bold scarf changes the vibe of your hair tone without committing to dye.
The Lace Headscarf Trend 2026, soft and bridal
Lace headscarves are having a real 2026 moment because they do two jobs at once: they read romantic and occasion-ready, but they can still feel fashion-forward if you style them cleanly. Lace behaves very differently than silk. Silk slides, lace grips. Lace also has visual texture because it is literally an openwork decorative fabric, so it catches light and creates pattern on your hair. That is gorgeous for weddings, date nights, and spring events, but it can look “busy” fast if you pair it with too many other details (tight curls, heavy earrings, bold eye makeup, and a dramatic printed dress all at once).
How to wear a lace headscarf without looking dated
Keep lace simple, wide, and slightly back from the hairline, that is the shortcut to “modern” instead of “retro costume.” The tie that looks current in 2026 is a low, wide band with a small knot or twist placed near the ear, then finished with a sleek low bun or glossy waves. For the quick tie: fold the scarf into a 3 to 4 inch band, place it about 1 inch behind your hairline, and keep the band flat (no accordion bunching). Twist once near your temple (aim for just one twist, not a braid), bring the ends around to the nape, tie once, then tuck the tails under the band so it looks clean from every angle.
Color is where lace gets instantly 2026. Try black lace with neutral, soft-matte makeup and brushed brows (it reads chic, not gothic). Ivory lace looks especially expensive over warm brown hair, like chestnut, honey brown, or a soft brunette balayage, because the warmth keeps it from feeling stark. For a more editorial contrast, soft pastel lace (powder blue, lilac, or blush) looks striking over dark roots or a deep espresso base. One common mistake: too much lace plus too many curls can look costume-y, so pick one statement element. Either do the lace with sleek hair, or do big curls with a plain scarf or simple headband.
FAQ: quick answers before you tie
A lace scarf is usually easier to keep in place than silk because the texture grips hair, especially if you are not styling on freshly conditioned, super-slippery strands. Still, the goal is comfort plus security, not a tight wrap that gives you a headache by hour two. If you plan to dance, move around outdoors, or hug lots of people (hello, weddings), build in “invisible support” first: a smooth base style (low bun or low pony), two bobby pins crossing in an X near each ear, and a light mist of flexible-hold hairspray on the hair, not on the lace. That combo keeps the look polished without crunchy hair.
How do I keep a silk scarf from sliding on fine hair?
Give silk something to grab. On fine hair, prep with a little dry shampoo or texturizing spray at the crown and around the sides, then smooth only the very top layer with a soft brush. Tie your scarf over a low bun or low ponytail so the scarf has a “stopper” at the nape. Two bobby pins placed vertically right behind the ears (pinned through the scarf and into hair) make a bigger difference than adding five pins at the hairline. If you hate pins, wear a thin velvet no-slip band underneath, then tie the silk scarf on top.
How to wear a hair scarf with short hair without it puffing up?
The “puff” happens when short layers get trapped under the scarf with air pockets. Start by deciding if you want ends out or fully tucked. For a sleek look, smooth hair down with a lightweight cream, then use two flat bobby pins to anchor each side above the ear before the scarf goes on. Fold the scarf into a wider band (3 to 4 inches) so it compresses evenly instead of creating a tight ridge. Tie low at the nape, then tuck any extra fabric upward into the band, not sideways. Leave a little volume at the crown only if you want that intentional, rounded silhouette.
Can I use a virtual hairstyle try on to test scarf placement and hair color?
Yes, and it is one of the easiest ways to avoid buying a scarf shade that fights your undertone. Use a virtual try-on to test your base hair finish first (sleek low bun vs glossy waves), then adjust hair color so the lace looks intentional. With Fravyn, you can preview 50+ hairstyles and 29+ hair colors on your own photo, then use face shape analysis to sanity-check the proportions. For lace specifically, try two screenshots: one with the band placed 1 inch behind the hairline (modern), and one right at the hairline (more vintage). Compare which one lifts your cheekbones and balances your jawline best.
Ready to see how a new hairstyle looks on you before you commit. Try Fravyn and preview 50+ styles on your own photo in seconds, including scarf-friendly looks that match your vibe. Download the app, upload a selfie, and start experimenting right away. Get it here: iOS.
Try a New Hairstyle Today
Preview 50+ hairstyles and 29+ colors on your own photo with Fravyn.