Hairstyles With Hearing Aids: Comfort, Clarity, Confidence
Hearing aids and great hair can absolutely coexist. This guide walks through hearing aid friendly hairstyles that reduce microphone rustle, prevent tangling, and improve all-day comfort, plus when to conceal versus show off your devices and how to test looks with a virtual try-on.
Wearing hearing aids should not mean giving up the hairstyle you love. The right cut and styling choices can reduce distracting hair noise, prevent snagging around behind-the-ear devices, and keep everything feeling secure all day. In this guide, you will find practical, testable hairstyle ideas for short and long hair, plus simple adjustments like part placement, layers, and accessories. You will also learn when it helps to cover your devices, and when showing them can feel confident and intentional.
What hairstyles work best with hearing aids
Keep hair off the microphones, keep pressure off the ear, keep products off the device. Those three rules solve most of the annoying stuff people blame on “my hearing aid being picky,” especially with behind-the-ear hearing aids and cochlear implant sound processors. Microphone rustle is usually not a tech problem, it is a friction problem. When strands repeatedly brush the mic ports, you get that crisp scratchy sound that can make you want to rip your style out by noon. The good news is that you do not need a boring haircut to fix it. You just need shapes that sit cleanly around the ear, plus styling habits that prevent tangling and snagging.
The comfort and clarity rules that matter most
Here is the plain-language mechanics: hair brushing the mic equals rustle, pressure behind the ear equals soreness, and repeated snagging equals broken hairs and daily frustration. Wavy and curly textures can be extra “mic-active” because the curl pattern springs back toward the ear after you tuck it, then bounces with every step. Very fine hair can be surprisingly noisy because it is light enough to flutter and sweep across the microphones all day. Super thick hair can create the opposite problem, it piles weight behind the ear and pushes the device inward, which can leave you tender by evening. Your goal is a calm zone around the ear so your device is picking up voices, not movement.
Common mistakes are almost always well-intentioned: loading up heavy hair oils or scalp serums right where the device sits (hello slip and grime), doing a tight ear-tuck that pulls the processor hook every time you smile or chew, or spraying flyaways directly next to microphone openings. Even glasses can add contact points, so the more you can reduce “stuff rubbing together” behind the ear, the cleaner your sound tends to be. If you want a nerdy confidence boost, Oticon’s handling noise research calls out everyday triggers like brushing hair and taking glasses on and off, which is exactly what your hairstyle can help you avoid.
If you can feel tugging behind your ear, your hearing device can too. Aim for styles that lift hair above the mic area, keep the ear relaxed, and stay smooth through a full day of movement.
Easy wins: styles that keep hair off microphones
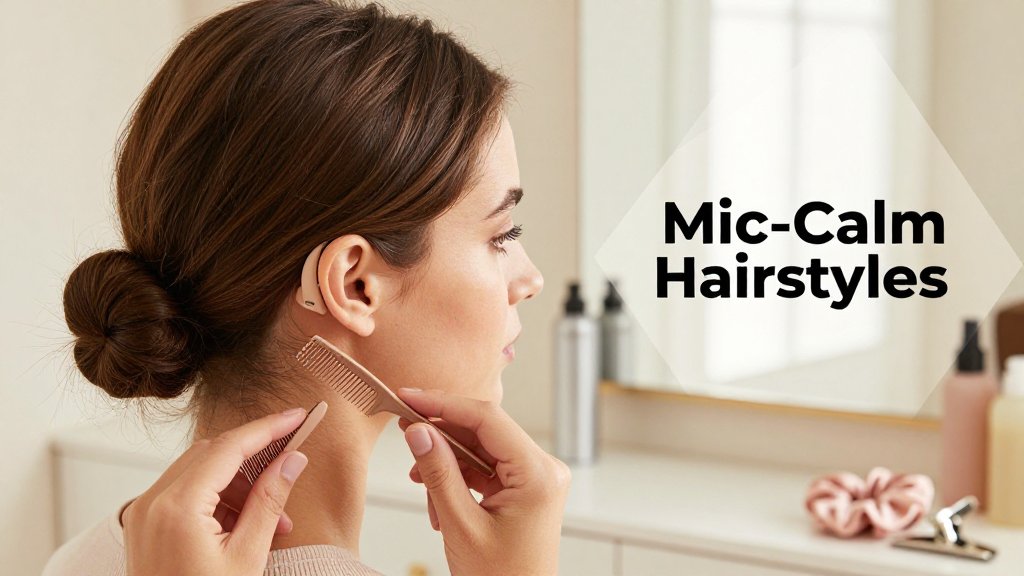
The most reliable families are simple, soft, and slightly structured: a low pony, a low bun at the nape, a half-up half-down that lifts hair above the ear line, or short cuts with a clean perimeter around the ear. For most people, the best placement is anchoring the top section about 0.5 to 1 inch above the top of the ear so hair stays suspended away from the device instead of collapsing onto it. Think of it like creating a little “shelf” of pinned hair that keeps the ear area clear. A low pony works beautifully on straight, wavy, curly, and coily textures if you keep it soft at the base and avoid a super tight elastic that makes the area behind the ear feel compressed.
If you love shorter hair, ask for a shape that intentionally clears the ear: a pixie with a tapered side, a bixie with a neat ear contour, or a bob with a slightly undercut perimeter just around the ear so hair does not constantly brush the mic area. If bangs are part of your plan, choose them for your face shape, then control the “bang-to-side” transition so it does not sweep right onto the device. (That is where a lot of rustle happens.) A quick way to preview whether fringe will behave on your exact proportions is using face shape bangs finder guidance, then pairing the bang choice with a clean ear zone and a soft, movable finish.
Real-world scenario: you are getting ready for a wedding as a guest, or you are the bride and wearing a veil, and you want your hearing devices to feel secure from photos through dancing. A half-up half-down with the top section pinned above the ear keeps your style romantic while protecting clarity during vows and speeches. Use two or three smooth bobby pins crossed in an X, then add a small clear elastic or mini claw clip at the nape so the down section does not migrate forward. Before you leave, do a “sound check” in the mirror: turn your head side to side, hug your shoulders like you are putting on a cardigan, and listen for scratchiness. If it rustles, move the pinned section a little higher or switch to a low bun for the night.
Behind the ear hearing aid hair tips for long hair
Long hair can look gorgeous with behind-the-ear hearing aids, but it can also create three common annoyances: tangles around the ear hook, “stacking” pressure if you wear glasses, and that microphone rustle that shows up the second you turn your head or step into wind. The fix is rarely a specific haircut, it is the way you place your part, manage tension, and “lock in” the hair so it does not slide forward every time you talk, chew, smile, or look down at your phone. Think of your goal as building a low-friction path around the top and back of your ear, then anchoring hair above the aid so the length stays behind your shoulders instead of drifting into the device area.
How to wear hearing aids with long hair without tangles
Start with a clean part, because part placement decides where your “heaviest” section falls. If hair keeps catching on the hearing aid, try shifting from a middle part to a soft off-center part that sends more hair to the opposite side, so the aided side stays lighter and easier to control. Keep the part crisp with the tail of a comb, then fully dry your hair before you style. Damp hair stretches and shrinks as it dries, which can tighten around the ear and pull strands into the microphone area. If you blow dry, aim airflow down the hair shaft and away from the ear, using your hand to guide hair behind the ear without wrapping it around the device.
Next, anchor hair above the ear before you finish the style. This one step prevents the slow creep that happens after a few minutes of chatting. Gather a small section just above the top of your ear (not over the hearing aid), then secure it with a mini elastic, a tiny claw clip, or two crossed bobby pins placed in an X. After that anchor is in place, you can style the rest normally: a low braid, a low ponytail, a half-up twist, or a loose bun held with a medium claw clip. The anchor acts like a “stopper,” keeping the front pieces from sliding forward during chewing, laughing, and windy walks.
Scarves and hats can be hearing aid friendly, you just want to control friction. Position the scarf so the fabric edge does not rub directly behind the ear, and avoid thick seams sitting on the same spot as the hearing aid tubing or wire. For beanies and wide headbands, pull the band slightly upward so the tightest area sits above the ear instead of pressing directly on it. If you also wear glasses, pick one “closest to the head” layer: either keep glasses temples snug and style hair flatter behind the ear, or keep hair anchored back and choose glasses that sit a touch looser. Reducing that three-layer stack (hair, glasses, device) can make a surprising difference in comfort by the end of the day.
Hair products safe with hearing aids: what to use and where
Product choice matters, but product placement matters more. Keep creams, oils, and serums on mid-lengths to ends, not around the ear, and not directly behind it. If you need slip for detangling, use a light leave-in spray on the bottom half of your hair, then comb through and keep that “product zone” below the jawline. For shine, warm one drop of a lightweight oil between palms and skim only the ends, especially if you wear your hair down. The common mistake is smoothing flyaways with a heavy pomade right where the microphones sit, which can trap residue, grab loose strands, and increase rustle when hair brushes the device.
For roots, dry shampoo can be helpful, just apply it away from the device zone. Spray at the crown and top-back of the head first, then let it sit for 20 to 30 seconds and massage in, keeping your fingers out of the area directly behind the ear. For hold, choose flexible hairspray, spray it into your hands first, then smooth over the surface of a braid, ponytail, or tucked-behind-ear section. That method gives control without misting the hearing aid itself. Health guidance also backs the “no spray on the device” rule: the NIH care guide advises avoiding hairspray and other hair products while wearing hearing aids. If you are a daily product person, a quick end-of-day wipe around the ear area and a gentle brush through lengths can keep both hair and devices feeling fresh.
Updos, wedding looks, and when to show devices
The most hearing aid friendly updos are low, secure, and leave a clean zone around the ear so nothing presses on the device or brushes the microphones. From there, you have two equally valid paths for a wedding or formal event: conceal your devices for a classic, soft look, or showcase them as part of your style. Either way, plan for three moments, not one: close-up photos, the ceremony (lots of stillness and quiet listening), and dancing (heat, movement, hugs). A good updo lets you hear clearly, keeps the devices seated, and still looks polished after a few hours of celebrating.
Updos with hearing aids that stay comfortable for hours
For bridal hair, start with a low chignon at the nape of the neck, placed slightly off-center if you like a romantic vibe. This shape is naturally friendly to behind-the-ear devices because the tension sits lower than the ear, not on it. Ask your stylist to keep the sides smooth but not “vacuum tight,” then leave a fingertip of space around the top of the ear so the device can sit without pressure. High buns can look stunning, but they often create upward pulling along the sides of the head, which can tug the ear area and make your device feel like it is being lifted or squeezed.
If you want extra security for long ceremonies and long reception lines, try a low braided bun. The braid gives “grip,” which means fewer pins need to be anchored near your ear. A twisted half-up style is another smart option because it keeps hair out of your face for photos while leaving the ear zone more relaxed than a full slick-back updo. Watch out for tight ear tucks. They can press hair directly over microphone ports and create a faint scratching sound with every head turn. Accessory placement matters, too: bobby pins and decorative combs should sit above and behind the device, not directly over it.
Outdoor venues add two common styling problems: wind and “mic rustle.” Loose, face-framing pieces are pretty, but in a breeze they can flutter against your hearing aid microphones and show up as a distracting swish in quiet moments like vows. A simple fix is choosing longer face-framers that curve forward and stay off the ear, then setting them with a light cream and a soft mist of flexible hairspray sprayed into your hands first (so you are not blasting product near the device). For dancing, pack a mini rescue kit: 6 to 10 bobby pins that match your hair color, one small hair elastic, and blotting papers for sweaty hairlines.
Cochlear implant styling has the same goal as hearing aid styling: a calm, low-tension ear and scalp area so your processor feels stable and sounds consistent. Long hair works beautifully with a low bun, a low ponytail with a wrapped base, or a half-up twist that keeps bulk away from the magnet site. If you are worried about retention during dancing, consider using a manufacturer accessory designed to secure the processor, such as a Safety Line and headband, then style hair to hide the clip under a small twist at the back. If you are showcasing devices, coordinate with statement earrings, sparkly pins placed higher than the ear, or a sleek side part that frames your face intentionally.
FAQ: hearing aid friendly hairstyles and styling problems
A quick trial run can save your whole event. If possible, wear your devices to your hair trial, bring your veil or hairpiece, and take a few test videos outside so you can hear and see what your style does in real life. Your “best” hairstyle is the one that lets you focus on people, not on adjusting hair every ten minutes. If a style fails on the day, do not panic. Most problems come from only two issues: too much tension around the ear, or too much hair brushing the microphones. Both are fixable in under five minutes with a couple of pin changes.
How can I keep hair off microphones on hearing aids without pinning it too tight?
Aim for “guided placement,” not tightness. Use a soft side part, then twist a 1 inch section from the temple back and pin it above and behind the device so the pin anchors to hair on your head, not to the ear area. If flyaways keep tickling the microphones, add a pea-sized amount of styling cream to your fingertips and smooth hair away from the ear, then set with a flexible spray. Quick alternative if it still rustles: switch to a low half-up twist so the sides stay controlled without pressure.
What are the best cochlear implant hairstyles for long hair and updos?
Look for styles that keep weight low and reduce tugging near the implant site: a low chignon, a low braided bun, or a low ponytail with the base wrapped in hair so elastics do not snag. If you want hair down, choose loose waves and pin only the front pieces back, leaving the processor area uncompressed. For updos, ask your stylist to avoid backcombing directly over the magnet area since it can make removal uncomfortable. Quick alternative if your updo shifts: redo it as a sleek low ponytail and add a small twist over the elastic.
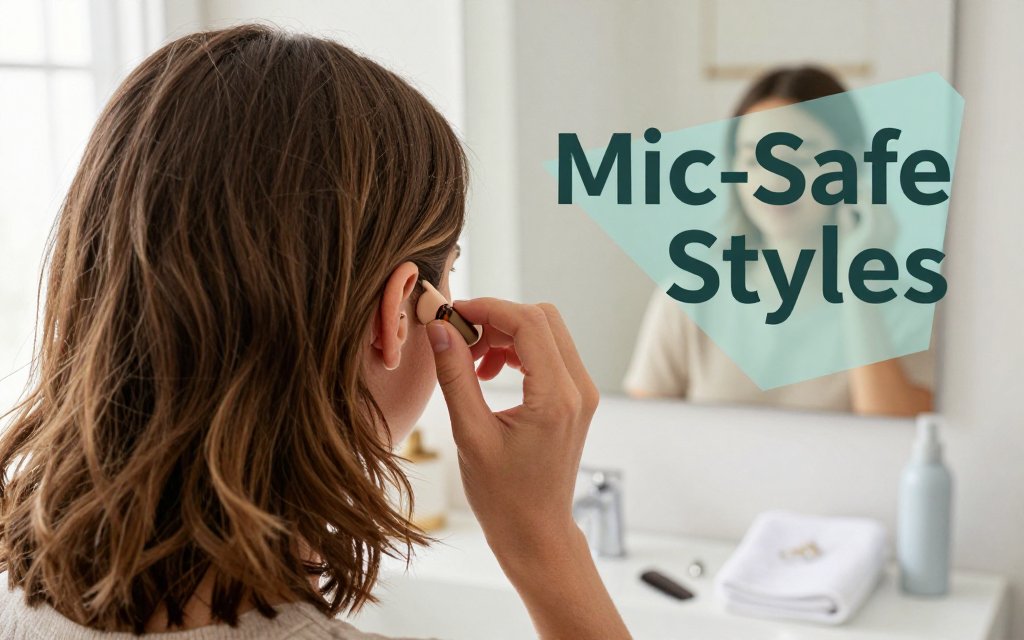
Which hairstyles cover hearing aids well, and which ones look best when you show them?
To cover devices, choose styles with movement that falls past the ear, like shoulder-length layers with loose curls, a side-swept blowout, or a half-up style where the top section is lifted while the sides stay softly down. Avoid heavy, tight tucks that press hair onto microphones. To show devices, go intentional: a sleek low bun with clean sides, a tapered cut, a textured crop, or a deep side part that keeps one ear visibly clear. Add confidence details like matching earrings or a pretty pin placed higher than the ear.
Ready to see how a new hairstyle looks on you? Try Fravyn and preview 50+ styles on your own photo in seconds, so you can choose looks that feel comfortable with hearing aids and still match your personal style. Download the app, test a few options, and save your favorites before your next haircut. Get Fravyn on iOS and start experimenting today.
Try a New Hairstyle Today
Preview 50+ hairstyles and 29+ colors on your own photo with Fravyn.