Bring Your AI Try On to the Salon: A Consultation Script
A practical, say-it-out-loud consultation script that helps you turn virtual hairstyle try on results into a haircut and color you actually love, with a simple checklist, better reference photos, and realistic expectation setting before the first snip.
AI try-on makes it easy to collect hair inspiration, but screenshots alone do not guarantee you will leave the salon with the look you imagined. The missing step is translating what you liked into clear, stylist-friendly details about length, shape, layers, fringe, and color placement. In this guide, you will get a simple consultation script, a checklist of what to bring, the best questions to ask, and quick confirmation steps that lock in expectations before any cutting or coloring begins.
What to bring to your hair appointment
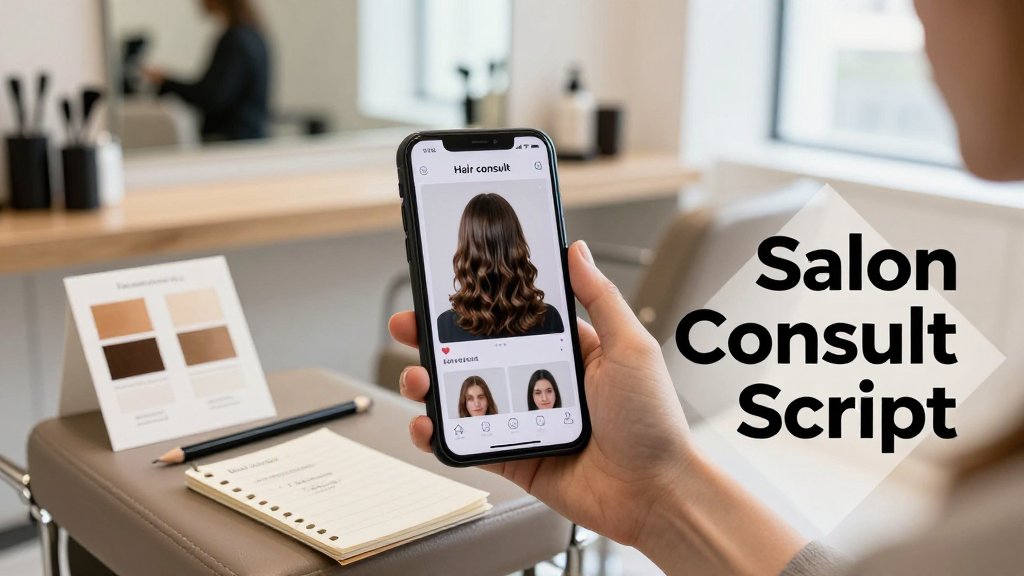
Your stylist can work magic faster when you walk in with clear, visual targets and a few practical details. The quickest way to translate a Fravyn try-on into salon-ready direction is to bring a tiny set of screenshots that show shape, movement, and color intent, plus notes that explain what you are reacting to. Think of it like giving your stylist a map and a destination, not a single rigid picture. If you can, create a photo album on your phone named “Hair consult” and favorite the key images, so you are not scrolling in the chair while your cape is on and the clock is ticking.
That checklist is the whole point of your prep: it turns “vibes” into decisions your stylist can actually execute. If you only do one thing, do the front and side screenshots, because they answer two different questions. The front view shows the face-framing, fringe, and where the length visually hits (jaw, collarbone, shoulders). The side view shows profile balance, whether layers stack nicely, and how much weight sits at the ends. Color screenshots help too, but they work best when you label them with what you mean, like “cool espresso brown, not black” or “beige blonde, not icy.”
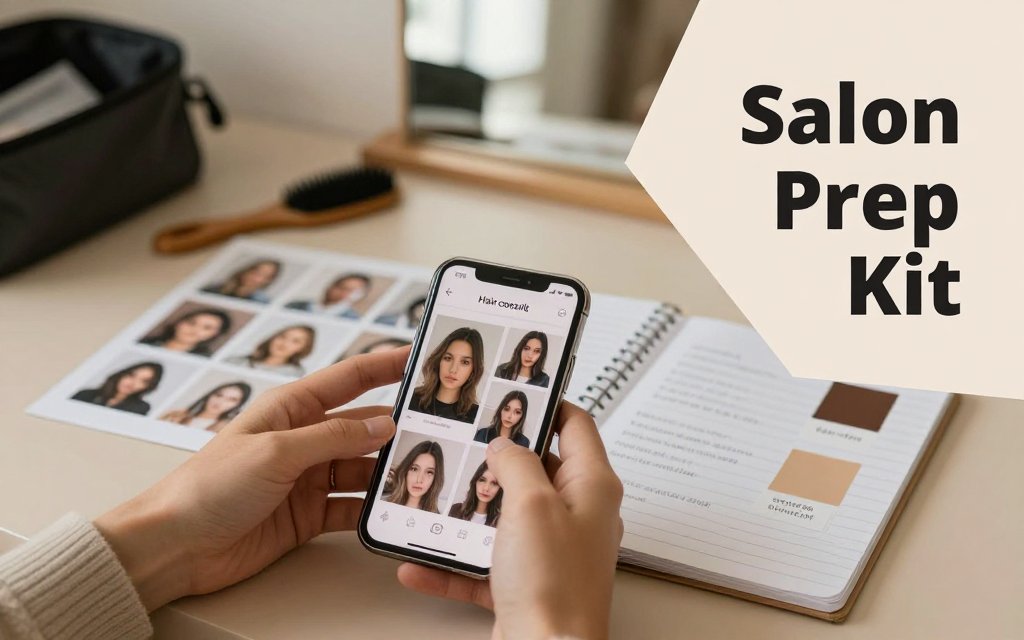
Your 5 minute prep from Fravyn screenshots
In Fravyn, save four images total for speed: (1) a front view of your favorite haircut try-on, (2) a side view of the same look, (3) one hair color option you would be happy to wear for at least 8 to 12 weeks, and (4) one backup option that feels slightly safer. Your backup matters because your stylist may tell you the exact tone in the screenshot needs a different route (for example, a gloss first, then highlights next visit). Add a simple note under each screenshot in your phone: “I like the collarbone length, the soft curtain fringe, and long layers that start at the cheekbones.”
Also write down what you do not like, because it prevents misunderstandings. Examples: “I do not want a blunt triangle shape,” “I do not like see-through bangs,” “I do not want warm copper tones,” or “I hate styling with a round brush.” Then list your non-negotiables in plain language: “keep length above shoulders,” “no bleach,” “needs to air-dry,” or “I work out five days a week and wash often.” If Fravyn’s face shape analysis suggests a style, treat it as supportive context, not a command. You can say, “Fravyn suggested cheekbone framing for my face shape, and it looks good in the preview, but I want your opinion.” If you fight brassiness often, bring that up and consider reading hard water brassiness fixes before your appointment so you can describe what you see at home.
The opening script: how to start the consult clearly
Walking in with a calm, clear opening makes you sound confident, not controlling. Try this word-for-word script, then pause so your stylist can ask questions: “My goal today is a wearable change that still feels like me. I usually style my hair by air-drying or doing a quick blow-dry, about 10 minutes max. I need this to look good for everyday, and I’d love it to be photo-ready by (your date). My biggest fear is ending up too short, too warm, or with bangs that are hard to manage.” The common mistake is saying only “I want this” while pointing at a photo. Instead, name the features you want, like “jaw-length face framing” or “soft layers that keep thickness in the ends.”
I brought a few Fravyn screenshots of styles I like. I’m not married to an exact photo, but I love the cheekbone-length layers and soft curtain fringe. Can we talk about what’s realistic for my texture and color history?
End the consult setup by inviting professional realism, because feasibility depends on density, texture, and your color history. Ask: “Do I have enough density for this shape, or do we need fewer layers?” and “With my curl pattern, will this fringe sit right, or should we tweak the length?” If color is involved, mention anything from the last two years: box dye, salon toner, highlights, balayage, henna, relaxers, keratin treatments, and even well water issues. If you have ever had itching, swelling, or a rash from dye, say so up front. The FDA specifically notes that some hair dyes include directions for a skin test, and it is smart to follow FDA hair dye safety guidance when you are changing formulas or going darker. You are not being high-maintenance, you are being safe and specific.
How to show haircut reference photos that work
Say the haircut in measurements, not vibes
Reference photos work best when you treat them like a translator, not a promise. Your stylist is not only seeing the cute “lob” or “pixie,” they are clocking shape, weight, and where the line sits on the neck and jaw. So instead of, “I want something fresh, not too short,” try numbers and landmarks: “Take 2 inches off,” “I want the length to hit collarbone,” or “Keep it grazing my shoulders when it’s dry.” Those phrases tell them what you mean even if your hair curls up, flips out, or shrinks as it dries. Bonus tip: pick photos with a similar hair density to yours (fine vs thick) so the silhouette is actually achievable.
Walk in with a tiny, curated set of visuals. Two photos max for your target haircut, ideally one front view and one side view. Then bring one “no thank you” photo that shows what you hate, like a shag with wispy ends when you want a fuller blunt look, or a heavy fringe when you really want airy curtain bangs. Your job is to point to specific details, not hand over a 40-photo camera roll. Try saying: “Keep the perimeter blunt,” “Face-framing starts at cheekbone,” “Curtain fringe that hits the eyebrow,” and “No thinning shears.” Those are salon-proof sentences that prevent the classic problem where you love the vibe but hate the execution.
Be extra honest about texture and effort, especially if you are using an AI try-on. Try-ons can smooth frizz, soften cowlicks, and make waves look more uniform than real life. So spell out your natural pattern and your reality: “My hair is 2B to 2C wavy, it puffs if I brush it dry, and I style for 7 minutes on weekdays.” That single sentence helps a stylist decide if your reference photo needs more internal layering, less layering, or a different bang plan. If you have curls or strong waves, mention shrinkage and ask whether they prefer a dry finish for accuracy. Allure has a helpful explainer on dry-cut advice for curls that matches what many curl specialists do in practice.
Use your photos to discuss shape in plain language. A blunt bob is basically a strong outline with minimal layering, while a butterfly cut is long layers that keep length but add lift around the face. A modern shag or wolf cut is more about creating movement and removing weight, which can read “edgy” on straight hair and “big and fluffy” on curls. So name the trade-off you actually want: “I want more volume at the crown, but I do not want to lose thickness at the ends,” or “I want movement, but I still need to be able to tuck it behind my ears.” That keeps you both out of the vague zone where misunderstandings happen.
> “Let’s agree on three things: where the length lands when it’s dry, how blunt the perimeter stays, and where the face-framing begins. If we match those, the haircut will feel like the photo even on my texture.”
Confirm the plan before the first cut
Before any scissors open, do a quick call-and-response that feels friendly, not controlling. You can say: “Can you repeat back what you’re planning to do, just so I know we’re picturing the same thing?” A good stylist will not be offended, they will usually appreciate the clarity. Then confirm the dry landing point: “When it’s dry and sitting naturally, where will the longest pieces hit, collarbone or shoulder?” This matters a lot for wavy, curly, and coily hair, and also for anyone who wants a very specific line like a jaw-length bob. It is also smart for cowlicks, since they can lift bangs shorter than expected.
Agree on a stop point for a mirror check, and say it out loud. Example: “After you establish the first length guideline in the back, can we pause and check the length before we commit to the whole head?” That one sentence prevents the common situation where you only realize it feels too short after everything is already blended. This is especially helpful if you are going from long hair to a lob, from a lob to a bob, or adding fringe for the first time. If you are nervous about bangs, ask for a staged approach: start longer, dry it, and then shorten in small steps until it hits the eyebrow or cheekbone exactly where you want it.
Here is the counterintuitive tip that saves haircuts: ask to see the sectioning and the first guideline before they proceed. You are not judging technique, you are confirming the roadmap. Try: “Could you show me the sectioning and where the first guideline will sit, just so I can visualize the shape?” If your goal is a blunt perimeter, you want to see a clean, consistent baseline. If your goal is long layers, you want to confirm that the perimeter stays strong and layers start where you agreed (for example, “layers start below the chin,” not up at the cheekbone). Adjusting early is easy. Fixing it later can mean losing more length than you wanted.
Hair color consultation tips to avoid surprises
A great color consult is basically expectation setting in three places: your phone screen, the salon mirror, and real life lighting. Before you say yes to anything, use Fravyn to try your top two to three shades (for example, soft beige blonde vs cool mushroom brown), then screenshot them without filters. Filters and salon spotlights can make hair look brighter, cooler, or smoother than it will look at home, so do a quick reality check by stepping near a window or even outside for a minute. Beauty editors have pointed out that lighting changes color, and it is one of the biggest reasons people feel surprised after an appointment.
Ask these questions before you agree to color
Start the conversation by showing your current hair in natural light. A quick phone photo by a window is more honest than a dim bathroom selfie, especially if you are dealing with brassiness, banding, or gray coverage. Next, give your stylist your color history from the last three to five years, including box dye, glosses, toning shampoos, keratin treatments, and any “I used a copper mask once” moments. Then ask what category you are actually booking today: permanent color (best for long term gray coverage), demi-permanent (softer grow-out), highlights or foils, balayage, a root smudge, or a gloss for shine and tone. You are not being picky, you are making sure you and your stylist are using the same vocabulary.
Lock in an expectation anchor before the formula gets mixed: “I am okay if it takes two sessions” versus “I need this finished today.” That one sentence changes everything, including how far you can lighten safely and whether you should pick a softer end goal for now (think honey bronde instead of icy platinum). If you used Fravyn face shape analysis, share it as a guide for where you like brightness around your face, like cheekbone level highlights for a round face or a lighter money piece to open up a square jaw. Then confirm placement based on your actual haircut and part, because a curtain fringe, a deep side part, or a blunt bob will change where the lightest pieces should live.
FAQ: Can my virtual hair color look different in real life?
Yes, and it does not mean your stylist did anything wrong. Screen brightness can make blondes look lighter and cool browns look smokier. Your camera also auto-adjusts white balance, so the same shade can read warmer under indoor bulbs and cooler outdoors. Salon lighting is usually bright and reflective, which boosts shine and makes tone look cleaner than it will in your bedroom mirror. Hair porosity matters too, because more porous ends can grab pigment and look darker. Fix: compare your top two Fravyn shades next to a window at midday, then show those screenshots plus a photo of your current hair taken in that same light.
FAQ: What should I ask for when I want "ashy" or "warm"?
Ask for three things: level (how light or deep), tone (gold, copper, neutral, violet, blue), and finish (glossy vs matte). “Ashy” usually means neutral to cool tones that soften orange or yellow, while “warm” means deliberate gold, caramel, or copper. Bring two references: one labeled “too warm” and one labeled “too cool,” so your stylist can hit the middle. Maintenance matters: ask if you will need purple shampoo and how often (many people do well with once a week), plan a gloss or toner refresh about every six to ten weeks, and use heat protection to reduce fading and brassiness.
FAQ: How do I prevent the "not what I pictured" moment?
Ask for a strand test any time you are lightening or making a big jump, especially if you have old color on the mid-lengths. Then ask what the hair will look like at week 2 and week 6, not just the day you leave the salon, because tone and shine settle. Confirm the total cost range before you commit, including add-ons like a root shadow, toner, or bonding treatment, and ask what service is being booked today so there is no surprise at checkout. One more save: talk through a plan B if your hair does not lift evenly, like choosing a warmer level for now or adding dimension to blend patchy areas.
Before you pay, do a final mirror check in two lights and ask your stylist to describe what they did in simple terms: “foils plus root melt plus gloss,” for example. That summary helps you rebook correctly and shop the right upkeep products later. If your stylist recommends a toner or gloss, ask what it is meant to do for you specifically, like cancel yellow, add beige softness, deepen the brunette, or just boost shine. Finally, leave with a maintenance plan you can actually follow: how often to wash, what to use once a week, when to come back, and what change would count as “call the salon” versus “normal fade.” That is how you get the screenshot vibe without the surprise.
Ready to see how a new hairstyle looks on you? Try Fravyn and preview 50+ styles on your own photo in seconds, so you can walk into your next appointment with confident, specific direction. Download the app, save your top looks, then use the script in this article to communicate them clearly. Get Fravyn on iOS and start testing styles today.
Try a New Hairstyle Today
Preview 50+ hairstyles and 29+ colors on your own photo with Fravyn.