Bixie Cut Blueprint: Pick Your Length, Texture, Bangs
A practical decision guide to choosing the right bixie haircut: how long to go, how to match texture to your hair type, which bangs actually flatter your face shape, and how to preview the look with a virtual hairstyle try on before you commit.

The bixie cut can look effortlessly cool or oddly in-between, and the difference usually comes down to a few small decisions. Because it lives between a pixie and a bob, placement matters: where the length sits, how your natural texture behaves day to day, and whether bangs complement your face shape and hairline. In this blueprint, you will learn how to choose the right length and layering, match the cut to your real texture, and ask for bangs that flatter. You will also see what to avoid and how to preview options first.
Choose the right bixie length placement first
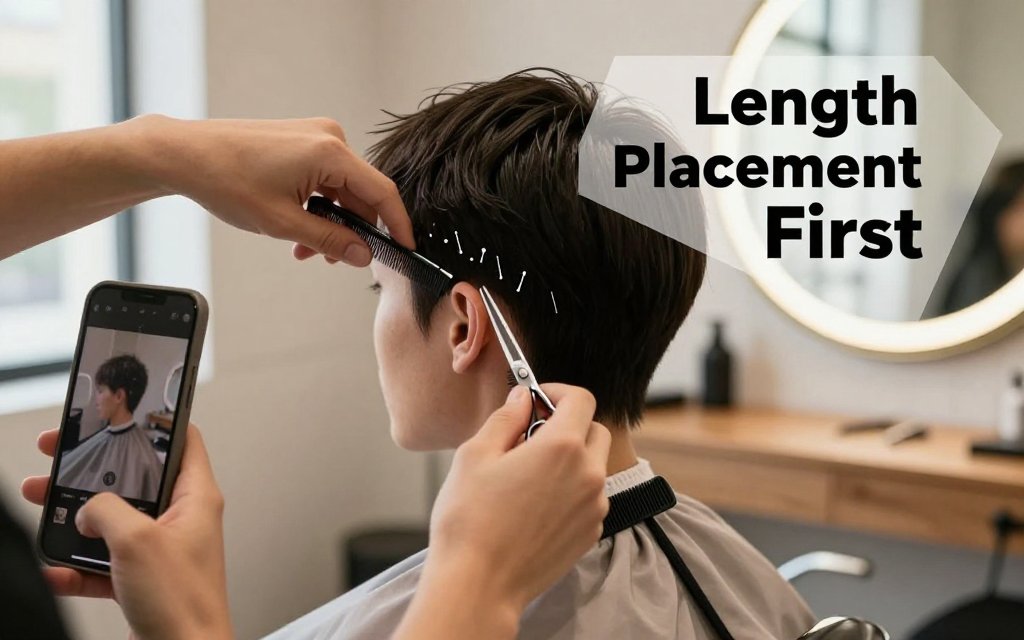
The fastest way to get a bixie you actually love is to decide the length placement before you talk texture, bangs, or color. “Where does it hit?” controls everything: how short it feels when you see yourself from the side, whether it reads more pixie-like or more bob-like, and how often you need a clean-up. A bixie that stops around the top of the ear can feel bold and sharp, but it also shows every extra week of growth. A bixie that grazes the jawline feels softer and more flexible, and it tends to grow out into a cute short bob instead of an awkward in-between.
If you are still deciding, do a quick photo test before your appointment: pull your hair back, then use your fingers to “fake” three hemlines (top of ear, covering the ear, grazing the jaw). Take a straight-on selfie and a profile shot. That profile shot is the truth teller for whether the cut will feel too short at the nape. If you are using Fravyn to preview styles and colors, make sure your photo is well-lit and front-facing, because that improves edge accuracy and how the length reads near the cheekbones. If your preview looks oddly wide or too helmet-like, use these virtual hair try-on fixes before you lock in your choice.
Micro, classic, or long bixie: a quick reality check
Think of bixie lengths as three “anchor points” your stylist can visualize in two seconds. A micro bixie hits around the top of the ear or just above it, with a short perimeter that shows your neck and earrings. A classic bixie covers the ear (or skims the top of it) and usually lands somewhere between the ear lobe and upper cheek area in front, with a slightly longer, bob-inspired outline. A long bixie grazes the jawline, sometimes dipping a touch longer toward the front, so you can still tuck hair behind your ears. Biggest tradeoff: shorter looks sharper and more editorial, but it needs more frequent shaping; longer gives more styling options and typically grows out more gracefully.
Here is the chair language that keeps you safely in bixie territory (not surprise mullet, not bowl cut). Start with your hemline, then add two guardrails: “keep the nape clean but not tight” and “leave length at the crown for volume.” Clean but not tight means you want a tidy neckline with softness, not a clipper-close fade that can make the back look severe. Crown length is what stops a bixie from collapsing flat, especially on fine hair. If you are nervous about a mullet vibe, say, “I want a bob-like perimeter with soft tapering, no long tail at the back.” If you fear the bowl cut look, say, “Please remove weight so it does not turn round at the sides.”
Micro bixies are the most “pixie-forward.” They look incredible with deliberate texture, like piecey ends around the temples and a slightly longer top that you can push forward, flip to one side, or spike up with a matte paste. The maintenance reality check is real: that crisp ear and nape area is the first place you notice growth, so many people prefer trims every 4 to 6 weeks if they like a sharp outline. If you want micro length without feeling exposed, ask for “soft, face-framing bits that hit at the cheekbone” and a fringe that can be styled forward. That little face frame creates a buffer so the cut still feels flattering even with minimal makeup or when you wear glasses.
Classic and long bixies live closer to bob energy, so they are often the sweet spot if you want versatility. Classic length is ideal if you want the ear covered and a bit of swing, but still want that airy, textured bixie feel. Long bixie length, grazing the jawline, is the move if you love tuck-behind-ear styling, want a softer bridal-friendly silhouette, or simply want a grow-out path that turns into a bob without a weird stage. For a clear technical reference you can share with your stylist, this bixie cutting and styling breakdown highlights how stylists remove bulk for movement and specifically de-bulky bangs so the shape does not read too round.
Pick your hemline first, then protect it with two sentences: “clean nape, but not tight,” and “keep crown length for lift.” Those cues prevent the two common misreads, mullet in back or bowl shape on the sides.
Face shape goals: what length does to your proportions
If you want a cheat code, choose length based on what you want your face to look like in photos, not just what looks cool on a model. If your goal is to look longer (common for round or shorter faces), keep height at the crown and avoid heavy width right at the cheeks. That usually points to a micro or classic bixie with a slightly longer top and lighter sides, plus airy bangs that can be pushed up or swept. If your goal is to soften angles (square jaws, strong chin, very sharp cheekbones), keep a little length at the jawline and add movement near the temples. That usually points to a classic or long bixie with face-framing pieces that bend and “break up” hard lines.
The most common mismatch I see is choosing the shortest bixie when you actually want softness. Super short sides can emphasize a strong jaw and make the overall vibe sharper, even if the cut is technically well done. If softness is the goal, ask for “jaw-skimming length in front” or “a longer perimeter with textured ends,” plus “lightness around the temples” so the silhouette moves. On the other side, if you want more height and less width, avoid a heavy, blunt line that sits exactly at the fullest part of your cheeks. Tell your stylist, “I want lift at the crown, not width at the cheek area,” and you will steer the shaping exactly where you need it.
Match bixie texture to your hair type
A bixie can look “light and airy” on one person and “puffy at the sides” on someone else, even at the same length. The difference is internal structure: where the layers sit, how weight is removed, and what the perimeter (your outline) is doing around the ears, nape, and jaw. If you want the cut to behave at home, decide where you want lift (usually the crown), where you need control (often the sides and behind the ear), and how crisp you want the ends (soft and piecey vs clean and compact). Bring two photos: one for overall vibe, one close-up showing the texture you like so your stylist can copy the finish, not just the length.
Fine hair vs thick hair: where volume should actually live
Fine hair volume is often lost by over-layering. Counterintuitive, yes, but fine strands need a little weight to look dense, especially through the perimeter. The move is: keep the crown slightly shorter for lift, keep the perimeter a touch heavier for shape. In the chair, try: “I want a soft crown with minimal layering, and a stronger outline so it looks fuller.” If your stylist uses a razor, ask for targeted texture, not an all-over shred. A good reference for how a razor can create fringe texture and controlled layers is these razor cut bixie steps, which show intentional sectioning instead of random choppiness. (marlobeauty.com)
For fine, straight hair that goes flat at the crown, ask for micro-lift, not big layers: “Keep my crown 0.5 to 1 inch shorter than the sides, and point cut for softness, not a razor all over.” That little crown change gives lift without collapsing the ends. Styling at home should be simple: a golf ball of volumizing mousse at the roots, rough-dry to 80 percent, then tip your head forward and blast the crown for 20 seconds. If you like a more polished look, set the top with two Velcro rollers while you do makeup, then finger-comb. Skip heavy oils on the crown because they make fine hair separate and show scalp faster.
Thick hair needs the opposite plan. If you “just add layers,” the sides can balloon into a triangle, especially at cheek level. You want strategic weight removal in the interior so the perimeter can sit cleanly. Chair language that works: “Remove bulk behind the ear, not at the ends,” and “take weight out at the occipital, but keep the outline intact.” This keeps the bixie from puffing at the widest part of the head. Styling tip: use a smoothing cream from mid-lengths to ends, then blow dry the sides downward with a nozzle and a paddle brush before you add bend on top. That one step keeps the silhouette compact and makes your face-framing pieces look intentional, not accidental.
Curly and wavy bixies: shape first, then curl definition
Curly and wavy bixies are all about silhouette. The best ones have a rounded, balanced shape that respects curl clumps, then the definition products do the rest. Ask your stylist to avoid thinning shears through the curl pattern because they can fracture clumps and create frizz halos, especially at the crown and temples. Shrinkage planning is also non-negotiable: if your curl springs up 30 percent, a “chin-length” idea on wet hair can land at cheekbone when dry. Try: “Let’s build a rounded outline and account for shrinkage so my final length is not a surprise.” Curly bixies look best with intentional face framing, not random short pieces that pop out in photos.
Use that checklist as your consult script. It keeps the conversation practical, and it tells your stylist how the cut must function in real life. If you air dry most days, you typically need a slightly heavier perimeter and fewer short interior layers so the hair does not expand sideways as it dries. If you diffuse, you can afford more crown shaping because the diffuser helps control direction. For wavy hair, ask for a perimeter that skims the jaw or sits just below the cheekbone, plus “graduation behind the ear” so it tucks easily. For tighter curls, request longer curls at the temples, plus a softly curved fringe, so the shortest pieces still blend into your curl pattern.
At-home definition is mostly about application order. For waves, start with a lightweight leave-in, then a foam or mousse, then scrunch and clip the crown for lift while it dries. For curls, use a cream for slip, then glaze a gel over the top and scrunch until you hear a slight “squish,” then diffuse on low heat and low airflow to avoid frizz. Once fully dry, break the cast with a drop of serum warmed between palms. If your bixie keeps flipping out on one side, it is usually growth pattern, not a bad cut. Ask at your next trim: “Can we shift the part and refine the crown so it lays the way I style it?”
Pick bangs and learn easy bixie styling
Bangs make or break a bixie, because they decide where the eye lands first: cheekbones, eyes, jawline, or forehead. The good news is that when your perimeter and crown layering are right, daily styling is usually a true 5 to 10 minute routine, not a 30 minute project. Even editors call out how much you can change the vibe just by changing the fringe, as noted in Vogue’s bixie haircut breakdown. If you are planning bridal hair, bangs also help you “set” your face framing so veils, clips, and side pins look intentional in photos from every angle. (vogue.com)
Bangs that flatter: curtain, side swept, micro, or none
In 2026, the bang requests I hear most with bixies are curtain, side-swept, bottleneck-inspired, micro, and “no bangs, just face framing.” Here is the face shape and hairline reality check. Curtain bangs soften a long forehead and balance heart-shaped faces because they widen at the cheekbones. Side-swept bangs are your best friend for strong cowlicks and for hairlines with a deep side part or temple recession, since the diagonal line hides gaps. Bottleneck-inspired fringe (shorter in the center, longer at the sides) flatters round and square faces by creating length without a heavy block. Micro bangs highlight eyes and brows, but they spotlight every cowlick and grow-out day. No bangs works well if you love tucking behind the ears, have a low forehead, or want your bixie to feel more androgynous and clean.
Use this quick chooser before you commit, because the “right” bang is mostly physics plus lifestyle. Then style it like you mean it, with tiny technique tweaks that keep the bixie looking salon-fresh.
Common mistakes are predictable: blunt bangs over a strong cowlick (they split), overly thin “see-through” fringe on very fine hair (it turns stringy fast), and micro bangs when you are not ready for weekly trims or at least frequent cleanups. For styling, side-swept bangs love round-brush lift at the root, aimed back and then over. Curtain bangs look modern with a quick flat-iron flick away from the face, just on the front sections. If your hair is fine, mist a root spray at the fringe, blow-dry with fingers for 20 seconds, and you will get shape without crunch.
FAQ: Is a bixie haircut low maintenance in 2026
“Low maintenance” should mean two things you can picture: under 10 minutes most mornings, and predictable salon timing. Plan on bang trims every 2 to 4 weeks if you wear fringe, plus a full shape refresh about every 6 to 10 weeks depending on how bob-like your length is. The cut feels easier when your stylist nails the perimeter and uses crown layering that falls into place as it dries, which reduces daily heat work. For most people, a simple trio covers it: light mousse at roots, texture spray on midlengths, and a pea-sized smoothing cream on ends.
FAQ: How do I style a bixie haircut at home fast
Keep it to three steps. Step 1 (2 minutes): rough-dry to about 70 percent with your head slightly tilted forward, so the crown does not dry flat. Step 2 (3 to 5 minutes): add lift at the crown using fingers or a small round brush, then set your part (switching from your usual part is the easiest instant volume trick). Step 3 (1 minute): warm a tiny dab of paste between palms and pinch the ends for piecey separation. Curly option: diffuse upside down, scrunch in gel or curl cream, then break the cast once fully dry.
FAQ: How can I preview bixie length and bangs before cutting
Do a no-regret preview with a virtual hairstyle try-on before you book the chop. In Fravyn, start with a front-facing photo in natural light, hair pulled back from the face, neutral expression, and minimal filters so the hairline reads correctly. Then test what actually changes your look: three lengths (short pixie-leaning, true bixie, long bob-leaning), two textures (sleek vs tousled), and at least two bang shapes (curtain plus side-swept is a smart baseline). Screenshot three angles for your stylist: front view, a side profile, and the bang outline you liked most.
Ready to see how a new hairstyle looks on you? Try Fravyn to preview 50+ styles on your own photo in seconds, including bixie variations with different lengths, textures, and bangs. Upload a selfie, compare options side by side, then walk into your appointment with a clear plan and reference. Download Fravyn here: iOS.
Try a New Hairstyle Today
Preview 50+ hairstyles and 29+ colors on your own photo with Fravyn.