Diffusing Curls Without Frizz: Hover vs Pixie
A technique-first diffuser guide that compares hover diffusing vs pixie diffusing, with exact heat and speed settings, a frizz-proof drying routine, and quick troubleshooting for wavy to curly hair.
Frizz can turn a great wash day into a guessing game, especially when you reach for a diffuser. The trick is not just using one, it is knowing how your technique affects curl definition, root lift, and drying time. In this guide, you will learn why frizz happens during diffusing, what hover diffusing does best, and when pixie diffusing is the better choice. You will also get practical tips on heat, airflow, and handling, so your curls dry soft, defined, and full.
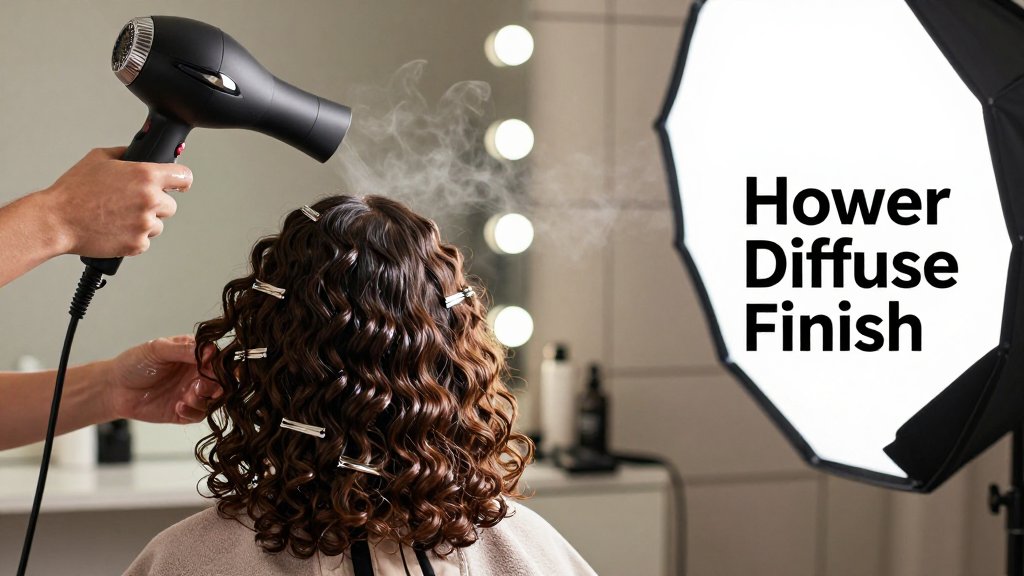
Hover diffusing for definition with less frizz
Hover diffusing is the best default if you frizz easily, have fine waves, or lose definition the second you start moving your hair around. Think of it as “dry the gel cast first, touch later.” Instead of scooping curls into the diffuser bowl right away, you let warm air gently set the outside of each curl clump while everything stays in place. This approach is especially helpful on wavy hair (2A to 2C) that can turn fluffy fast, and on looser curls (3A) that look great when they stay clumped. If you are a bride or just want a photo-ready finish, hover diffusing also tends to preserve shine because you are not roughing up the cuticle with too much airflow or contact.
What hover diffusing is and why it works
Hover diffusing is exactly what it sounds like: you hold the diffuser close to your curls, but you do not press into them. You “hover” over one section at a time so the surface of your curl clumps starts to dry and firm up, which helps lock in definition. Here is the simple, quotable rule that keeps most people out of frizz trouble: keep the diffuser 2 to 4 inches away until a cast forms, then get closer only if needed. A cast can come from gel, mousse, or a cream plus gel combo, and it is that slightly crunchy shell that protects the curl while it dries. Once that shell starts to set, your hair is much less likely to explode into halo frizz.
Frizz is not “random,” it is usually mechanical. High airflow flips and lifts the cuticle, and it also breaks up the curl clumps you worked hard to create in the shower. Picture wind blasting through a neatly grouped ribbon bow, it separates into individual strands quickly. That separation is what makes curls look puffy and undefined. Hover diffusing limits both problems because the clumps stay intact and the cuticle is not being whipped around. If you love volume, you can still get it by drying the roots first (hovering near the scalp, not raking through the lengths), then switching your head position side to side rather than fully flipping and shaking while hair is soaking wet.
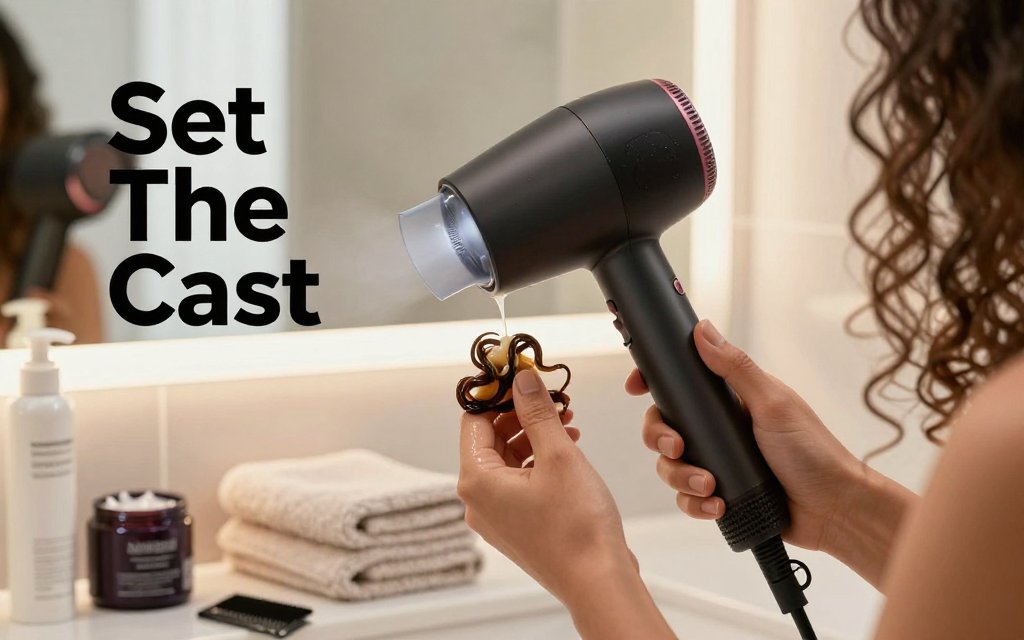
Micro plopping before diffusing, because your pattern sets early
Micro plopping is your “first five minutes” insurance policy, and those minutes matter because your curl pattern is basically being decided as water leaves the hair. After styling on soaking wet hair, use a microfiber towel or a soft cotton T-shirt and gently press, then scrunch upward in small sections. Do not rub back and forth. This step removes dripping water so your products can form a cast faster, which makes hover diffusing easier and less frizzy. For fine waves, micro plopping also prevents that sad, stringy look that can happen when hair stays too wet for too long. If you are using a gel like Ouidad Advanced Climate Control, a custard like Kinky-Curly Curling Custard, or an affordable mousse like Not Your Mother’s Curl Talk, micro plopping helps that hold product “grab” the curl before the dryer even turns on.
Keep micro plopping short, usually 60 to 90 seconds total, and stop while your hair still looks shiny and clumped. If you micro plop until it looks almost dry, you can disturb the clumps and create frizz before you even diffuse. This is also a great moment to sanity-check your overall look if you are planning a change, like going copper for fall or adding a deeper espresso shade for a wedding. You can preview hair colors in Fravyn and still be smart about safety by following hair dye patch test steps before you commit to a permanent formula.
If frizz shows up fast, treat the first five minutes like a no-touch zone. Micro plop briefly, then hover diffuse on low speed until a cast sets. Once clumps feel firm, you can move closer without breaking definition.
Settings and timing that stop the fuzz
For most people, the frizz-proof formula is low airflow, controlled heat, and patience in short bursts. Start on low heat and low speed for 3 to 5 minutes, moving the diffuser around your head in sections without touching the hair. This early stage is all about setting the cast, not “finishing” the dry. After that, you can bump to low to medium heat if your hair is dense, long, or takes forever to dry, but try to keep speed low almost all the time. High speed is the classic mistake: it feels faster, but it usually costs definition and creates a fluffy outer layer that no serum can fully fix later.
Aim to get your hair about 70 to 80 percent dry with the diffuser, then air dry the last 10 to 30 percent. That last stretch is where shine and smoothness can really improve because you are reducing heat exposure and minimizing movement while the curl finishes setting. This “diffuse most, air dry a little” approach is also backed up by mainstream curly guidance, including the idea that diffusing for a few minutes before air drying can help set the style and reduce frizz, as noted in diffusing reduces frizz. If your dryer has a cool shot, use it for 10 to 20 seconds per side at the end to help lock in the shape before you scrunch out the crunch with a drop or two of lightweight oil.
Pixie diffusing for root volume and curl clumps
Pixie diffusing is the technique you reach for when you want lift at the roots and a more rounded, bouncy silhouette, not just quick dry time. It is especially worth it for tighter curl patterns (think 3B to 4C), dense hair that dries “big” but not “defined,” and layered cuts that look best with a sculpted shape (curly shags, wolf cuts, rounded bobs, taper cuts, and cropped curly styles). Because pixie diffusing gathers hair into the diffuser bowl, it helps curls clump together and shrink into their pattern, which can make ringlets look more uniform and coils look more polished. The tradeoff is that it is easier to create frizz if you rush or over-handle damp curls, so the goal is controlled, boring, repeatable movements.
How to pixie diffuse without puffing up the cuticle
Pixie diffusing works best when the hair stays still while warm air circulates around it. That is why the biggest frizz trigger is “dragging wind” across the surface layer, especially around the crown and part line where hair is shortest and most exposed. Keep airflow low, keep the dryer close, and keep your hands out of your curls. If your dryer has multiple heat levels, start on low to medium heat with low speed. If you need more speed for comfort, raise heat before you raise airflow because high airflow is what makes the halo of frizz around your top layer. Also, do not bounce the diffuser up and down like you are scrunching quickly, that movement roughs up the cuticle and breaks clumps apart.
The most counterintuitive pixie tip is this: fewer, longer holds create less frizz than lots of quick, bouncy moves. Think of it like “set and let it be.” Holding one section steady for 15 to 25 seconds gives your gel or mousse time to form a light cast and helps your curl clumps stay together. Rapidly moving from spot to spot keeps rewaking the surface, so the cuticle never settles. Also, touching curls while they are warm and damp is the fastest path to frizz, even if your hands are clean. If you need to move hair out of your face, do it before you turn the dryer on, or wait until hair is fully dry and cool.
To avoid halo frizz, be intentional about your route around the head. Start with the underside (nape and behind the ears) so the top layer stays undisturbed while you build structure underneath. Then move to the sides, and save the crown and part area for last, when curls are already partially set and less likely to explode into fuzz. Another common mistake is pulling a section out of the diffuser while the dryer is still running, which blasts the curl clumps apart right at the finish line. If you notice a fuzzy “aura” starting at the crown, do not rake, fluff, or shake. Just switch to hover diffusing for a minute on that top layer to calm the airflow, then go back to gentle pixie holds.
Root volume tricks for flat crowns and wedding-day longevity
For a flat crown, use pixie diffusing like a root-lift workout, not a full-head acrobat routine. Flip upside down for only 1 to 2 passes max to avoid tangling at the nape and stretching your curl pattern from too much flipping. Then go upright and target the roots: place the diffuser at the root area, turn it on, and hold without scrunching the lengths. If your hair collapses as it dries, add root clips (duckbill or double-prong clips) at the crown and along your part line while you diffuse. Clip so the root is propped up, not creased. If you have bangs or a face-framing layer, diffuse that area in the direction you want it to live, because that is what will read in photos.
To lock in shape, finish with a cool shot for 20 to 30 seconds after your last few holds, focusing on the crown and any pieces you pinned or directed into a side part. Beauty editors often describe the cool shot as the step that helps “set” the style, which is why the cool shot button is such a helpful final pass for definition and shine. Then do a patience check: let curls cool before you scrunch out any cast. Scrunching while hair is still warm can turn perfect clumps into fuzzy cotton candy. If you need extra hold for an event, a light mist of flexible hairspray at the roots (not the ends) can help keep lift without making curls crunchy.
Pixie diffusing is a bridal secret weapon because root lift photographs well from every angle, especially with a side part, pinned front pieces, or a half-up style that needs height at the crown. If you are wearing a veil or hair comb, the extra lift gives your accessory a sturdier “base,” so it does not slide down as easily. Try this: pixie diffuse until 85 to 90 percent dry, clip the crown for 5 minutes while you do makeup, then remove the clips and do one final gentle pixie hold on each side to refresh the shape. If you are still deciding between a deep side part, center part, or swept-back front, it can help to preview those shapes (and even a warmer honey-blonde versus a deeper espresso) in Fravyn before the big day.
Your frizz-proof curly hair drying routine and FAQs
Here is the repeatable routine that keeps frizz down and curl definition up, no matter if you lean wavy, curly, or coily. Your main decision is simple: use hover diffusing to “set” smooth clumps with minimal disturbance, then add pixie diffusing when you want extra lift at the roots or more bounce in the mid-lengths. If your hair is fine or your wave pattern drops easily, you will usually do best with more hover and less handling. If your hair is dense (lots of hair per square inch) or tightly coiled, you can tolerate longer holds in the diffuser bowl, as long as your airflow stays low. Even Dyson notes that a diffuser is designed to distribute airflow more evenly, and suggests using low to medium heat in its Dyson diffuser tips.
A simple routine that works for wavy to curly hair
Start in the shower mindset: you want soaking wet hair, not towel-damp hair, when you apply your stylers. After conditioning, keep your head upright and “glaze” product over the surface using praying hands, then scrunch to encourage curl clumps. For wavy to loose-curly patterns, a lightweight curl cream plus gel is a reliable combo (try a curl cream like Not Your Mother’s Curl Talk or Curlsmith, then a medium-hold gel). For tighter curls that need more structure, a stronger gel or custard can help clumps stay together. If you brush-style, do it now, then re-wet with a spray bottle until the curls look smooth and evenly clumped from root to ends.
Next comes micro plopping, which is the quickest way to remove drip without shredding clumps. Use a microfiber towel or a soft cotton T-shirt and scrunch upward for 30 to 90 seconds total. Think “press and lift,” not rubbing or twisting. Your checkpoint is visual: the curls should still look glossy, springy, and grouped, but they should not be actively dripping. If you see frizz already forming at this stage, it usually means one of three things happened: you used a rough towel, you squeezed too hard, or you touched the hair after it started to set. Add a few drops of water, re-scrunch, and move on.
Think of diffusing as setting a style, not blasting hair dry. Keep airflow low, move slowly, and stop before the last bit of moisture is gone. Scrunch only after hair is fully dry, every time.
Only start diffusing after your curls look smooth and evenly clumped. If you diffuse while they are still stringy or separating, you “lock in” frizz. Begin with hover diffusing: hold the diffuser a few inches away and dry in zones (front, crown, sides, back) without touching the hair for the first few minutes. Once a light cast forms, switch to pixie diffusing for volume by gently loading a section into the bowl, lifting toward the scalp, and holding for 15 to 30 seconds before turning the dryer off and releasing. Switching methods mid-dry is not just allowed, it is often ideal: hover first to set, pixie near the end for lift.
Stop diffusing at 70 to 80 percent dry, then let the last bit air-dry while you get dressed or do skincare. This is a huge frizz saver because over-drying makes hair swell, roughen, and lose definition, especially on color-treated or high-porosity curls. Save “scrunch out the cast” for fully dry hair, not mostly dry hair. If you are impatient, use a tiny amount of lightweight oil or serum on your hands, then scrunch to break the cast without creating a halo. Common diffuser mistakes to avoid: high speed (it blows clumps apart), flipping hair aggressively, diffusing without heat protectant, and constantly moving the diffuser around like a windshield wiper.
How do I diffuse curly hair without frizz if I am short on time?
Use the “set, then lift” approach. Micro plop for 60 seconds, then hover diffuse on low speed for 3 to 5 minutes to set clumps without disruption. After that, pixie diffuse only at the roots and crown for 2 to 4 minutes for fast volume. Keep the dryer moving by sections, not by constant shaking. If your hair is wavy or fine, stop at 70 to 80 percent dry and let it finish air-drying so you do not puff it up. Scrunch out the cast only when fully dry, even if that is 15 minutes later.
Is hover diffusing or pixie diffusing better for wavy hair?
Most wavy hair does best with mostly hover diffusing, plus a little pixie at the very end. Waves can separate and frizz faster than tighter curls, so starting with pixie can break up the wave pattern before it sets. Try this: hover until the surface feels slightly crisp (a light gel cast), then pixie diffuse only the top layers at the crown for 1 to 3 minutes. If your waves fall flat easily, flip your part from side to side while hovering, instead of scrunching aggressively. If you have dense waves, you can pixie more, but keep holds short and airflow low.
What heat and speed settings should I use on my diffuser?
Prioritize low speed first, then choose heat based on your hair’s thickness and damage level. Low speed keeps clumps intact and prevents the “windstorm frizz” effect. For fine, highlighted, or easily frizzy hair, start low heat, low speed. For dense hair that takes forever to dry, use medium heat with low speed, and keep the diffuser moving in sections so you do not overheat one spot. Use a cool shot at the end for 10 to 20 seconds per side to help the cast set. If your scalp feels hot, your heat is too high or you are holding too close.
Ready to see how a new hairstyle looks on you, without the commitment? Try Fravyn and preview 50+ styles on your own photo in seconds, so you can explore cuts, bangs, and textures before you book an appointment. Download the app and start experimenting today on iOS. Your next look might be one tap away.
Try a New Hairstyle Today
Preview 50+ hairstyles and 29+ colors on your own photo with Fravyn.