2026 Hair Accessories Guide: Clips, Bands, Pins That Stay
A practical, trend-aware guide to hair accessories in 2026 that actually hold. Learn which clips, bands, and pins work best for fine, thick, and curly hair, how to place them so they do not slide, and how to choose face-shape-friendly looks you can preview with a virtual try-on.
Hair accessories are everywhere in 2026, but a cute clip is only as good as its grip. If your bands slide, your pins poke, or your claw clip gives up halfway through the day, the fix is usually simpler than you think. This guide breaks down what actually makes accessories stay put, including smart placement, the right amount of tension, and how to match clips, bands, and pins to your hair type and texture. You will also get fast troubleshooting tips for common slip-ups.
How to choose hair accessories that truly grip
Most “my clip won’t stay” problems come down to three sneaky mismatches: your hair is too smooth, the accessory is the wrong size for the amount of hair you are grabbing, or the tension is fighting your texture instead of supporting it. Freshly washed hair (especially if you used a slippery conditioner, silicone serum, or a gloss spray) is a classic slip zone, even for people with thick hair. On the flip side, day two or day three hair often holds better because it has a little natural texture. If you are planning a new cut or layers soon, remember that length and density changes can affect grip, too, so you may want to time accessory shopping around your haircut plan.
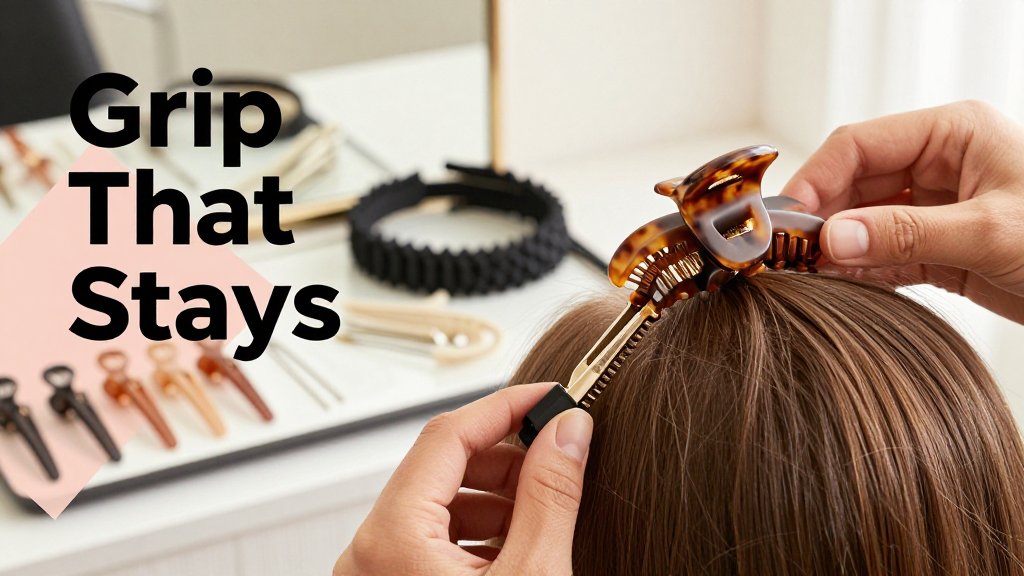
Use a quick “grab test” before you blame your hair. For claw clips, gather the section you actually want to hold, twist until it feels snug (not painful), then clamp and do two checks: a gentle head shake and a light downward tug on the ends. If it slides, do not immediately jump to a bigger clip. The counterintuitive fix that saves most claw clip fails is taking a smaller section, twisting it tighter, and clipping closer to the scalp so the teeth can anchor into a denser bundle. For bands, check your wrap count and comfort. If you need four or five wraps to feel secure, it is usually too thin or too stretched out to hold reliably.
If your claw clip keeps sliding, take less hair than you think, twist it tighter, and clip closer to the scalp. A smaller, denser bundle gives the teeth something to bite, so it lasts longer.
Grip rules by hair type: fine, thick, curly
Fine hair usually needs “more grip, less bulk.” Look for smaller claws (mini to medium), matte finishes, and micro-teeth that interlock tightly. If your clip is smooth and glossy, it can skate right over fine strands, especially on clean hair. Silicone-lined headbands are a cheat code for fine hair because they add friction without requiring tight pressure, which helps if you get headaches easily. Troubleshooting shortcut: if it slips in 10 minutes, switch to a smaller claw with tighter teeth, or add a little texture first (dry shampoo at the roots, or a light mist of hairspray on the section before you twist). If you are exploring a new fringe or face framing layers, Fravyn-style virtual try-ons can help you see where accessories will sit before you buy multiples.
Thick hair is heavy hair, so your accessory needs real structure. Choose jumbo claws with strong spring tension and deeper jaws, not just longer decorative wings. Wide elastics (including thicker fabric ties and scrunchies) distribute pressure better than thin bands, so they hold without creating a tight “dent” or breakage point. For updos, layered pinning makes a huge difference: secure the base first with two to three U-pins or sturdy bobby pins crossed in an X, then add the claw clip as the “cover” hold. Troubleshooting shortcut: if it slips in 10 minutes, switch to a clip with a stronger spring, or reduce the amount of hair in the clip and pin the rest, because too much volume forces the jaws to sit half open.
Curly hair grips differently because the strand shape creates natural texture, but curls can also pop out if a clip grabs the curl instead of the base. Aim for wider headbands (they spread pressure and protect edges), snag-free elastics (fabric-covered, no exposed rubber), and pins placed into the base of the section, not through the curl clump. A practical way to think about it is “anchor at the root, let the curls be free.” If you are doing a half-up style, slide pins in where the hair is denser near the scalp, then let the curl pattern sit on top. Troubleshooting shortcut: if it slips in 10 minutes, switch to a wider accessory with smoother seams, and try clipping a smaller section while leaving more curls outside the clip for shape. If your curls are in a trim cycle, your hold can change fast, so keep a note of your current length and check haircut timing by texture before you stock up.
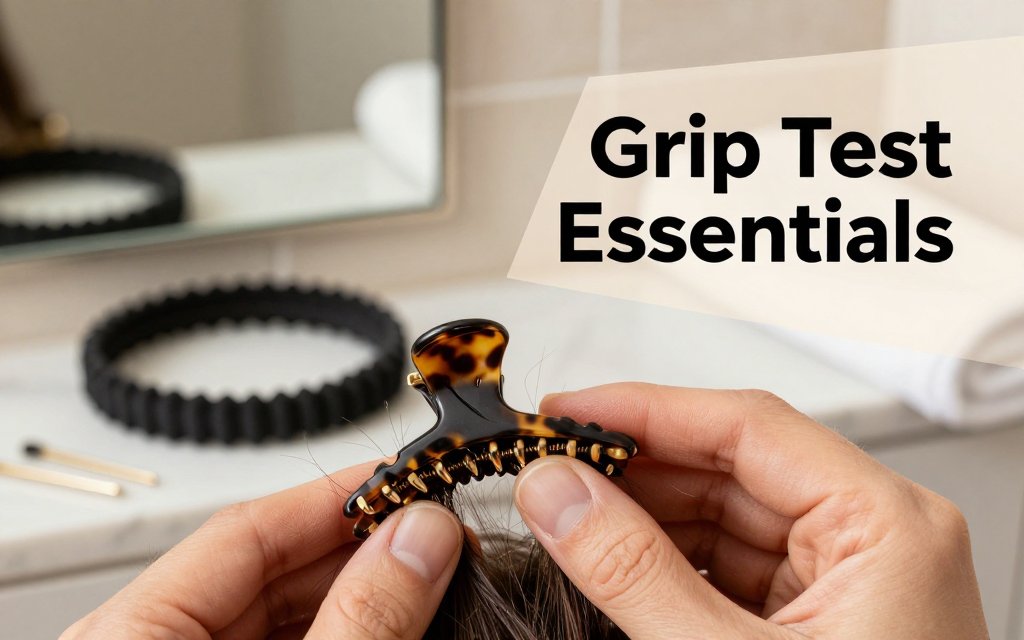
The 10-second store test: teeth, tension, texture
You can spot a “looks cute, fails fast” accessory in about 10 seconds. First, do the squeeze test on claw clips: press the handles together a few times and notice resistance. A good spring feels firm and consistent, not crunchy or wobbly. Next, run a fingertip along the teeth and the inner edges. You want smooth seams and no sharp molding lines that can snag, especially if you color your hair or heat style, since those strands are already more fragile. Finally, check the jaw shape. A slightly curved jaw hugs the head better than a totally flat one, which can create gaps and sliding. For pins, pick ones with coated tips and a strong bend, and remember the wavy side goes against the scalp for more grip.
Finish matters more than most people think. For everyday wear, matte and soft-touch finishes usually grip better than glossy plastic because they add a bit of friction. Glossy can still work, but it is best for sleek styles where you are deliberately using product and tension together, like a smooth low twist secured with a strong clip, or a gelled-back half-up where the accessory is clamping a tight, compact bundle. For hair bands and tiny elastics, prioritize fabric-covered options, since exposed rubber can snag and snap strands. The American Academy of Dermatology has specifically recommended using covered rubber bands made for styling, rather than uncovered elastics, which you can see summarized in AAD hair tie guidance. If a band leaves a painful groove or you feel tugging at your hairline, swap to a wider elastic or a claw clip plus pins so the hold is shared.
Claw clips, bands, and pins that stay put
A hair accessory that stays put is mostly about placement, not brute force. If you clamp harder, you often get a sore scalp, a slipping clip, and that “why is my part suddenly crooked?” feeling by lunch. Instead, build a little structure first, then let the accessory hold that structure. For a quick face shape check: if you want more length (round faces), lift slightly at the crown; if you want more width (long faces), keep volume at the sides; if you want softer angles (square faces), leave a few pieces out around the temples and ears.
Claw clip hairstyles that last all day
Classic French twist with a claw (best for medium to long): start with dry hair, then add a light mist of texture spray at the roots if your hair is silky. Gather hair at the nape like a low ponytail, sweep it slightly to one side, then twist upward so the twist sits tight to your head. Tuck the ends downward into the twist (or fold them to the left side for a softer, messier look). Practical tension tip: twist first, then loosen the crown slightly with your fingertips before clipping, so the clip holds the shape instead of fighting scalp tension.
Half-up with a clip (best for fine and layered hair): take two sections from the temples, meet them at the back of your head, then twist that small “bundle” upward two turns before clipping. That tiny twist is the secret, it creates a ridge for the teeth to grab so the clip is not sliding on flat hair. For lots of layers, leave the bottom half of the hair loose and only clip the crown section, then gently pull at the sides for a fuller silhouette. Low tuck with a claw (best for thick hair and tension headaches): make a low pony at the nape, twist once, then fold the pony upward like you are “tucking” it into itself. Clip horizontally at the nape so the weight is supported low, not pulling upward on your crown.
Headband placements for short, medium, and long hair
Short hair (pixie, cropped cut, bob): place the headband about 1 inch back from the hairline so it grips hair, not forehead skin. If you wear a side part, set the part first, then slide the band into place without “combing” it backward, which can flip short pieces up. For a sleek look, smooth the sides with a pea-size amount of light pomade and keep the crown a bit airy. For a softer look, pull out two small face-framing pieces in front of the ears. If the band creeps back, cross two bobby pins behind each ear to trap it in place.
Medium and long hair: treat the headband like a “frame,” then choose where you want your volume. For shoulder length hair, try a half-up moment first, then add the band so it sits behind the lifted section and cannot slide forward. For long hair, anchor the band by styling a low pony or low bun, then placing the band so the back edge sits just above the occipital bone (that gentle bump at the back of your skull). Brides and event looks hold best when the band is paired with a support style, like a low chignon with a padded satin band, or loose waves with a velvet band and pinned sides.
How to use bobby pins correctly, so they stop sliding
Two mistakes make bobby pins “fail”: pinning only surface hair (so the pin has nothing solid to bite into), and using pins like decor instead of anchors. The fix is to build a tiny base, then lock it. Take a small section where you want security, make a mini twist or a 3-strand braid about 1 inch long, and hold it flat to the head. Push the first pin in toward the scalp, then angle it slightly back. Add a second pin crossing the first in an X, so the pins brace each other. For extra grip, add dry shampoo or styling powder first, and place pins with the wavy side faces down against the scalp. (schwarzkopf.com)
The waved-side trick is also about where you pin on textured hair. If you are pinning a wave, don’t pin the shiny “peak” where hair is rounded and slippery. Pin the wave valley, the inward dip where the hair naturally presses closer to the head, and your pin will lock instead of skate. For curls and coils, try sliding the pin under a small twist so it grabs multiple strands at once, then finish with a second pin crossed over it. If your pins bend open easily, they are overstretched and will keep slipping, so replace them. For comfort, avoid stacking pins right at the temples, and move your anchors slightly back to reduce tension headaches.
Face shape and length friendly accessory styling in 2026
Most “wow, that looks good” accessory moments are about placement, not the accessory itself. A $6 claw clip can look custom if it adds height where your face needs length, or adds width where your face looks longest. Think of accessories as optical tools: they nudge the eye up (crown height), out (side volume), or down (low, full sections). If you are planning a cut, a color refresh, or a wedding look, testing placement first can save you from buying a headband that fights your features. In Fravyn (iOS), you can try 50+ hairstyles and 29+ hair colors on your photo, then compare accessory placements on different parts and silhouettes before you commit.
Two quick checks make accessory styling easier: your face shape and your face length. Face shape tells you where to soften or balance, while face length tells you whether to add height or spread volume sideways. The simple rule to remember is this: height elongates, side volume widens. If your cheeks read widest (common with round shapes), go for a higher focal point, like a top-of-head half-up clip. If your jaw reads strongest (often square), go for gentle diagonals, like side-swept pins. If your forehead feels wider than your chin (heart), keep the top sleek and build fullness lower, closer to the ears or nape.
Accessory hairstyles for round face and other shapes
Round: add height at the crown, and keep your width controlled at cheek level. A plush headband that sits low (right across the widest part of your cheeks) can make the face look broader, so slide it back an inch or choose a thinner band. A half-up claw clip looks most flattering when it sits higher than ear level, almost like you are “lifting” the top section. Oval: most placements work, so match the accessory to hair density and the occasion (thin satin band for fine hair, padded band for thick hair, pearl pins for bridal). Square: soften with side placement and a slightly off-center headband. Heart: balance forehead width with lower, fuller half-up sections, like a mini clip at the back of the head plus face-framing pieces.
Hair length changes the “sweet spot” for accessories. On short hair (pixie and bixie cuts), a side snap clip placed just above the temple can add structure without overwhelming your face, and a thin zigzag headband can give instant lift at the crown. On bobs and lobs, try a half-up twist secured with a medium claw clip placed high, then tug gently at the crown for a longer face effect. On long hair, a low bun with two crossed U-pins can look modern and bridal, especially with an off-center part. If you are unsure, use Fravyn’s face shape analysis, then try the same accessory placement across different cuts and hair colors to see which version actually flatters you.
How do I make hair accessories stay in place all day?
Start with grip, not force. Choose a silicone-lined headband or a claw clip with interlocking teeth, then anchor it to a “textured” base: a light mist of dry texture spray, or a tiny backcomb at the root where the accessory will sit. For pins, cross two bobby pins in an X, then slide your decorative pin over them so it has something to catch. Placement tip: set accessories on the ridge of the head (near the crown), not on the slippery curve above the ears. Mistake to avoid: overtightening to prevent slipping, since prolonged tension can contribute to traction alopecia, as summarized on a JAMA Dermatology patient page.
What hair accessories grip best for fine hair without slipping?
Look for smaller, lighter tools that “bite” without requiring bulk: mini claw clips, snap clips with a strong hinge, and thin metal barrettes with an inner comb. Product type to try: a mini claw clip for a half-up style, plus two tiny bobby pins underneath as a hidden anchor. Placement tip: gather less hair than you think, twist once, then clip high (above ear level) so the weight does not drag the clip down. Mistake to avoid: smooth, brand-new hair right after a slippery conditioner. Fine hair holds better with a pea-sized leave-in only on ends, not at the roots.
Which hair accessories work best for curly hair without frizz?
Curly hair usually grips well, but it frizzes when accessories snag or when you over-handle the curl pattern. Product type to try: satin scrunchies, smooth-edged claw clips (no sharp seams), and spiral hair pins for buns. Placement tip: apply accessory after your curls are fully dry, then use the “hands off” method. Scoop hair into place, clip once, and stop adjusting. For headbands, choose fabric or satin, and place it slightly behind the hairline so it does not rub baby hairs. Mistake to avoid: brushing curls to “smooth” before pinning, which can puff and separate curl clumps.
Ready to see how a new hairstyle looks on you before you commit? Try Fravyn to preview 50+ styles on your own photo in seconds, then pair your favorite look with the clips, bands, and pins from this guide. Download the app and start experimenting today on iOS, and find a style that stays from morning plans to night plans.
Try a New Hairstyle Today
Preview 50+ hairstyles and 29+ colors on your own photo with Fravyn.